
A Well Thought Out Space to Inspire
Written by Bethany Curee, God’s Daughter – Freckled & Free
Having now explained why we designed this one room schoolhouse just to leave it behind (you can read that here), we can get right down to fun design stuff. The thought that went into it, the design process and the fun DIYs and more.
I’ve been waiting months to share it. In fact over a year now. But let’s also admit, it’s taken me this long and many small pockets of time to finally get to do it as a busy mom.
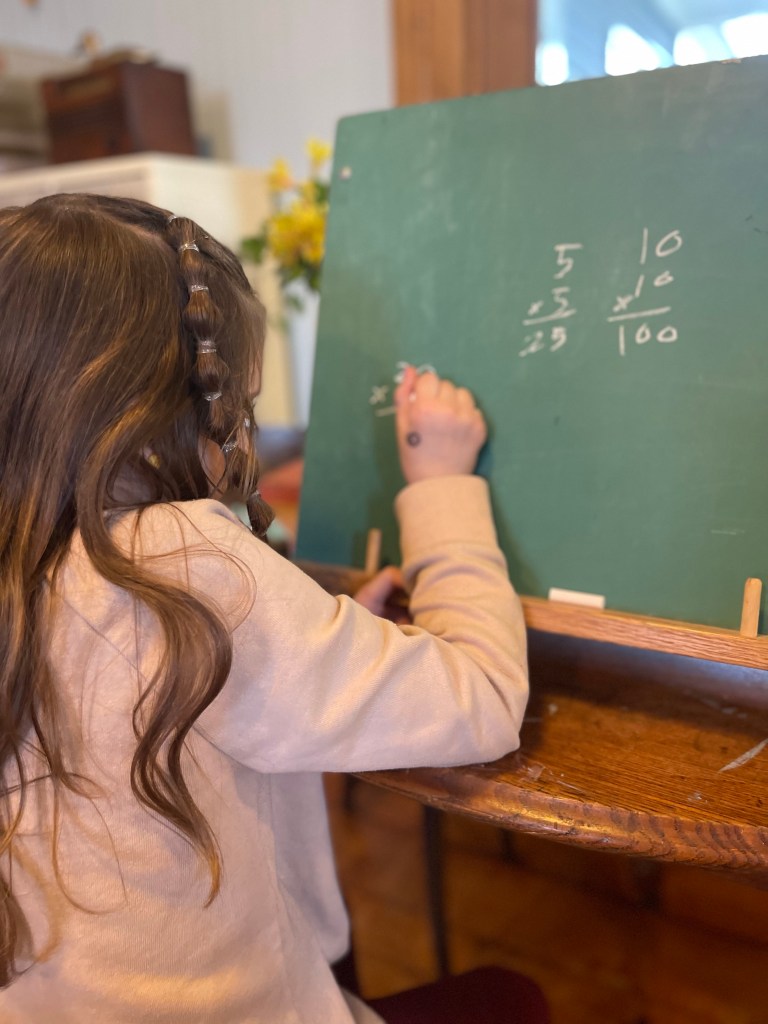
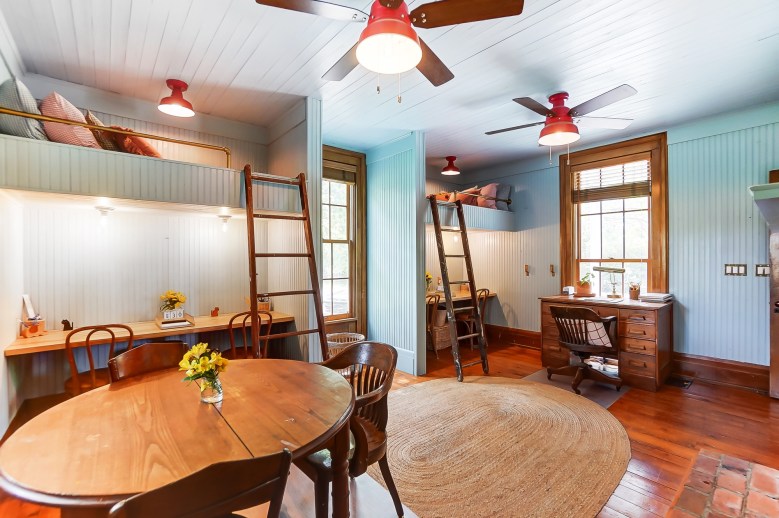
As you may assume, yes, a lot of planning went into this room as it needed to house many solutions for our family. Most importantly—we needed to maximize the space as much as we could for “creating”.
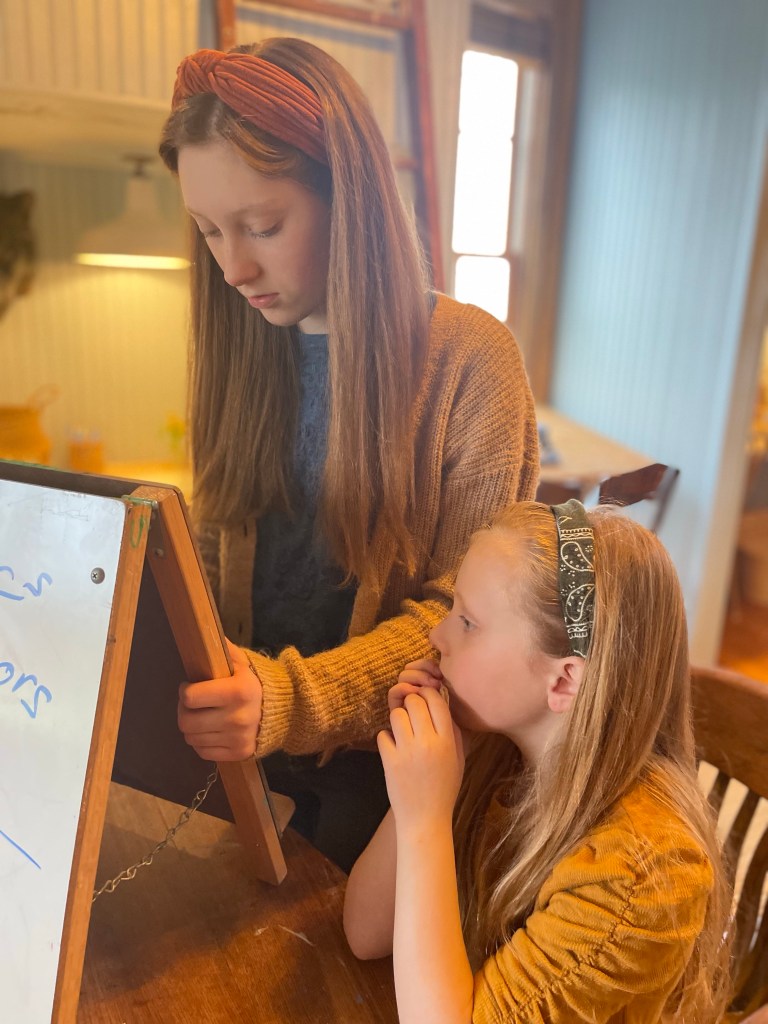
Like me our kiddos love getting to be creative and everyday desire to make something. Our hands stayed busy doing some type of art with every subject. Hence I knew a large workspace at each desk was going to be necessary, as well as a table where I could help do one on one work or projects all together (which I learned later).
The room had to be designed with these biggest goals in mind.
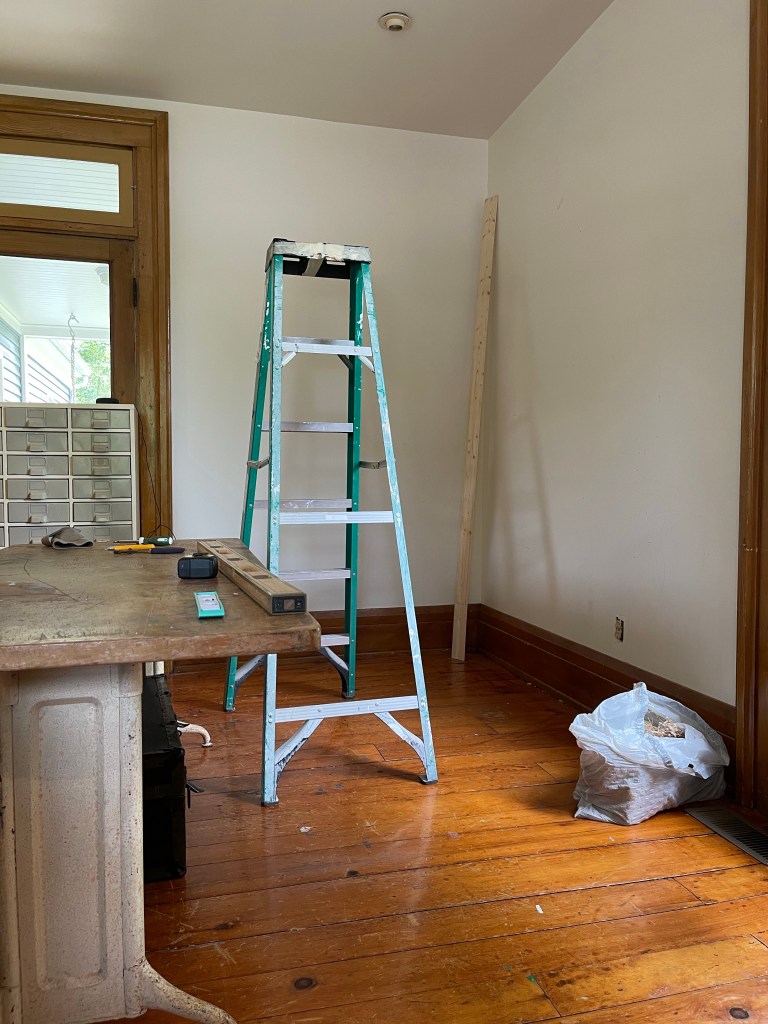
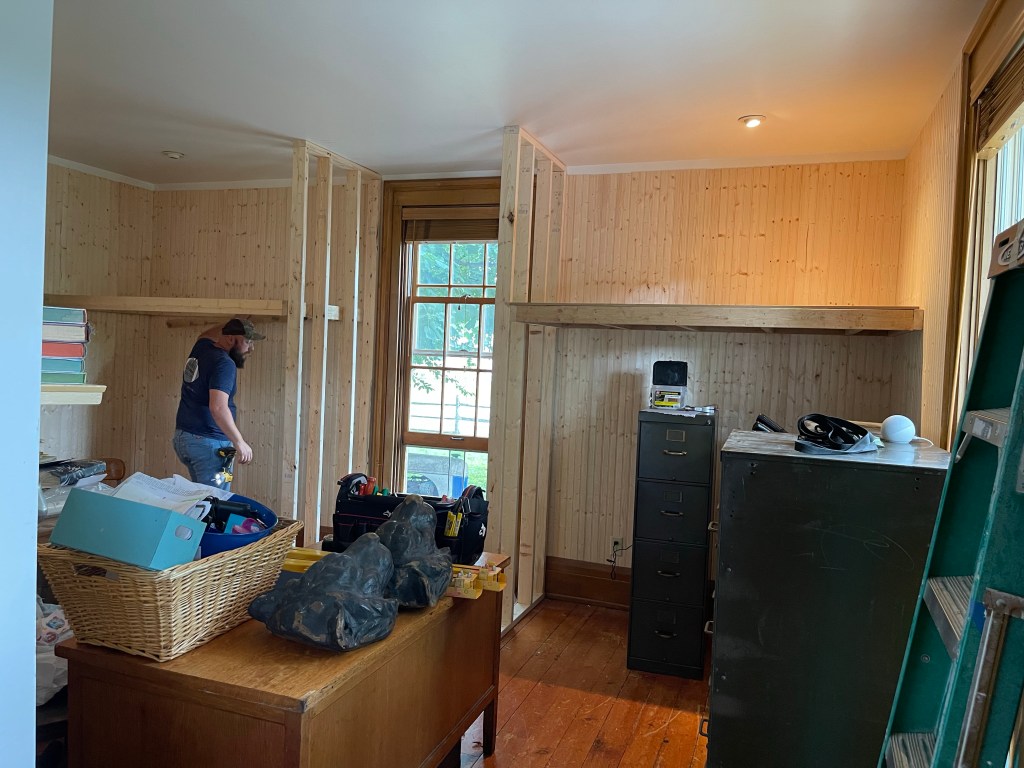
But to get to this beauty. A lot of work had to happen.
A lot of custom work creating little nook spaces inspiring enough to make a student want to work even when they’re not feeling it.
The only thing left to do was to convince my husband Tom of the workload it took to get to this dream. I needed his mind to solve my design challenges, his skills and muscles to make this happen.
DESIGN INSPO.
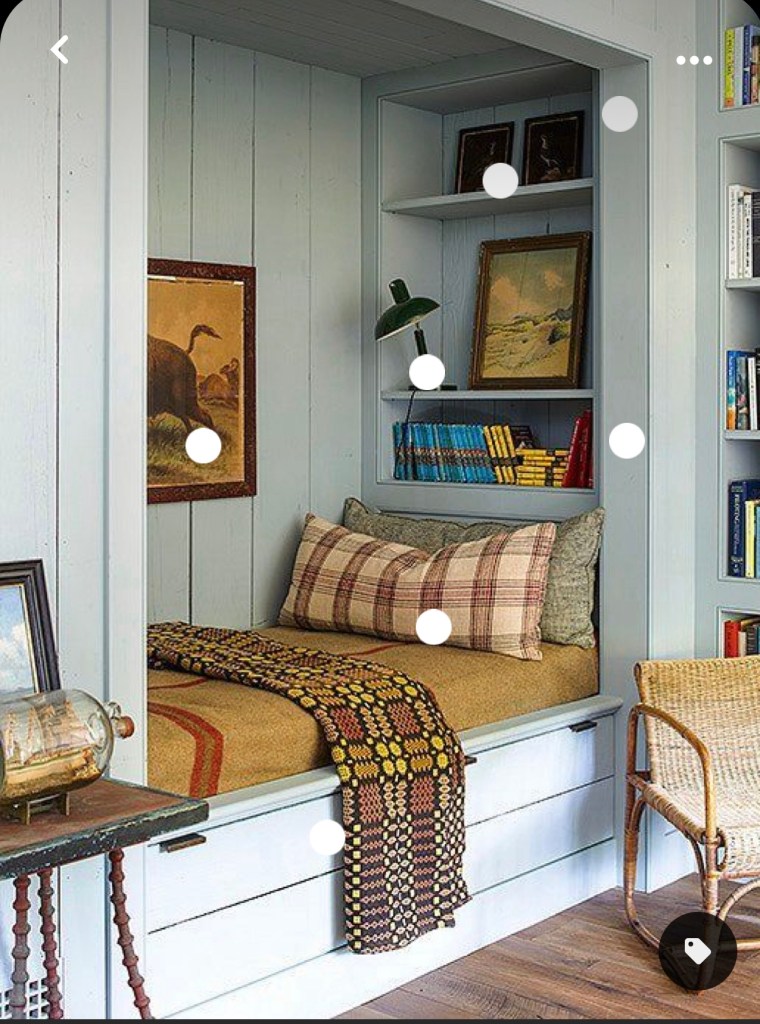
Some of my design inspirations came from years of pinning on my Pinterest board. I had so many ideas I loved but what I couldn’t get out of my head was a massive three floored antique shop we had went to many years ago that was covered in blue wainscoting and charming details. Every corner of it being crafted with custom woodworking, layering the space with texture, beauty and age. It was so dreamy. I was even more reminded of my love with this color concept from my favorite, Country Living magazine. Over the years I was also drawn to the red and blue combo that I saw was pulled off so well in many great samples I had collected.
So, my mood board naturally centered around it. As well as collections of photos of delightful nooks and bunk spaces inspiring me from my Pinterest board.
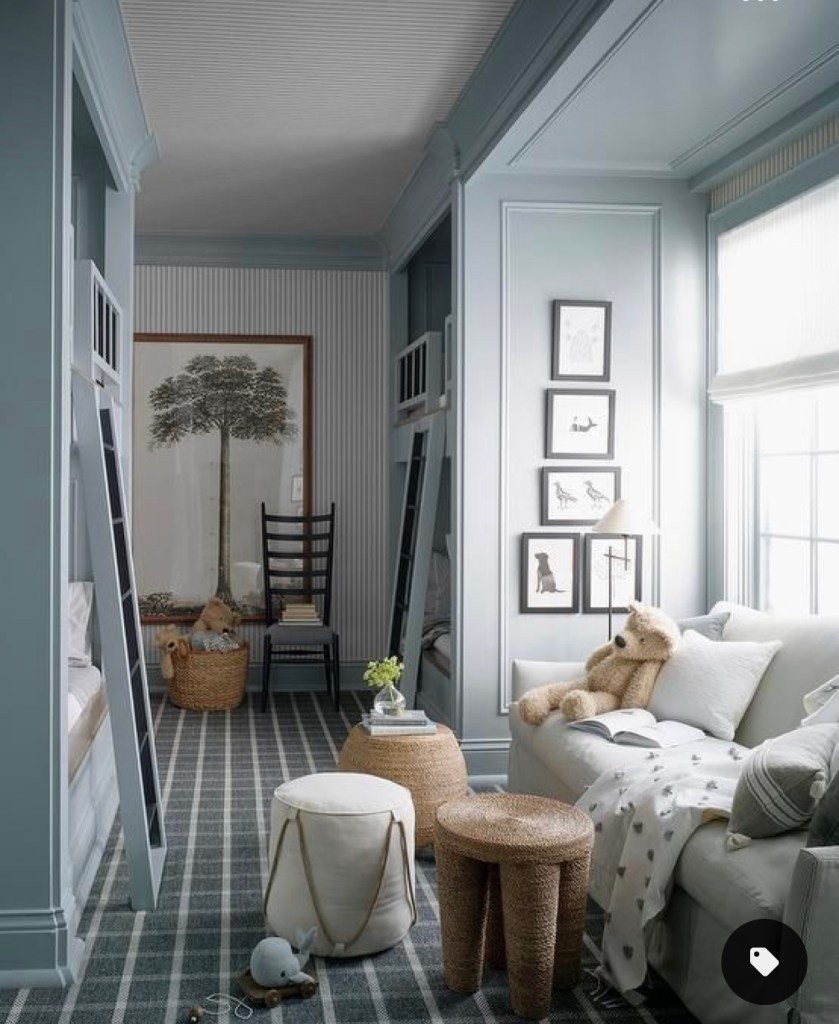
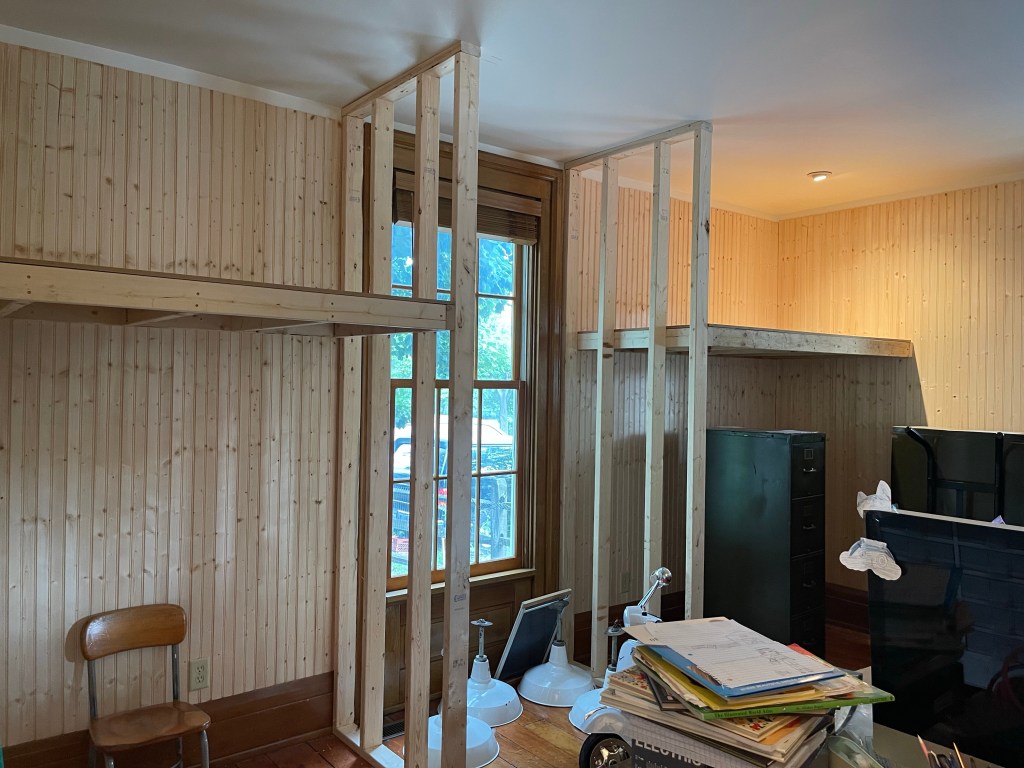
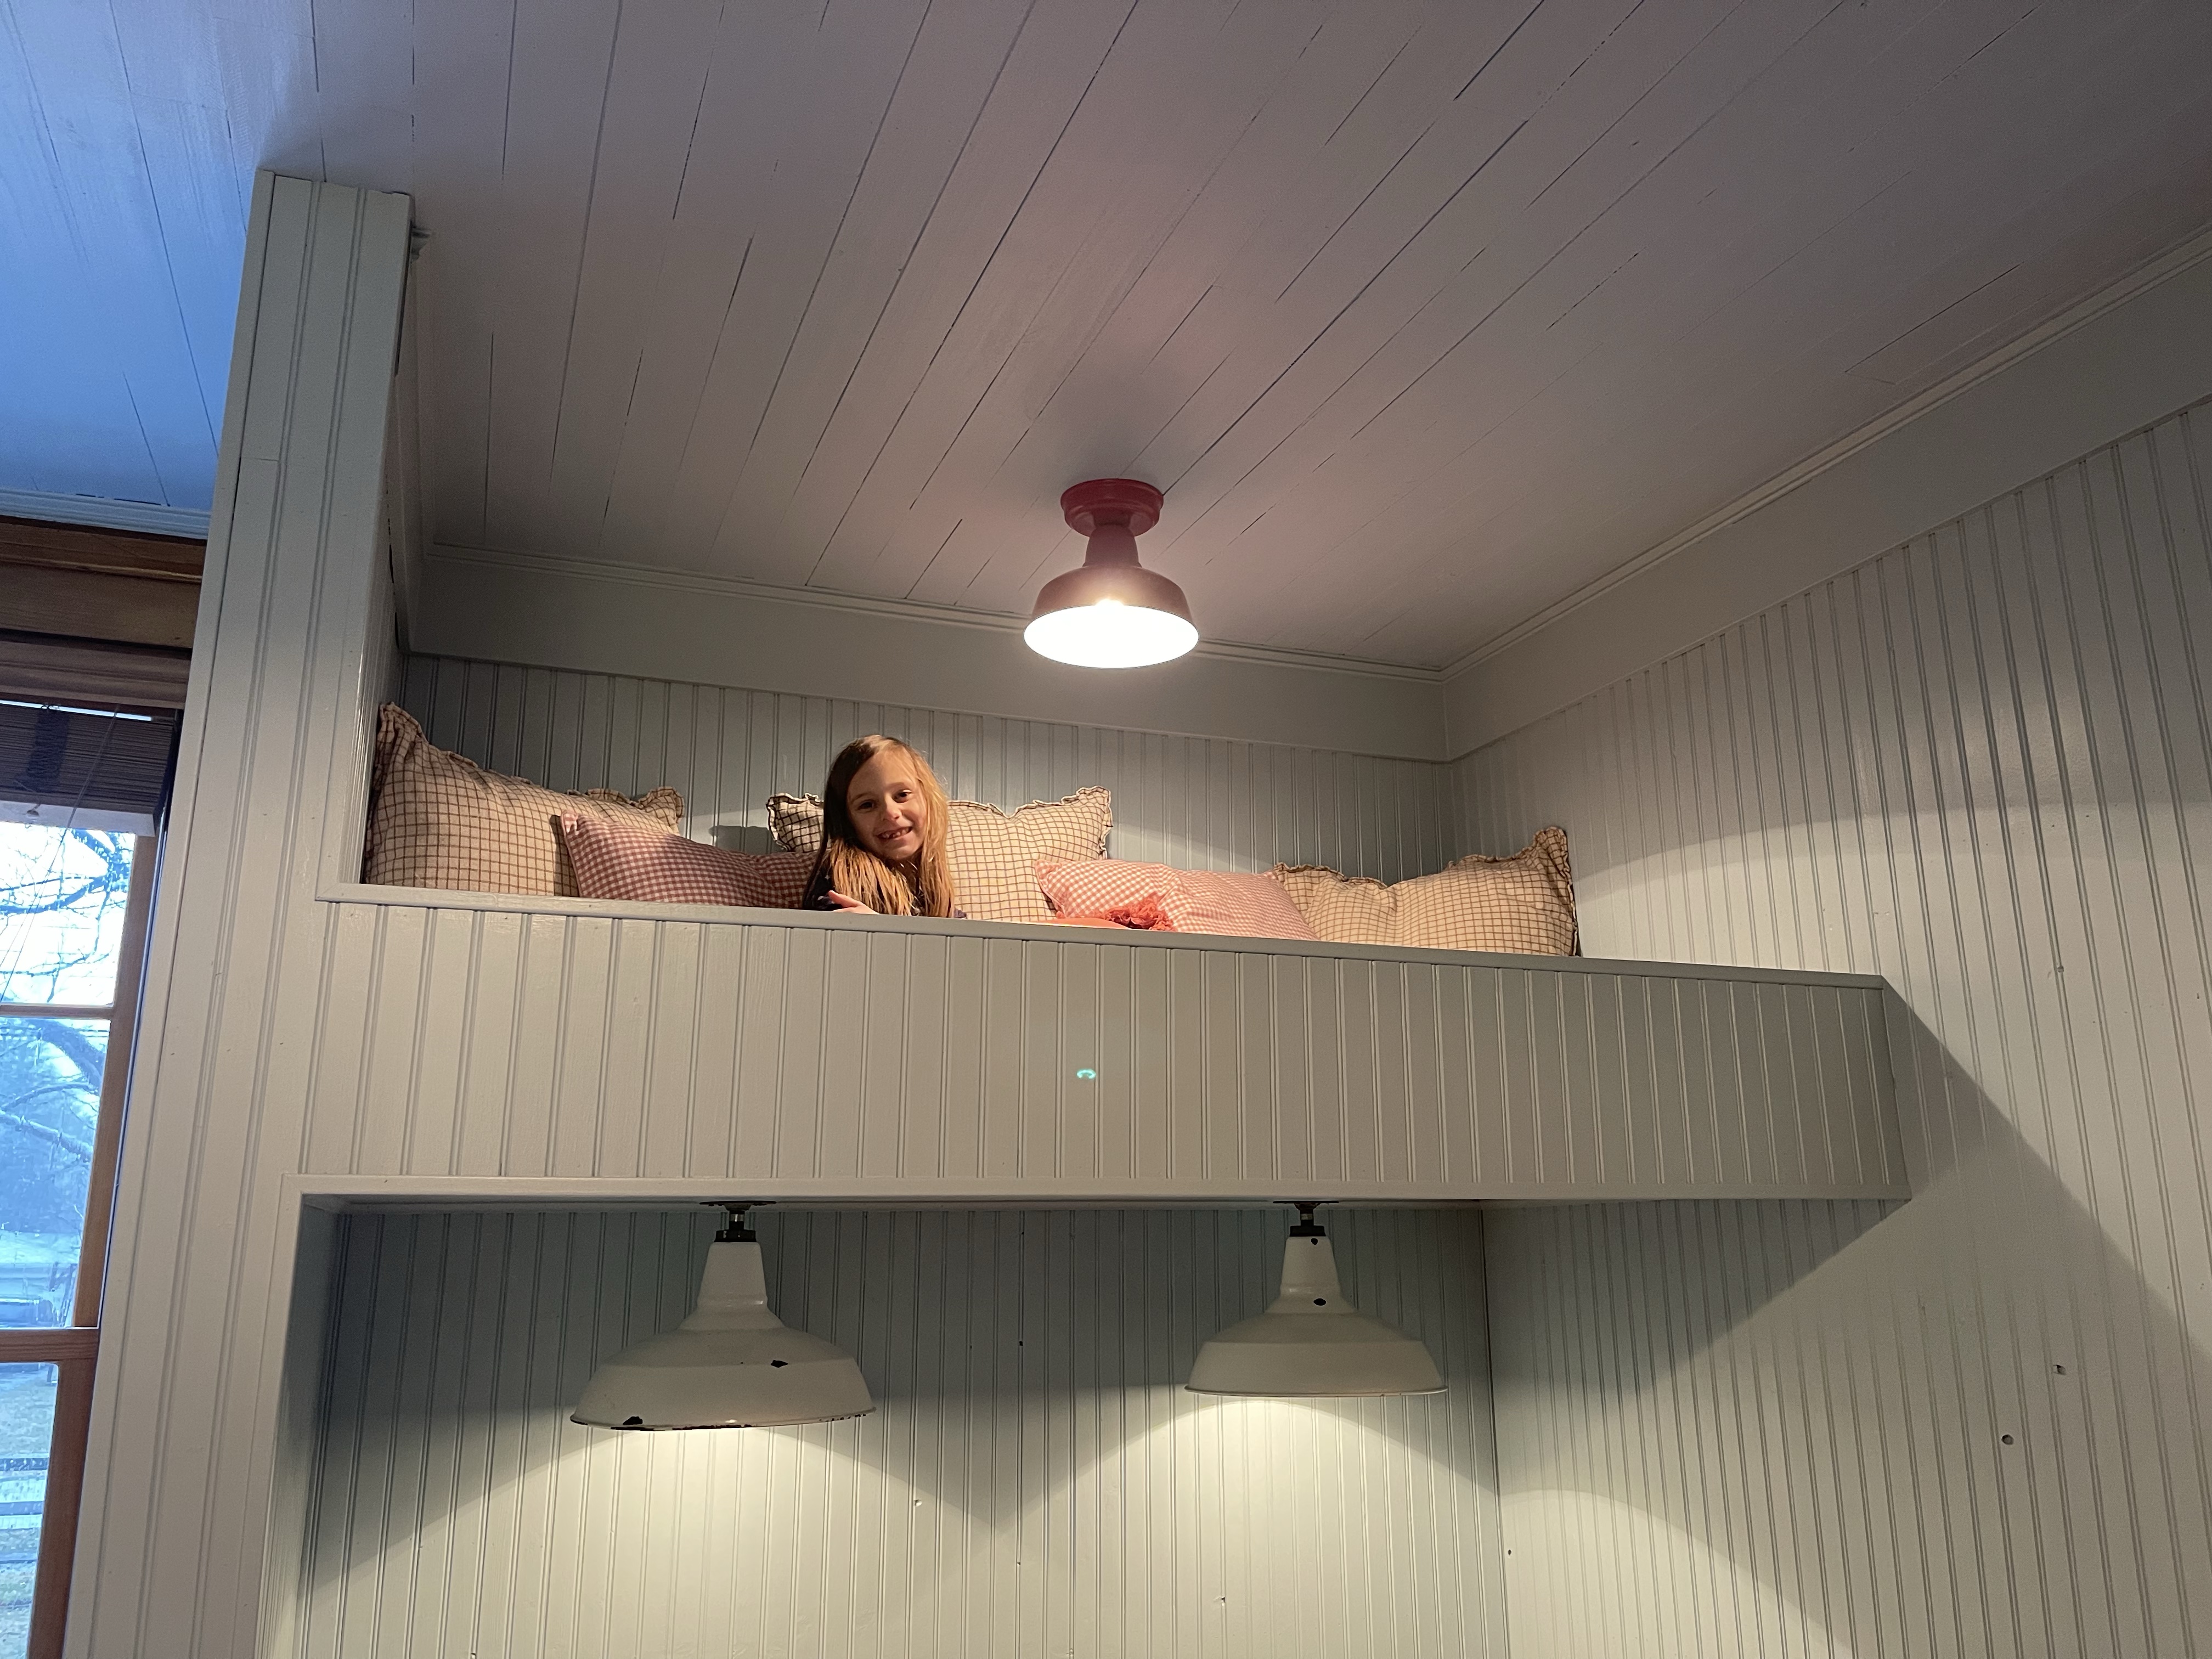
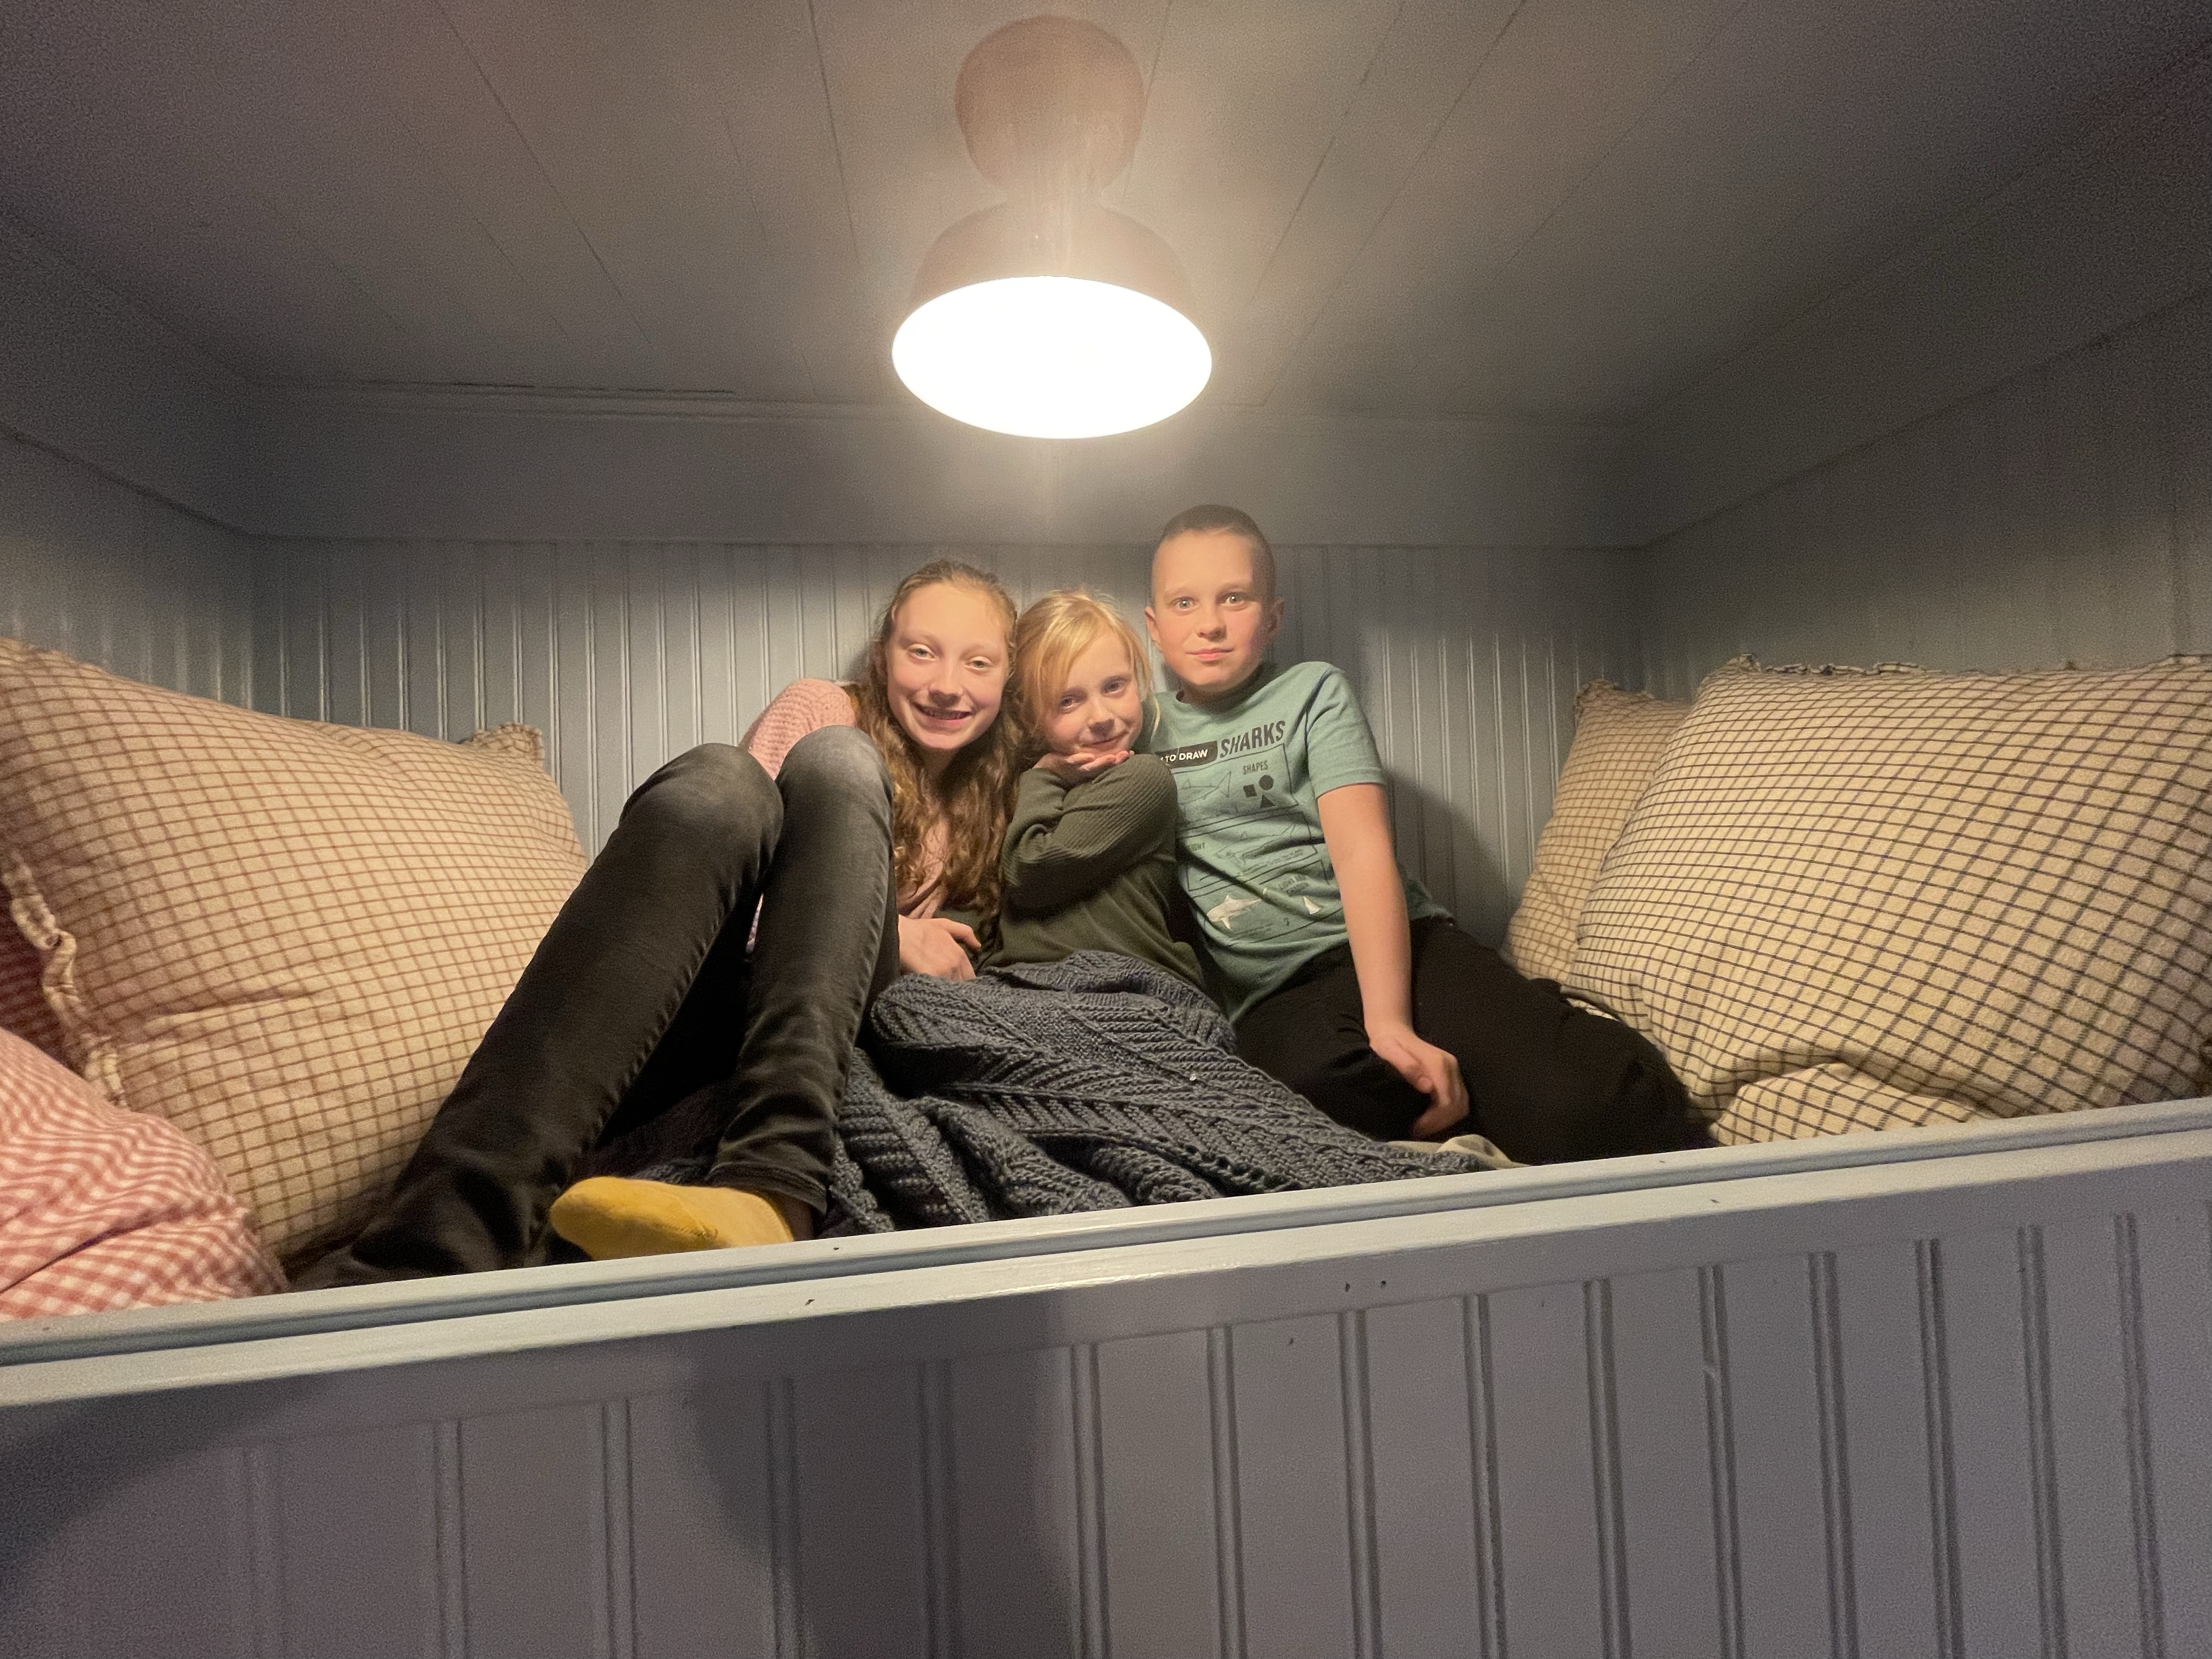
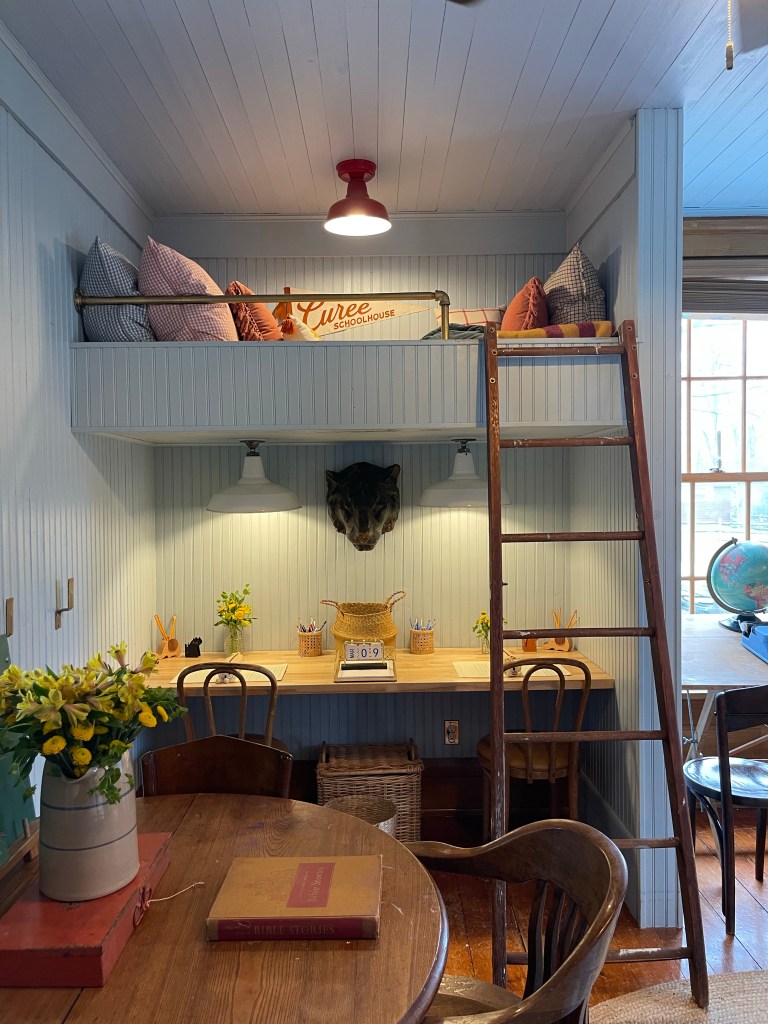
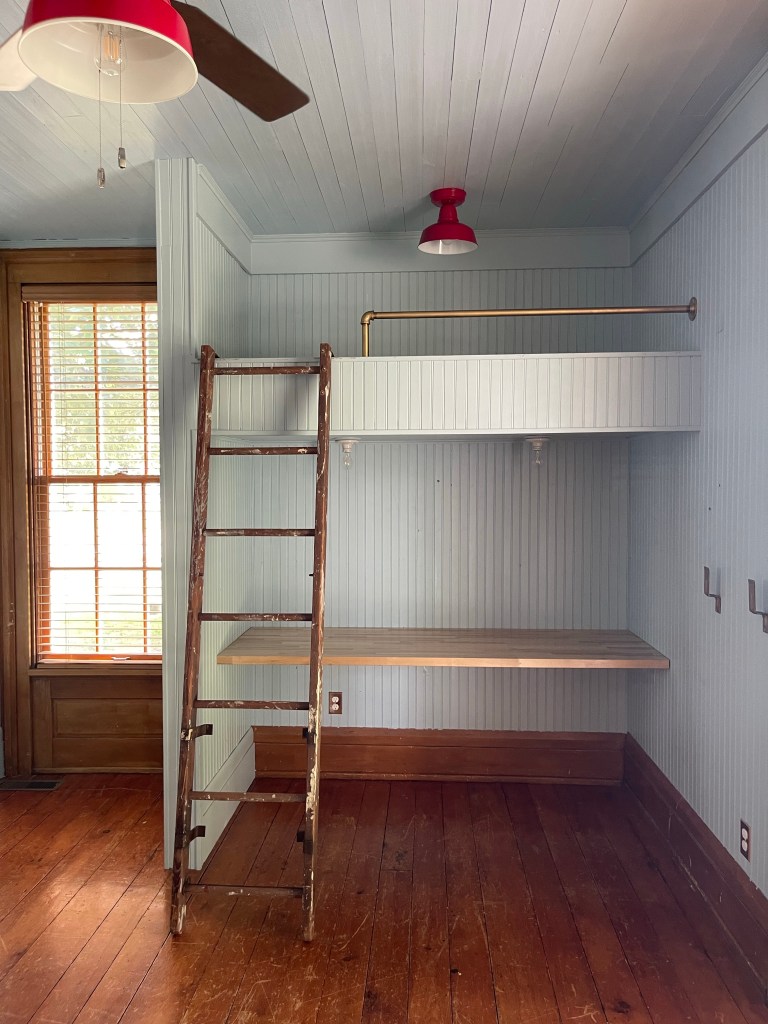
The biggest approval that took the most charming and convincing was to make these built-in-bunks for my darling little reading nooks. I needed it and he knew the workload it would entail.
After many, many discussions or maybe arguments, I successfully got Tom on board. That settled, we took our blank canvas and simply started building my dream that at the time was only in my mind. Little by little we chipped away at it. An adorable spot for the kiddos to adventure to and maximize the space we had available.
While it was quite the customization project, it so worth it in the end.
CUSTOMIZING IS KEY
From simple walls to character building by adding loads of wood details. Charm galore.

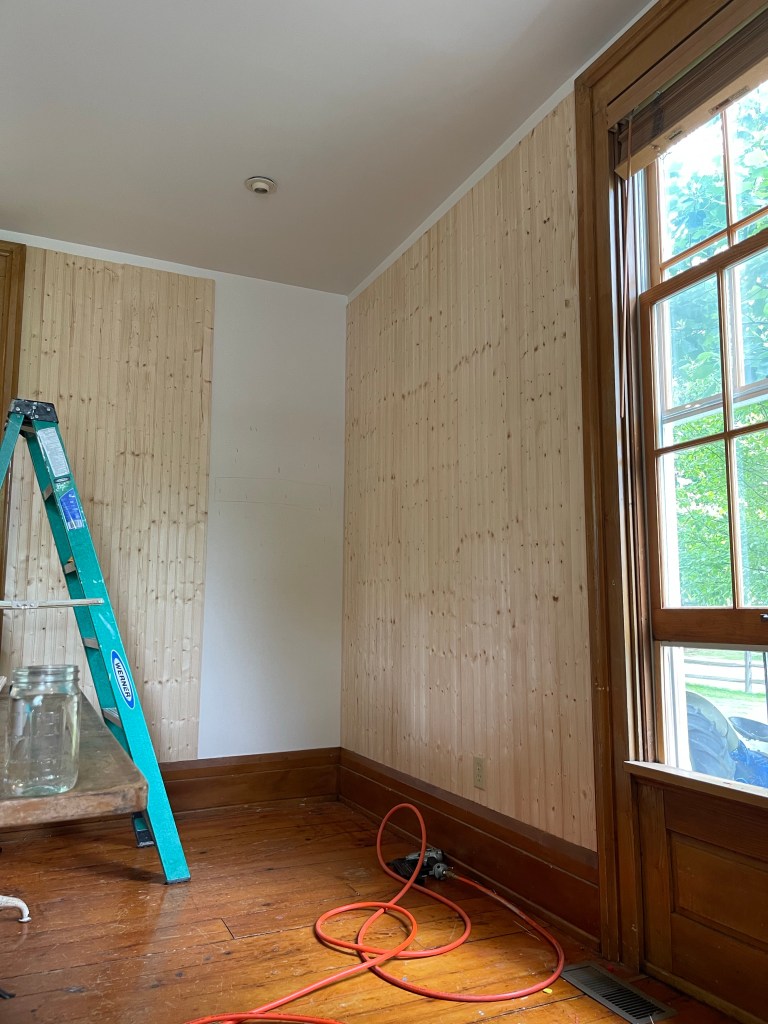
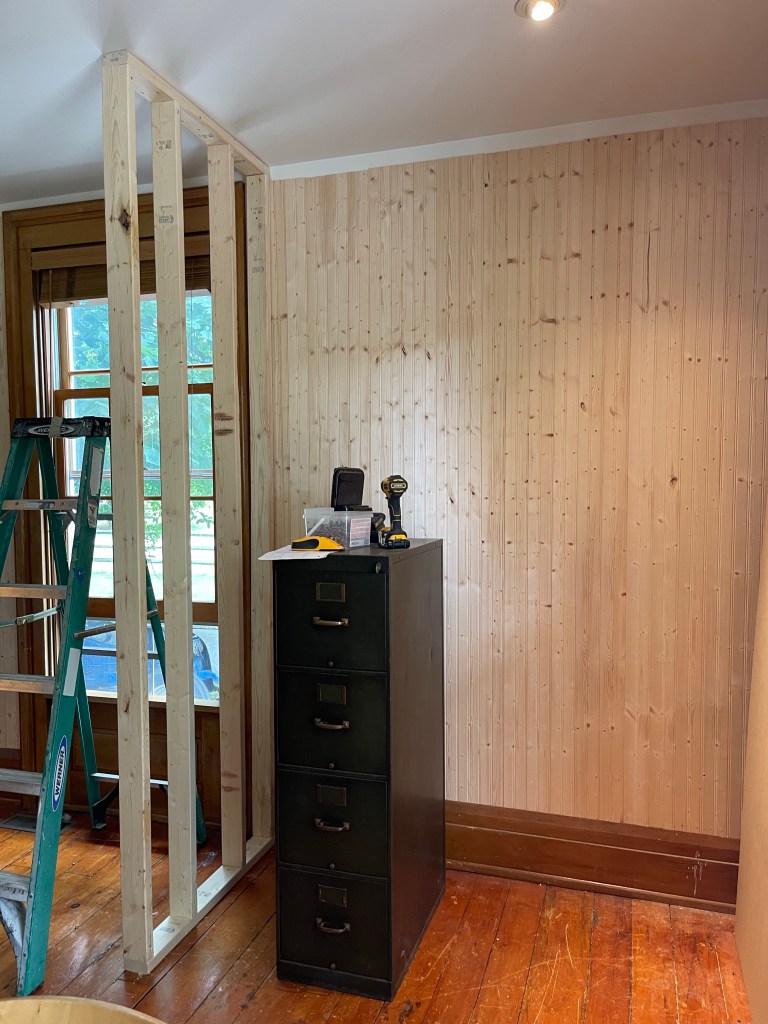
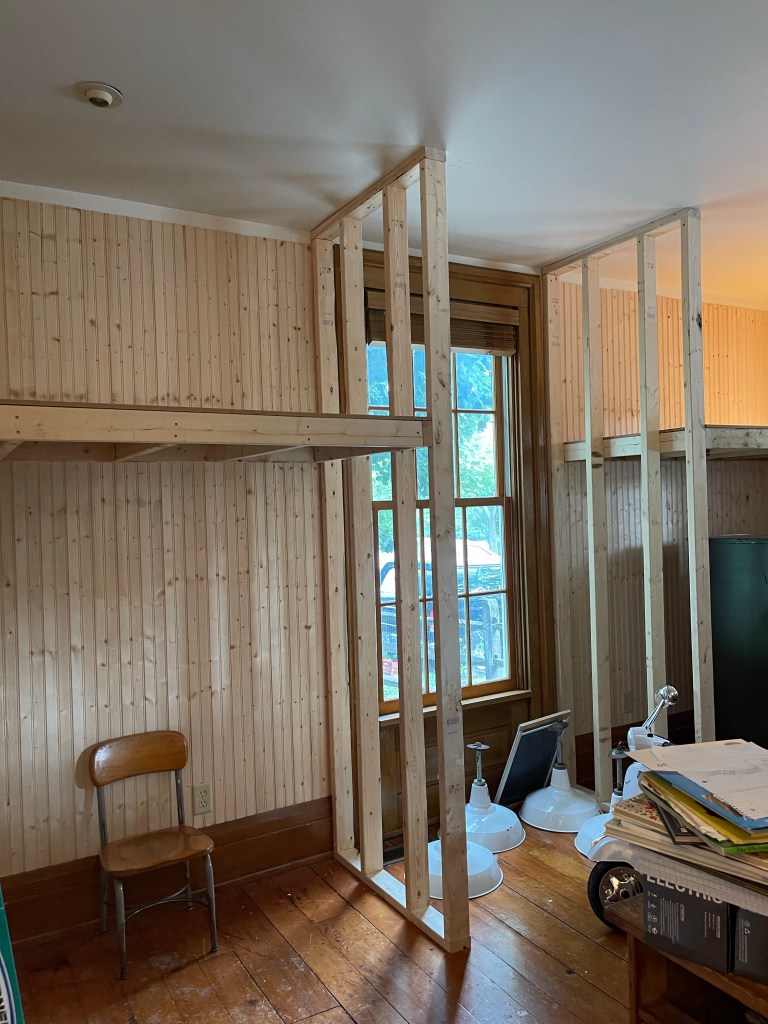
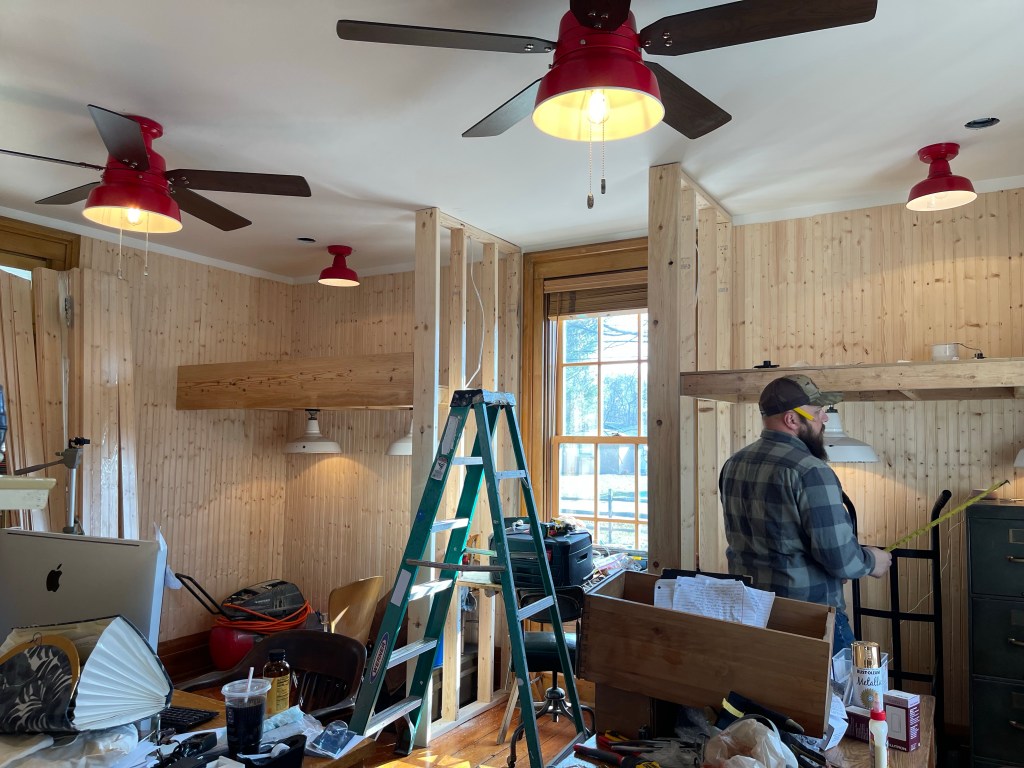

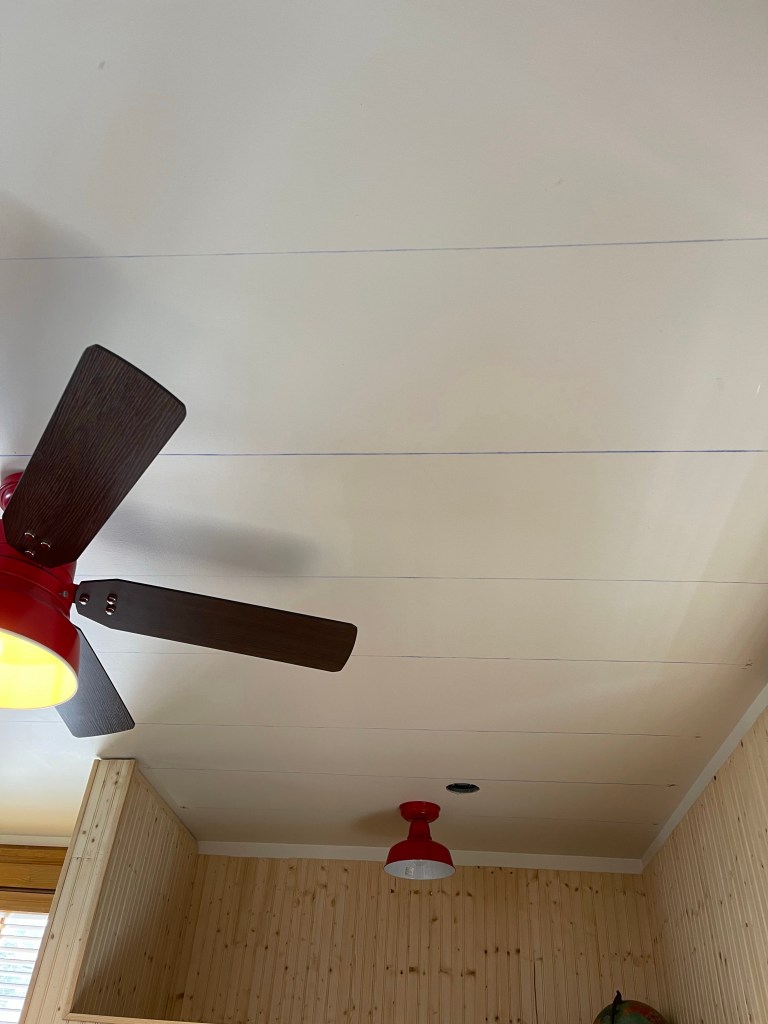
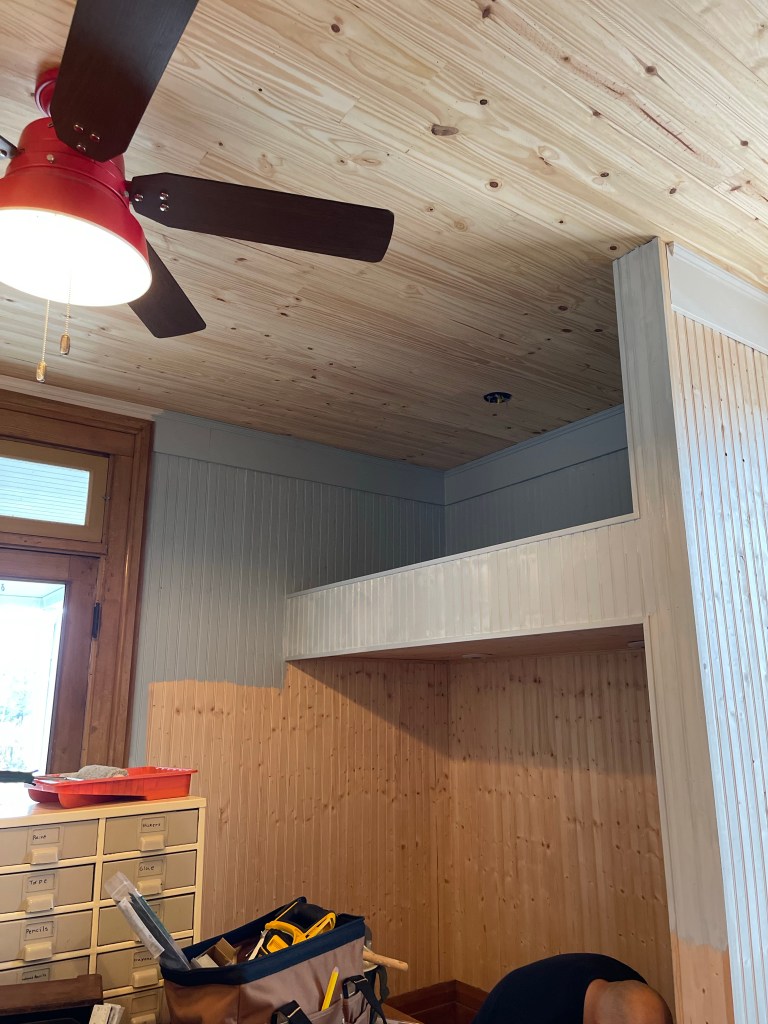
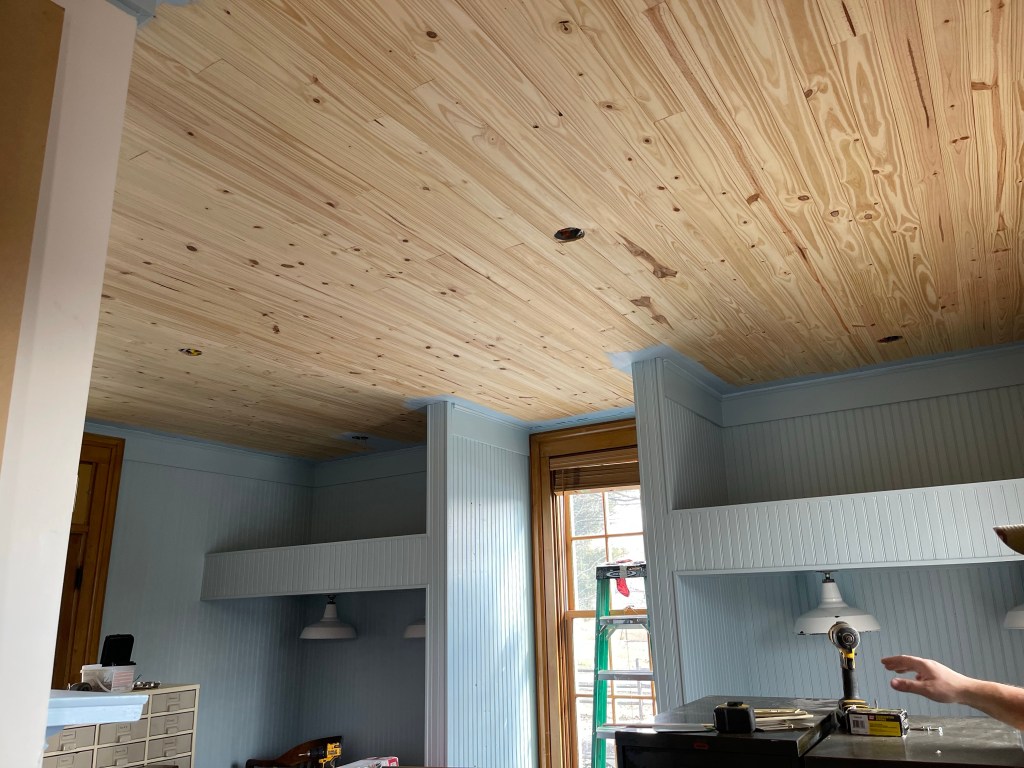
Tom chalk lined the ceiling for a map of where all the studs in the ceiling were for mounting the v-groove.

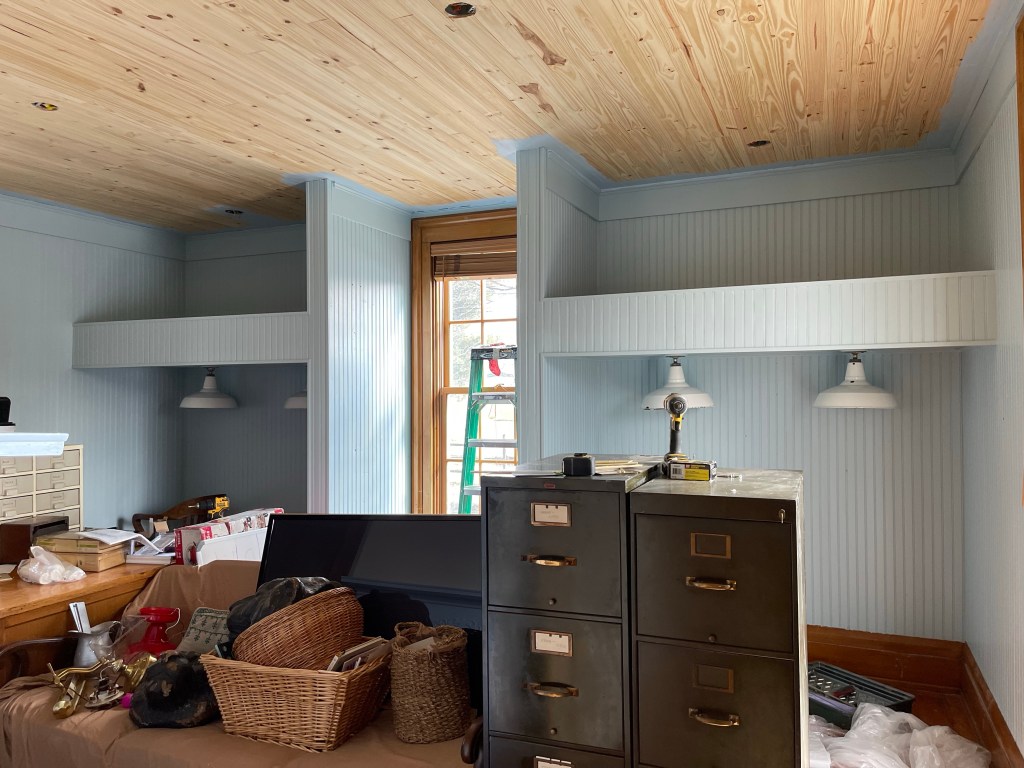
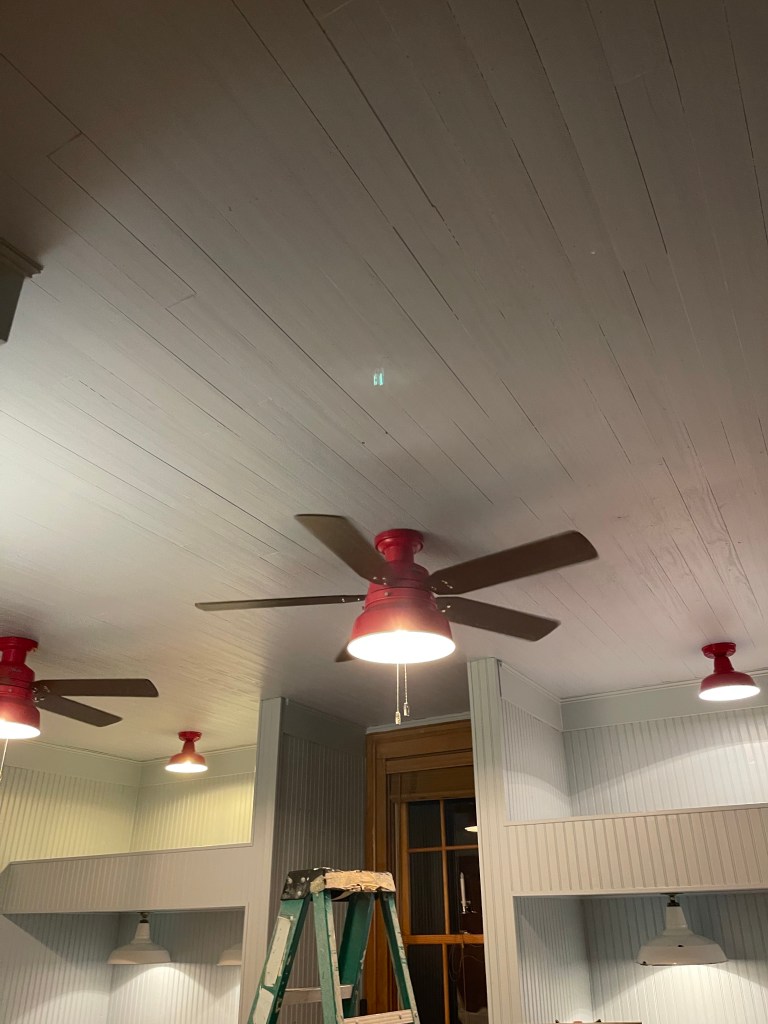
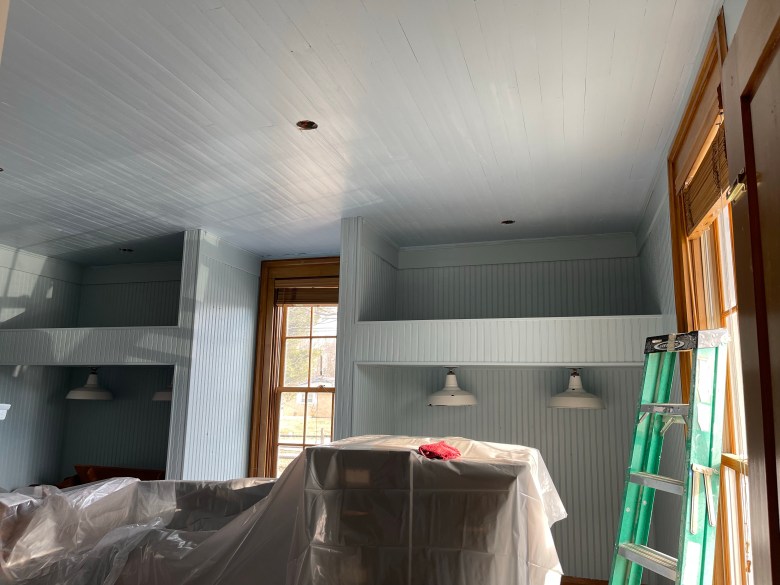
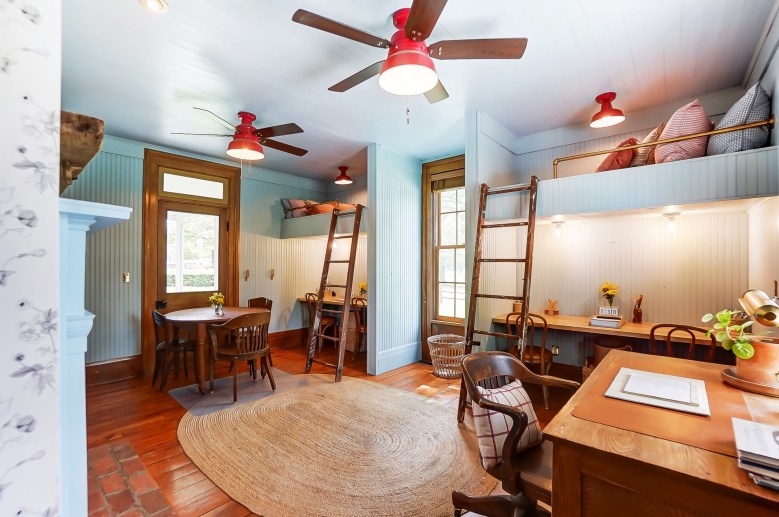
When that was mostly done, Tom was a very happy boy and proud of what he learned to do. From the wainscoting on the walls and bunk space, to the v-groove we chose for the ceiling, as well as the custom trim work, all went a long way to beef up the space even more.
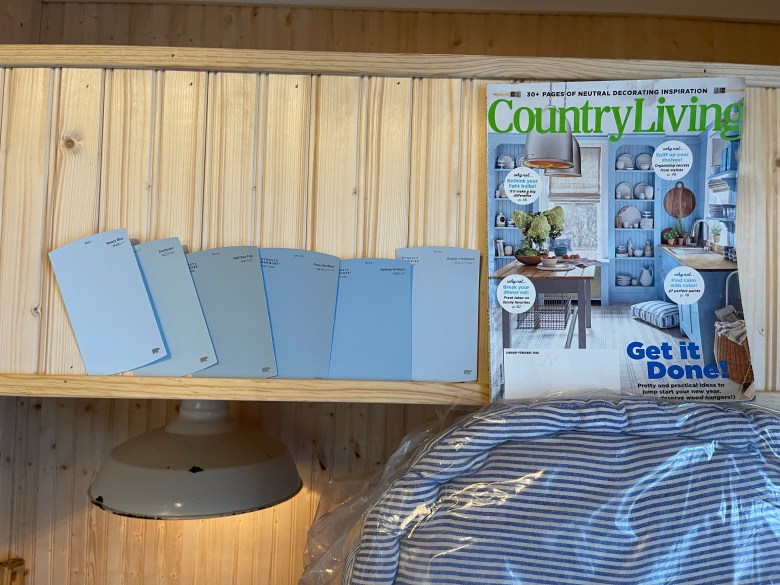
I also finalized the paint choices and this portion of lighting to move the project along. We chose Home Depot’s Marquee Paint with slightly different blues for the ceiling and walls. We decided to go with Hunter ceiling fans to keep that room cooler in the summer. And as I said I was pumped to finally put my red and blue color scheme vision in our own home. Things were really beginning to take shape.
It was a labor of love—all the tedious painting that was required for this space. But it was turning out exactly as we wanted it too.
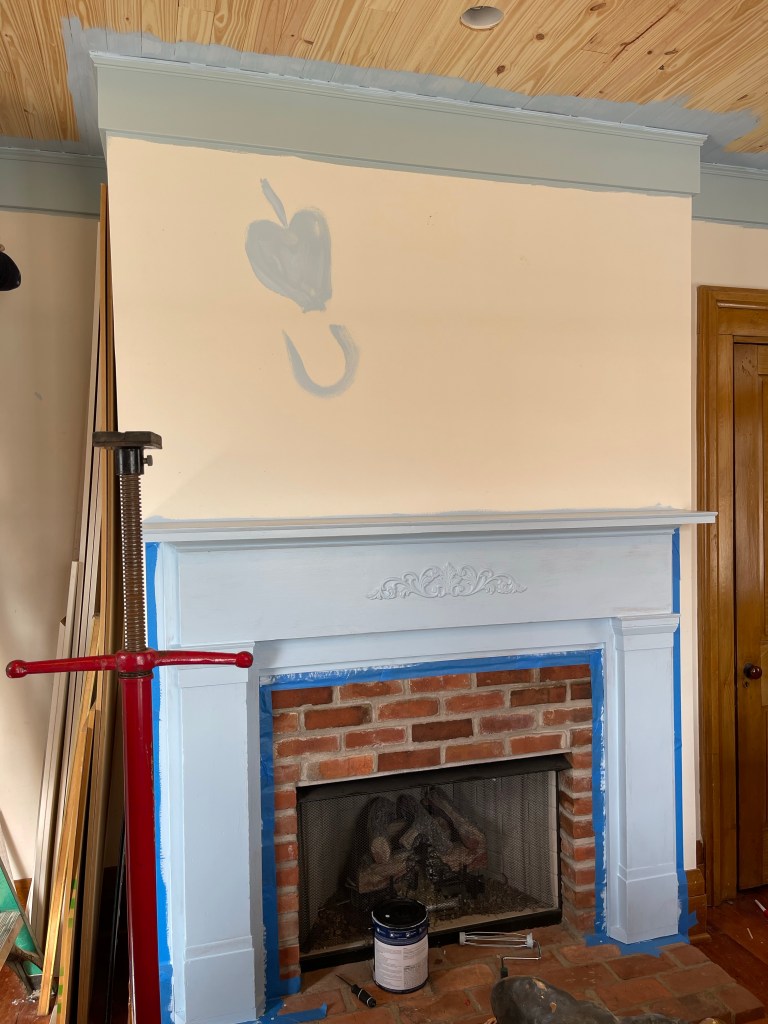
Tom even surprised me by painting I love you on the wall where the wallpaper was going to go. If anyone ever takes that down they’re in for a surprise.

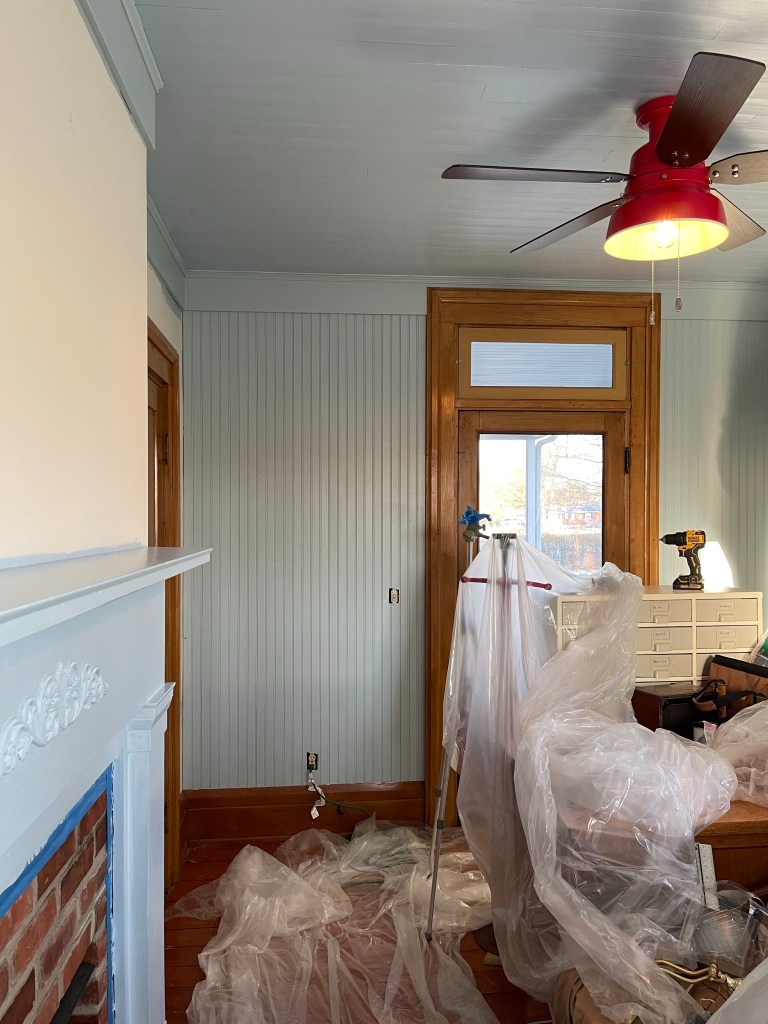
We loved the way the blue made the original wood trim on the doors and windows pop even more.
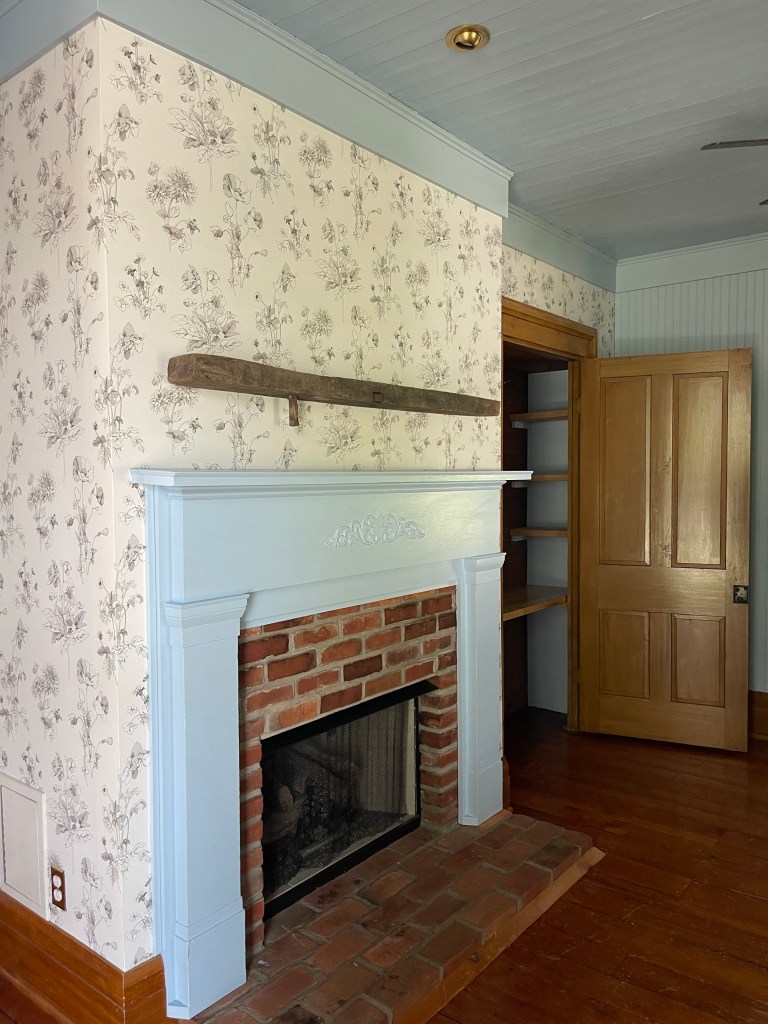
NEXT, GETTING THAT WALLPAPER RIGHT
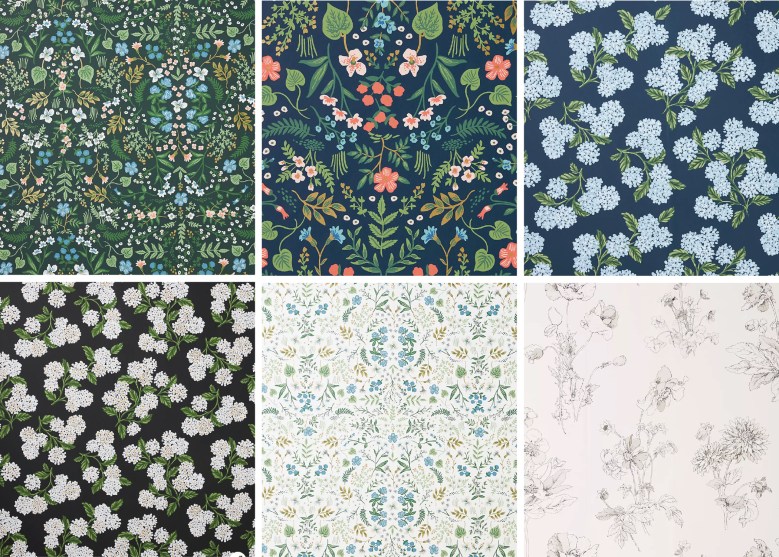
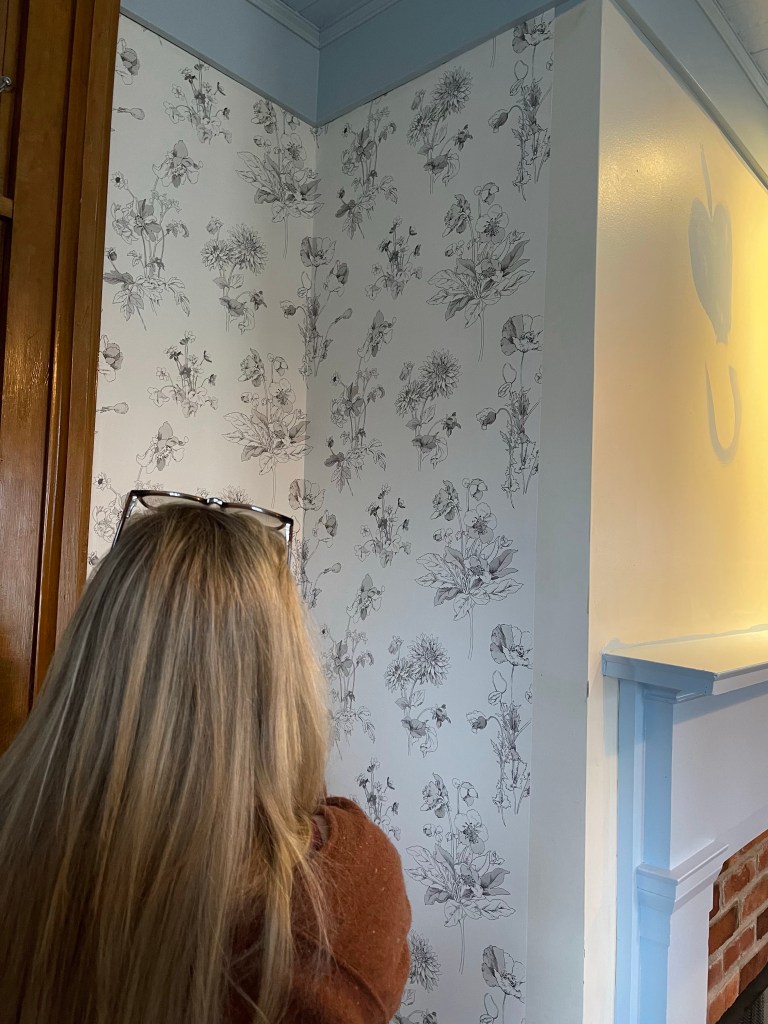
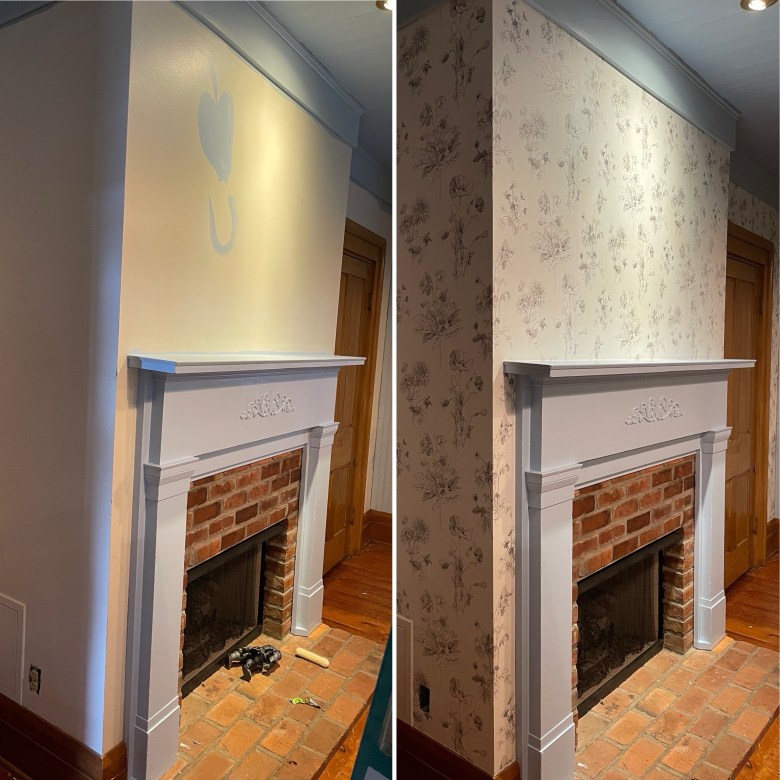
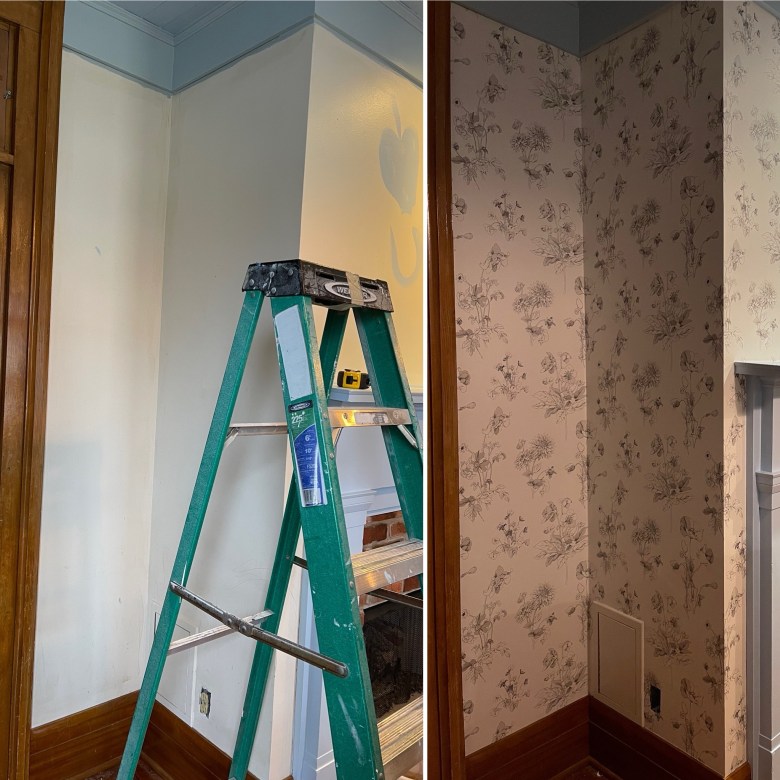
For the wallpaper wall, I planned to a put a combination of my artwork and the kiddos artwork on display as a gallery wall. Co-exisiting together. A beautiful way to debut all of our talents. I had several potential wallpaper choices I could have gone with. In the end, I decided to go with the most calming choice. Meadow Bloom wallpaper by Anthropologie.
Enjoy some before and afters.
Slaying to get it right.
Good craftsmanship is so vital and Tom outdid himself.
Gorgeous transition.
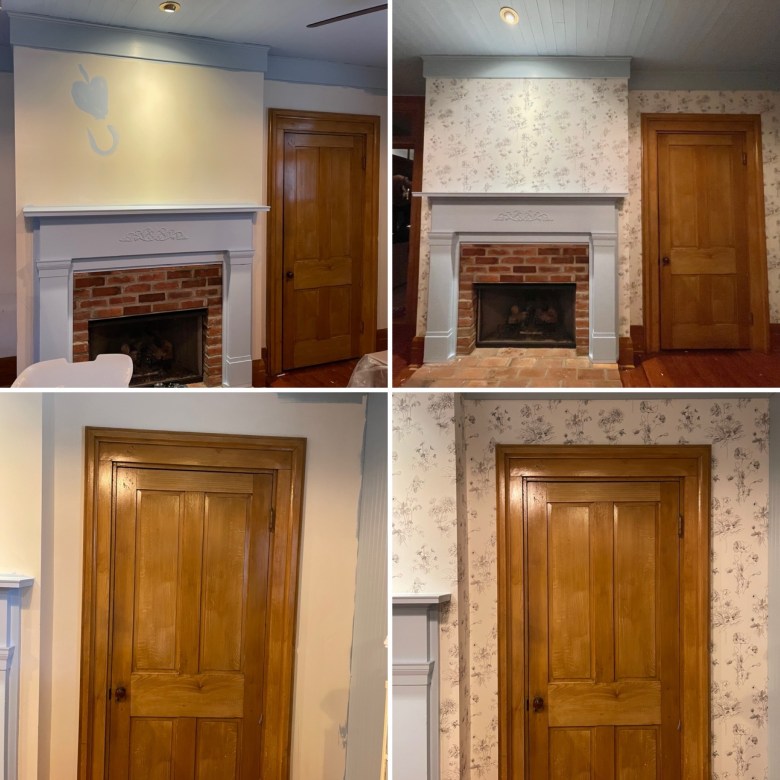
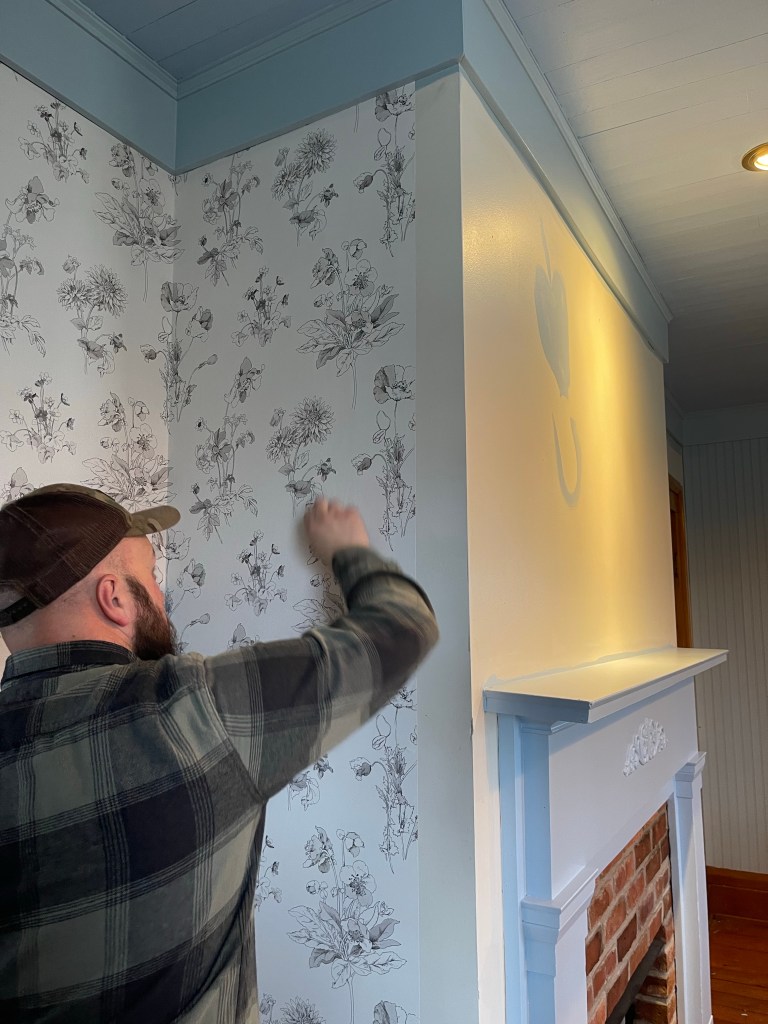
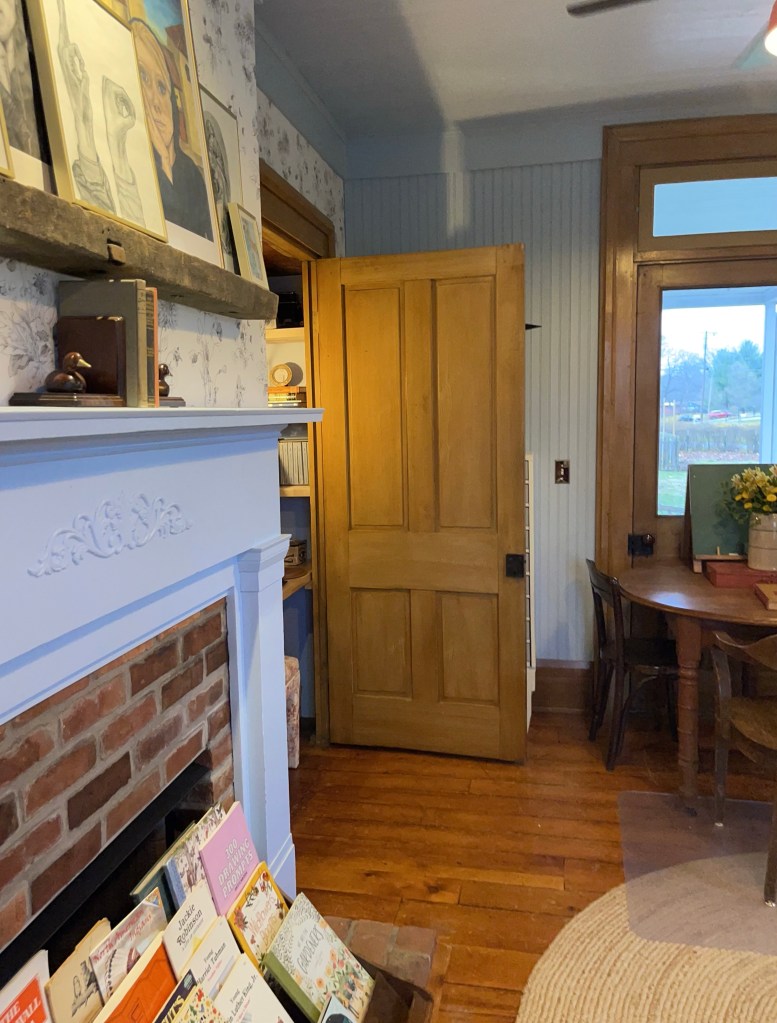
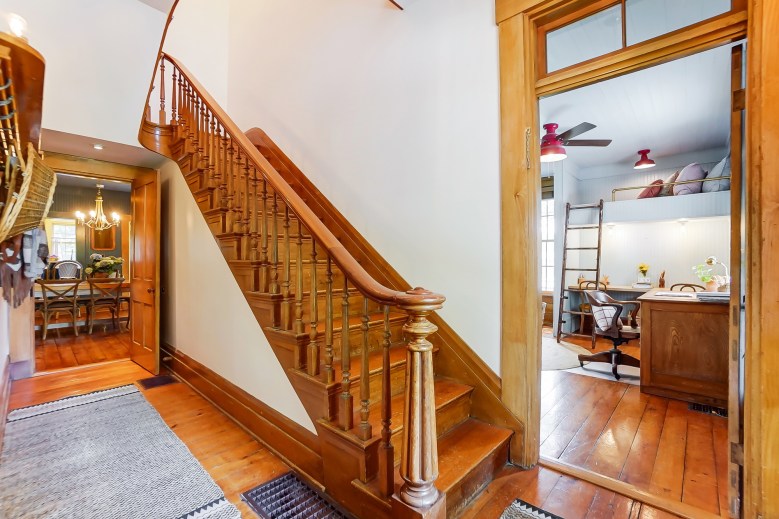
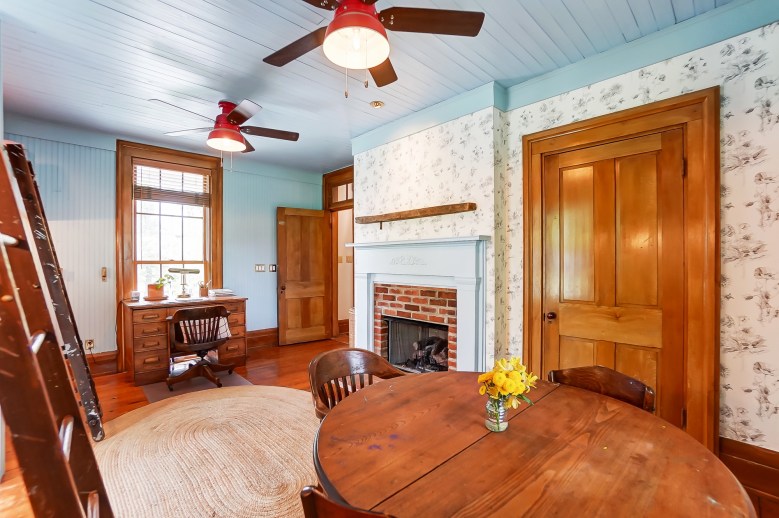
Felt so fitting for our 1955 home. In addition we had added the wooden scroll to the fireplace and painted it the new color. We decided to keep the gorgeous original brick and I’m glad we did.


It took 100% of all Tom’s focus to install this wallpaper, like me he is a bit of a perfectionist. We were freaking out with how much we loved it.

When I put my sample artwork up just to get a feel, we were geeking out with how perfectly it was turning out.
GLIMSPE OF VISION
Sneak peak getting us excited about what’s to come.

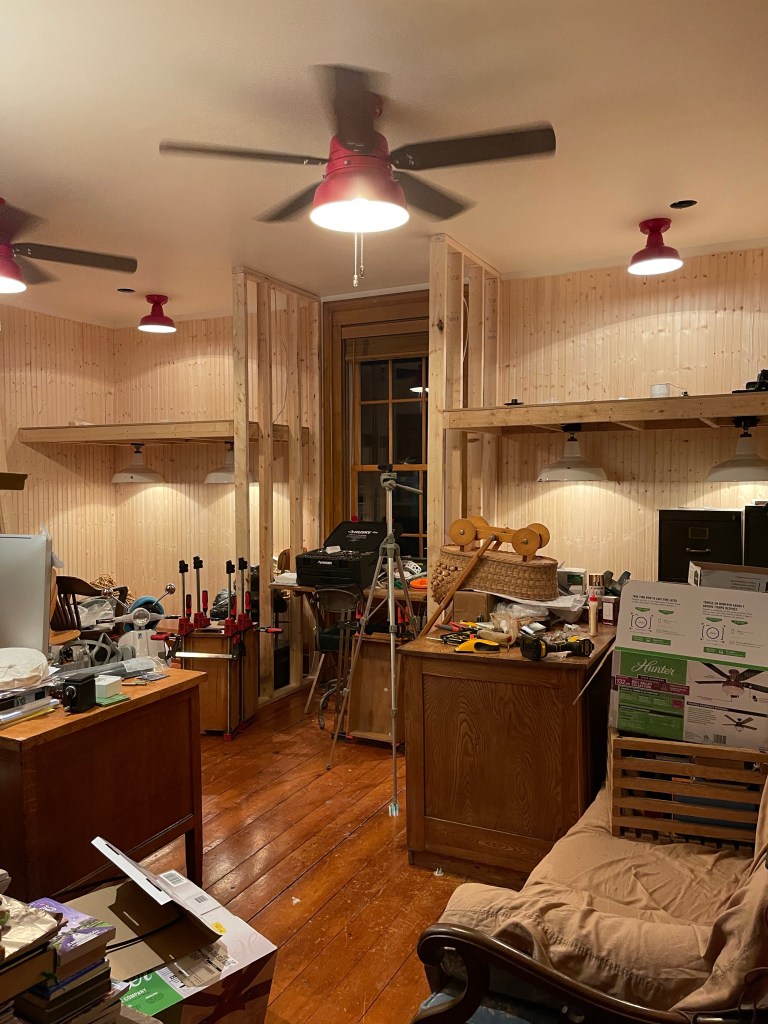
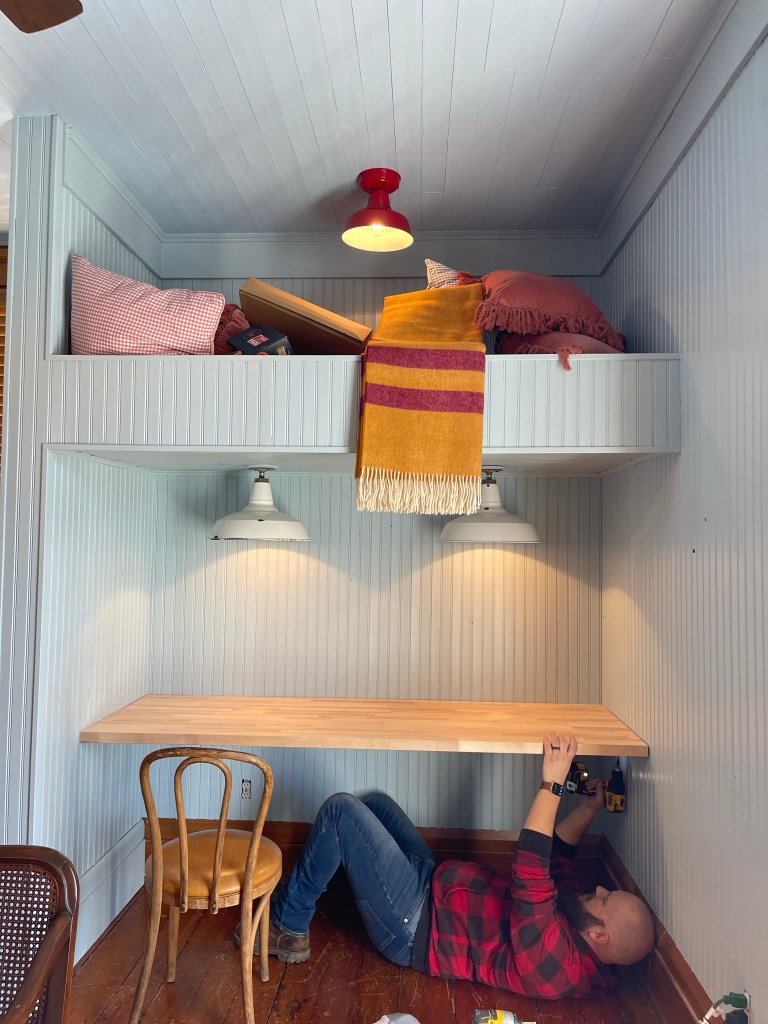
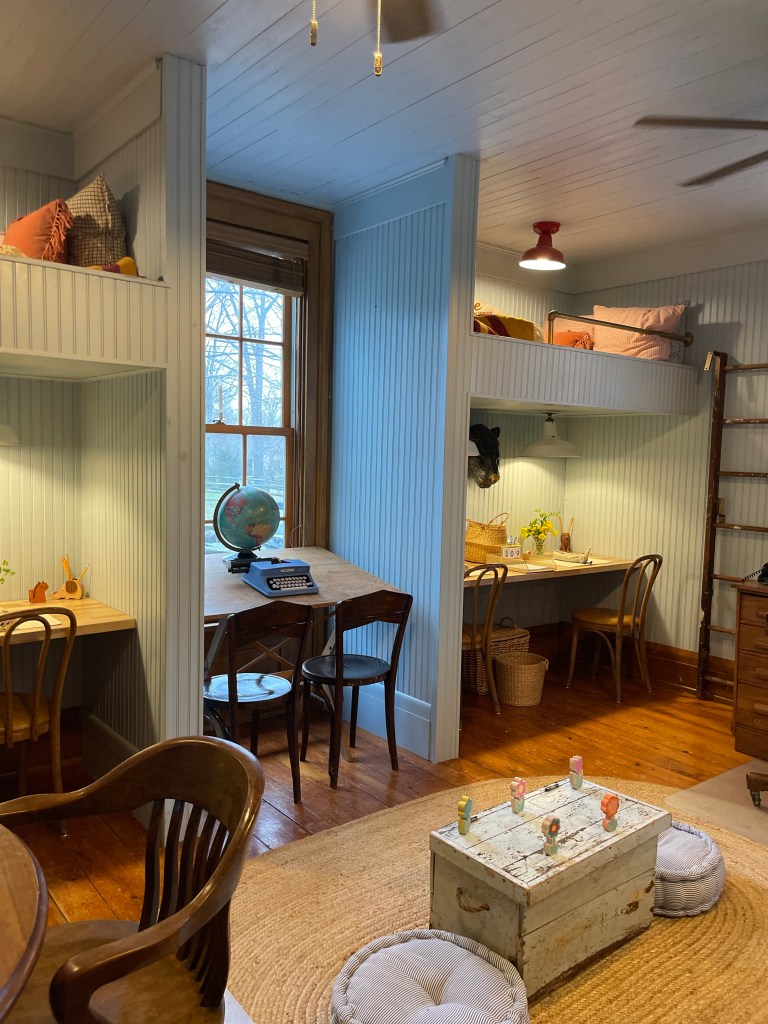
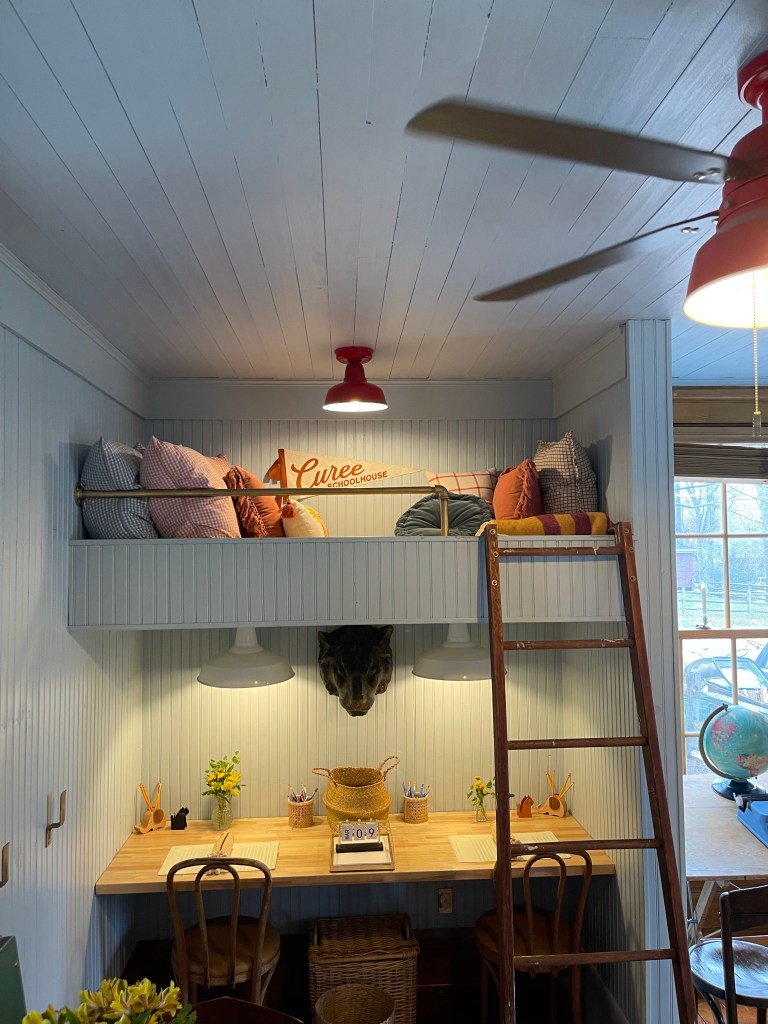
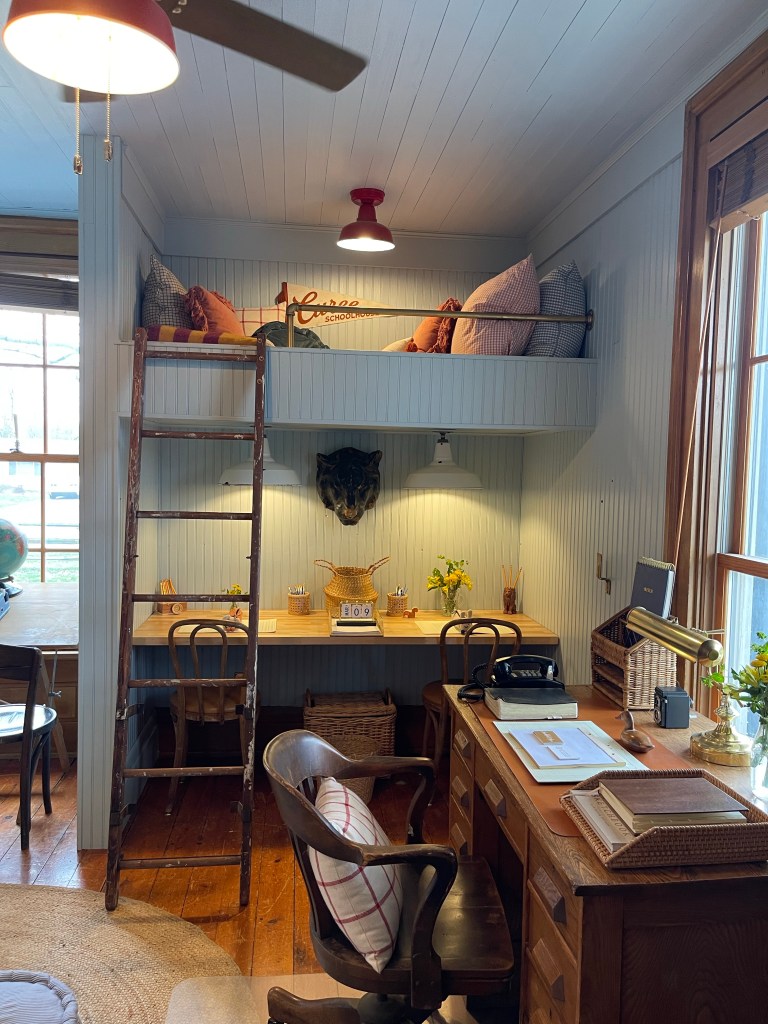
FINALIZING BUNK READING NOOKS, LIGHTING & DESK SPACE
Once the wallpaper work was complete, it was time to finish up the bunk space and desk spaces. Again, trying to customize as much elements in the room as we could, maximizing as much space as possible.
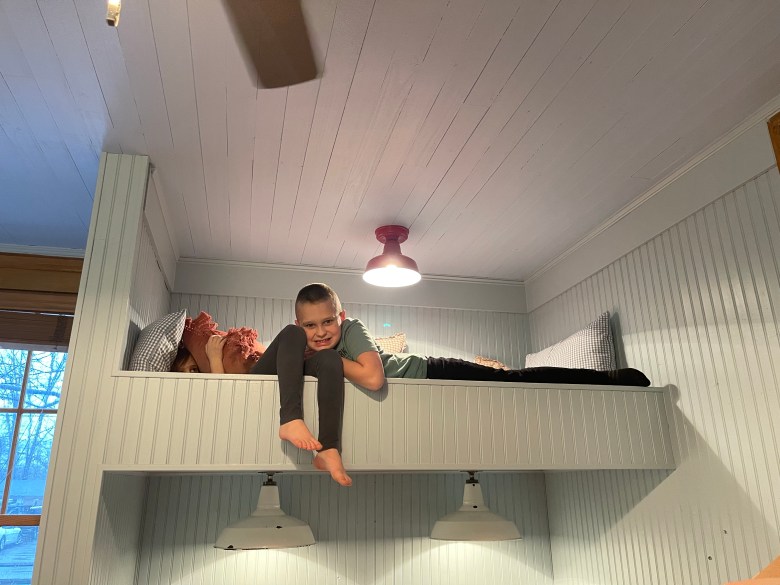
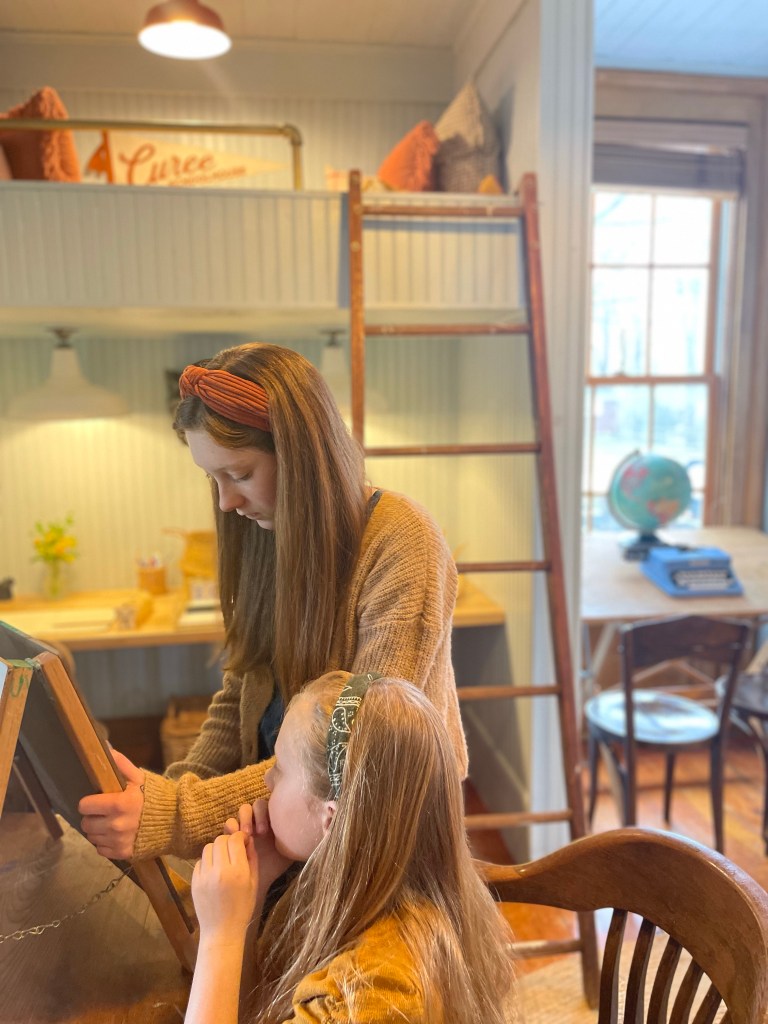
Those bunks look good on you kiddos!
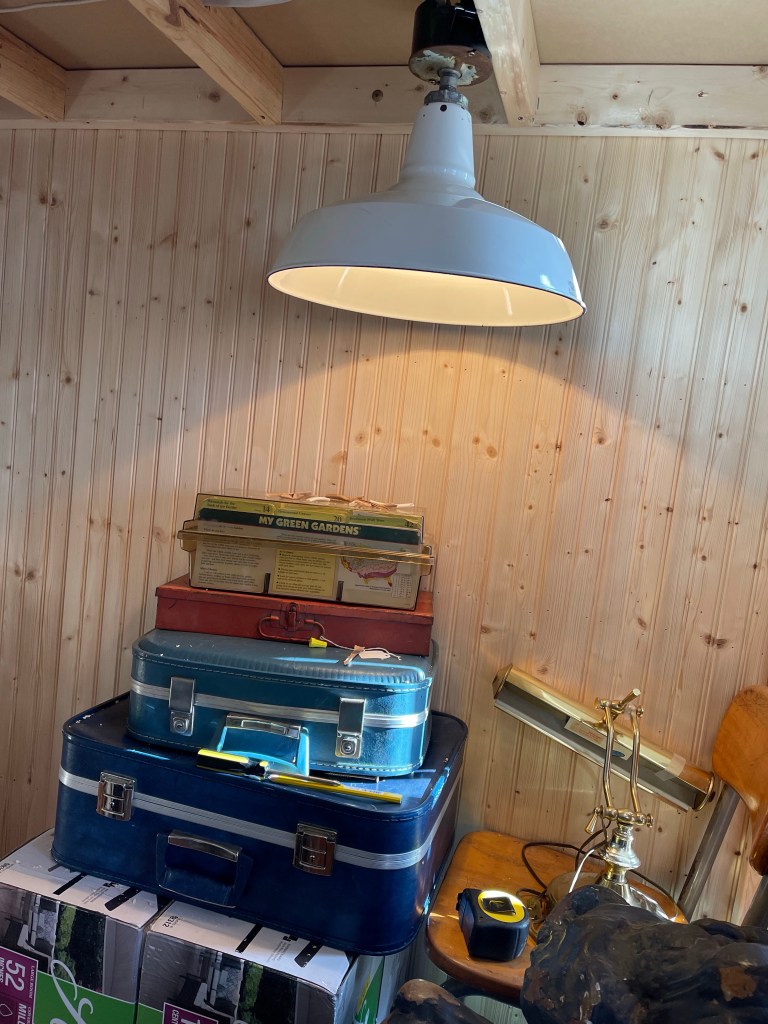
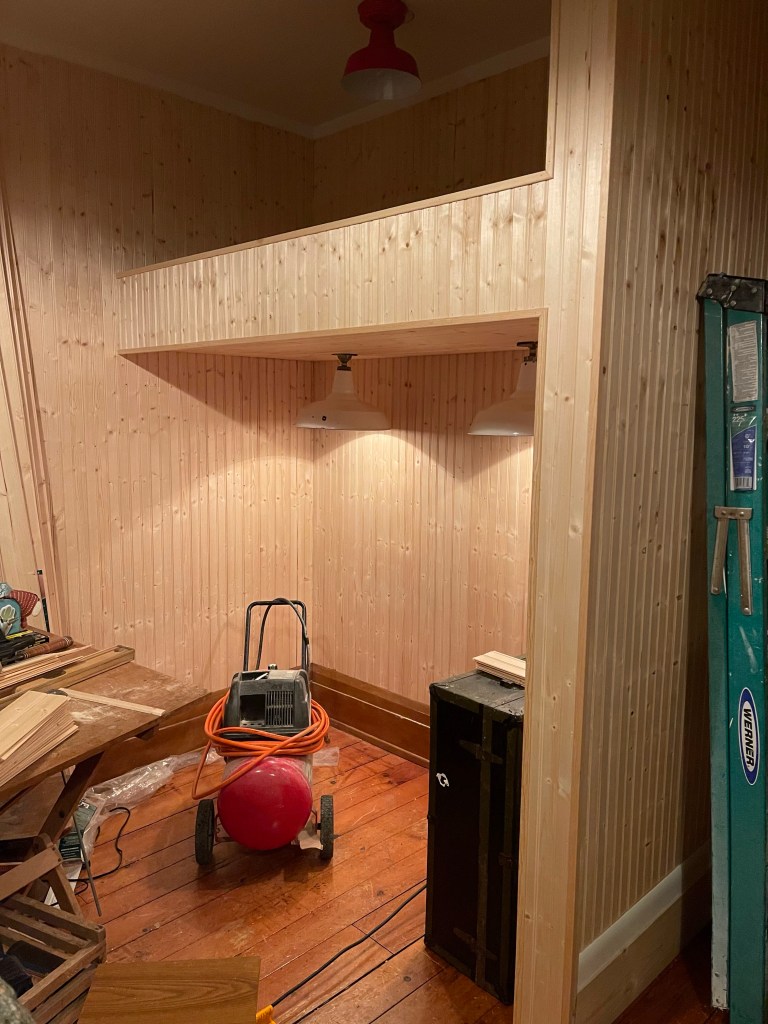
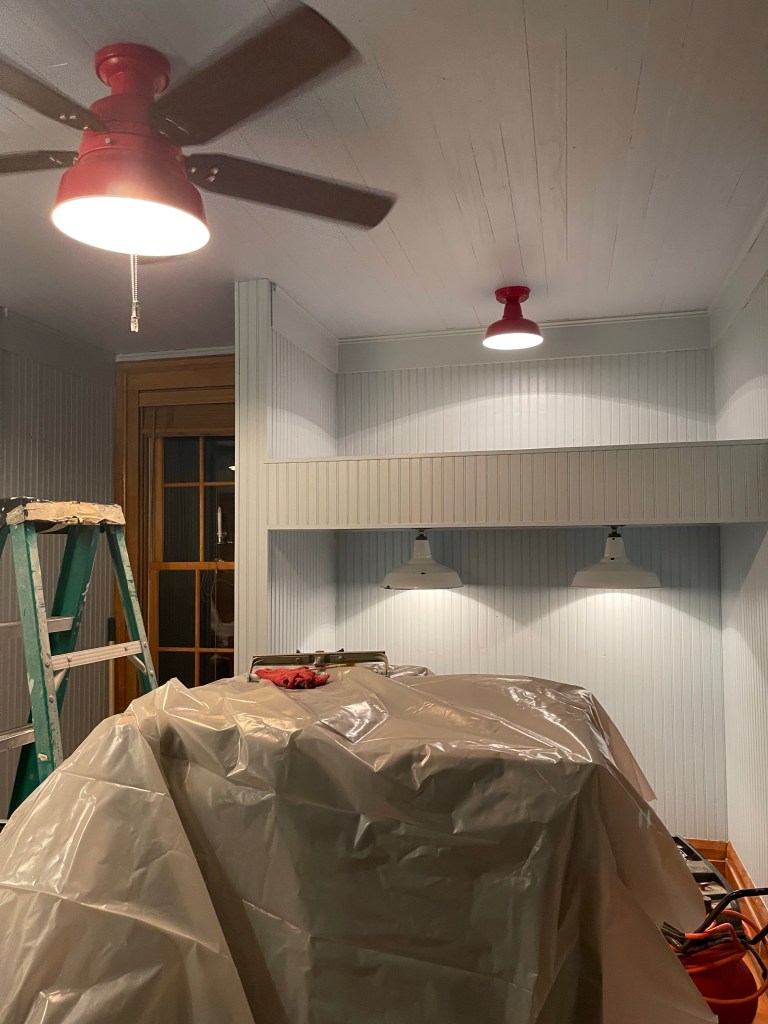
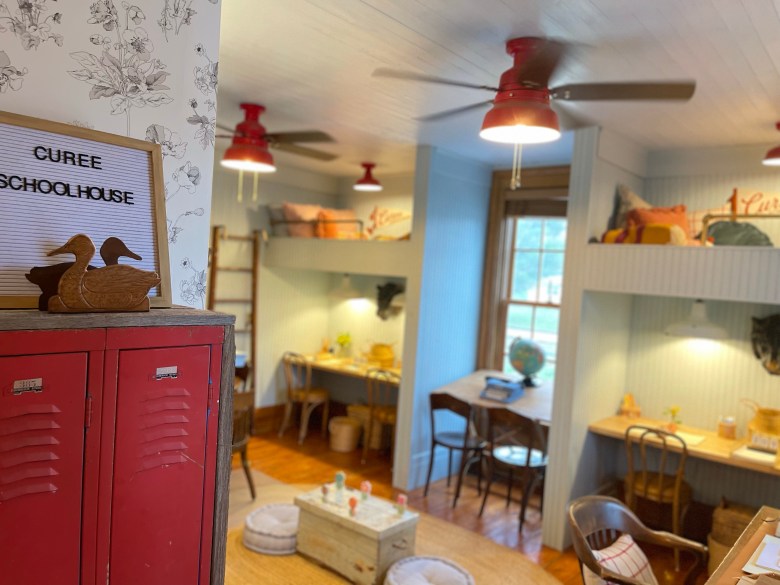
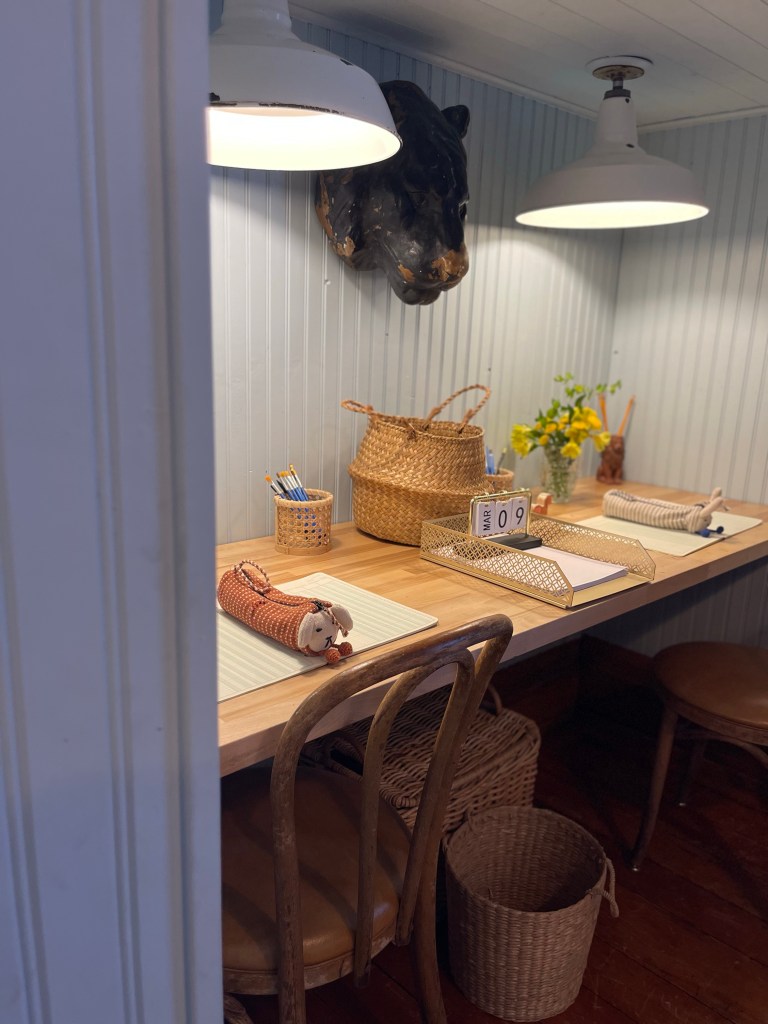
The lighting we chose was pretty special. The white antique lights being the last lights my dad picked with my mom while antiquing together. They had plans to utilize them in their home for an idea they had. After my dad’s passing in 2019, my mom decided to gift them to us. We put them to use in this very special place. Something we would see and use everyday and remind us of my dad, and their papaw. He would have loved to see it and been impressed with how much Tom’s skills grew even farther with all the projects that challenged him in this space. My carpenter father would have been proud.
Don’t worry, we did take them down with the sale of our home and we will be reusing them in our new home. They were too precious to leave.
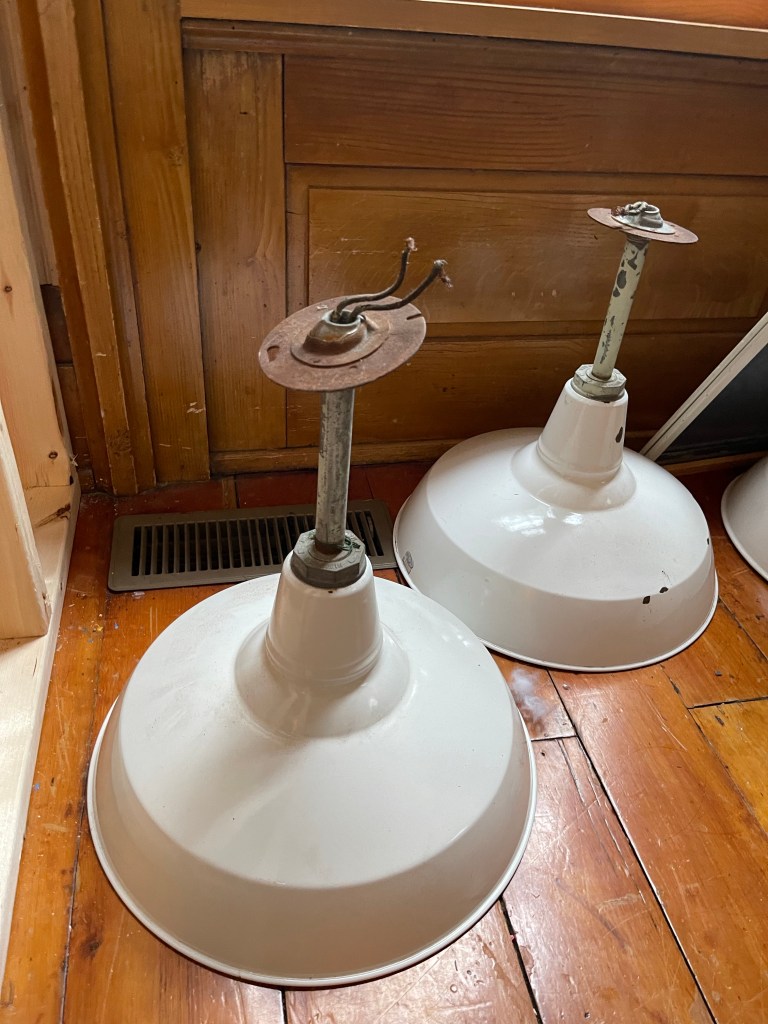
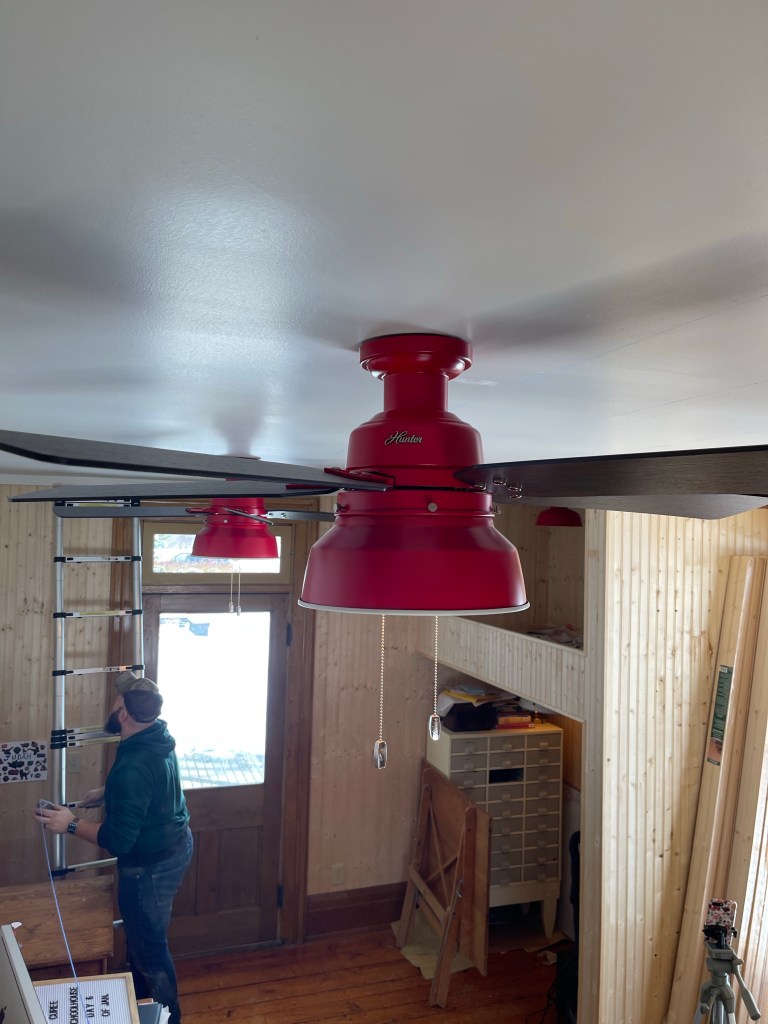
For the bunk nook lighting we chose a simple urban barn farmhouse industrial ceiling light in metal red, now sold out on Amazon. They still have them in black here. I loved the color in the space. If I had to redo it, I would have chosen a smaller light, maybe even flat against the ceiling as the kiddos constantly hit their head or backs on it. Lesson learned for next time.

Those open built-in desktops happening.
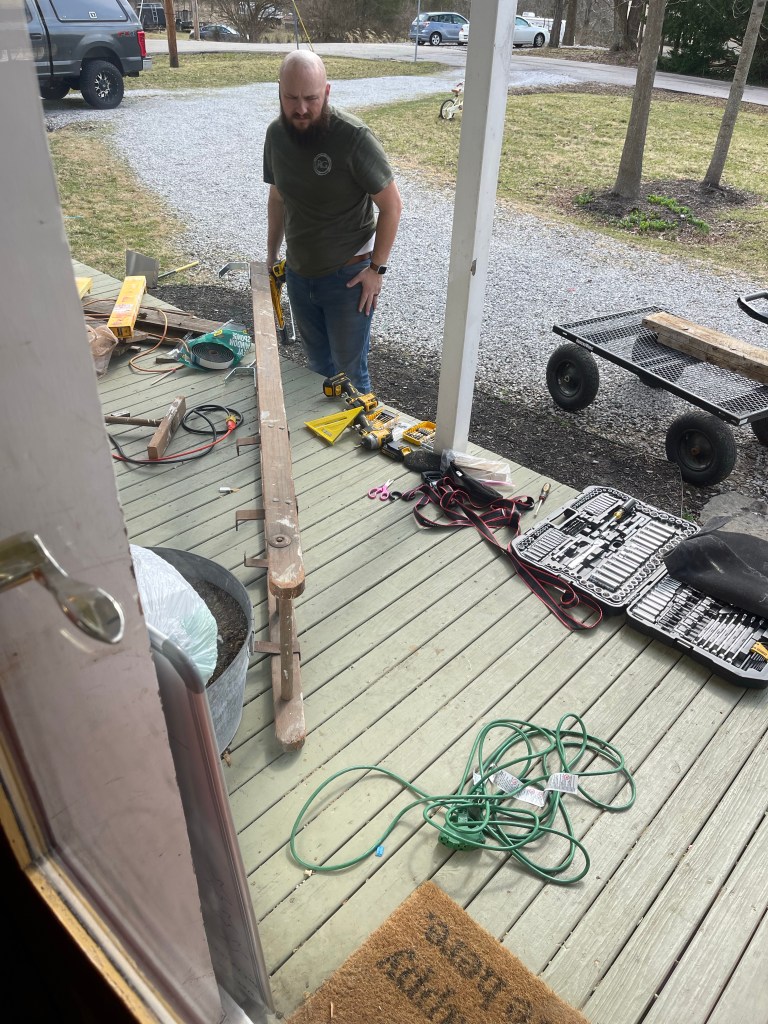
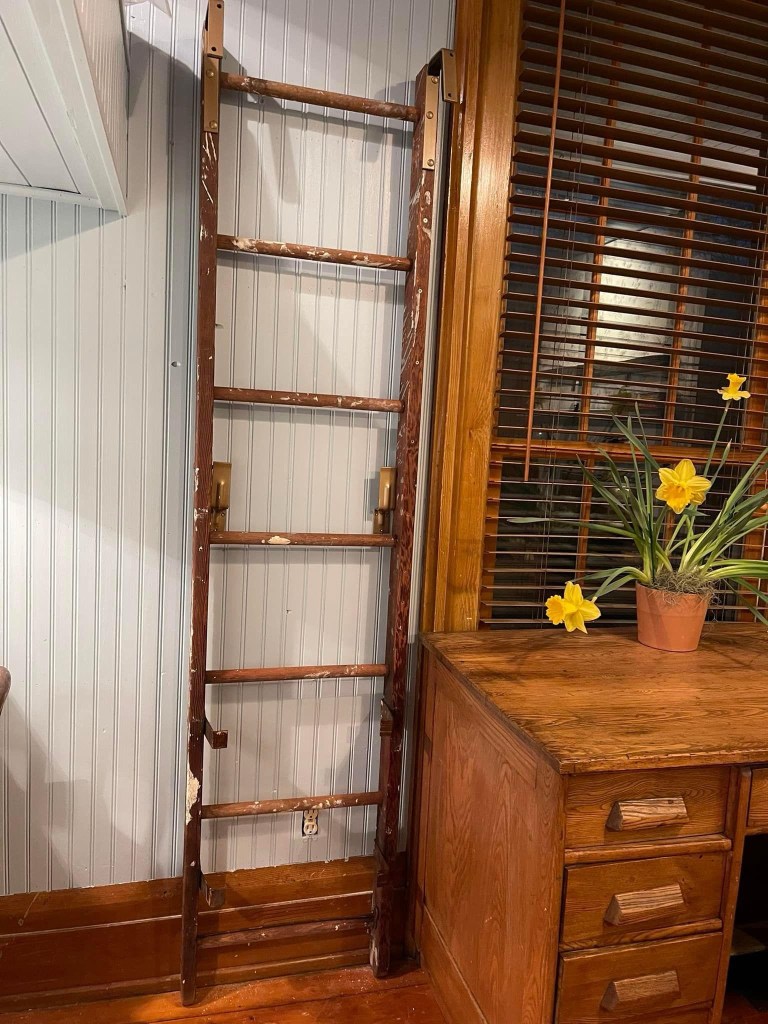
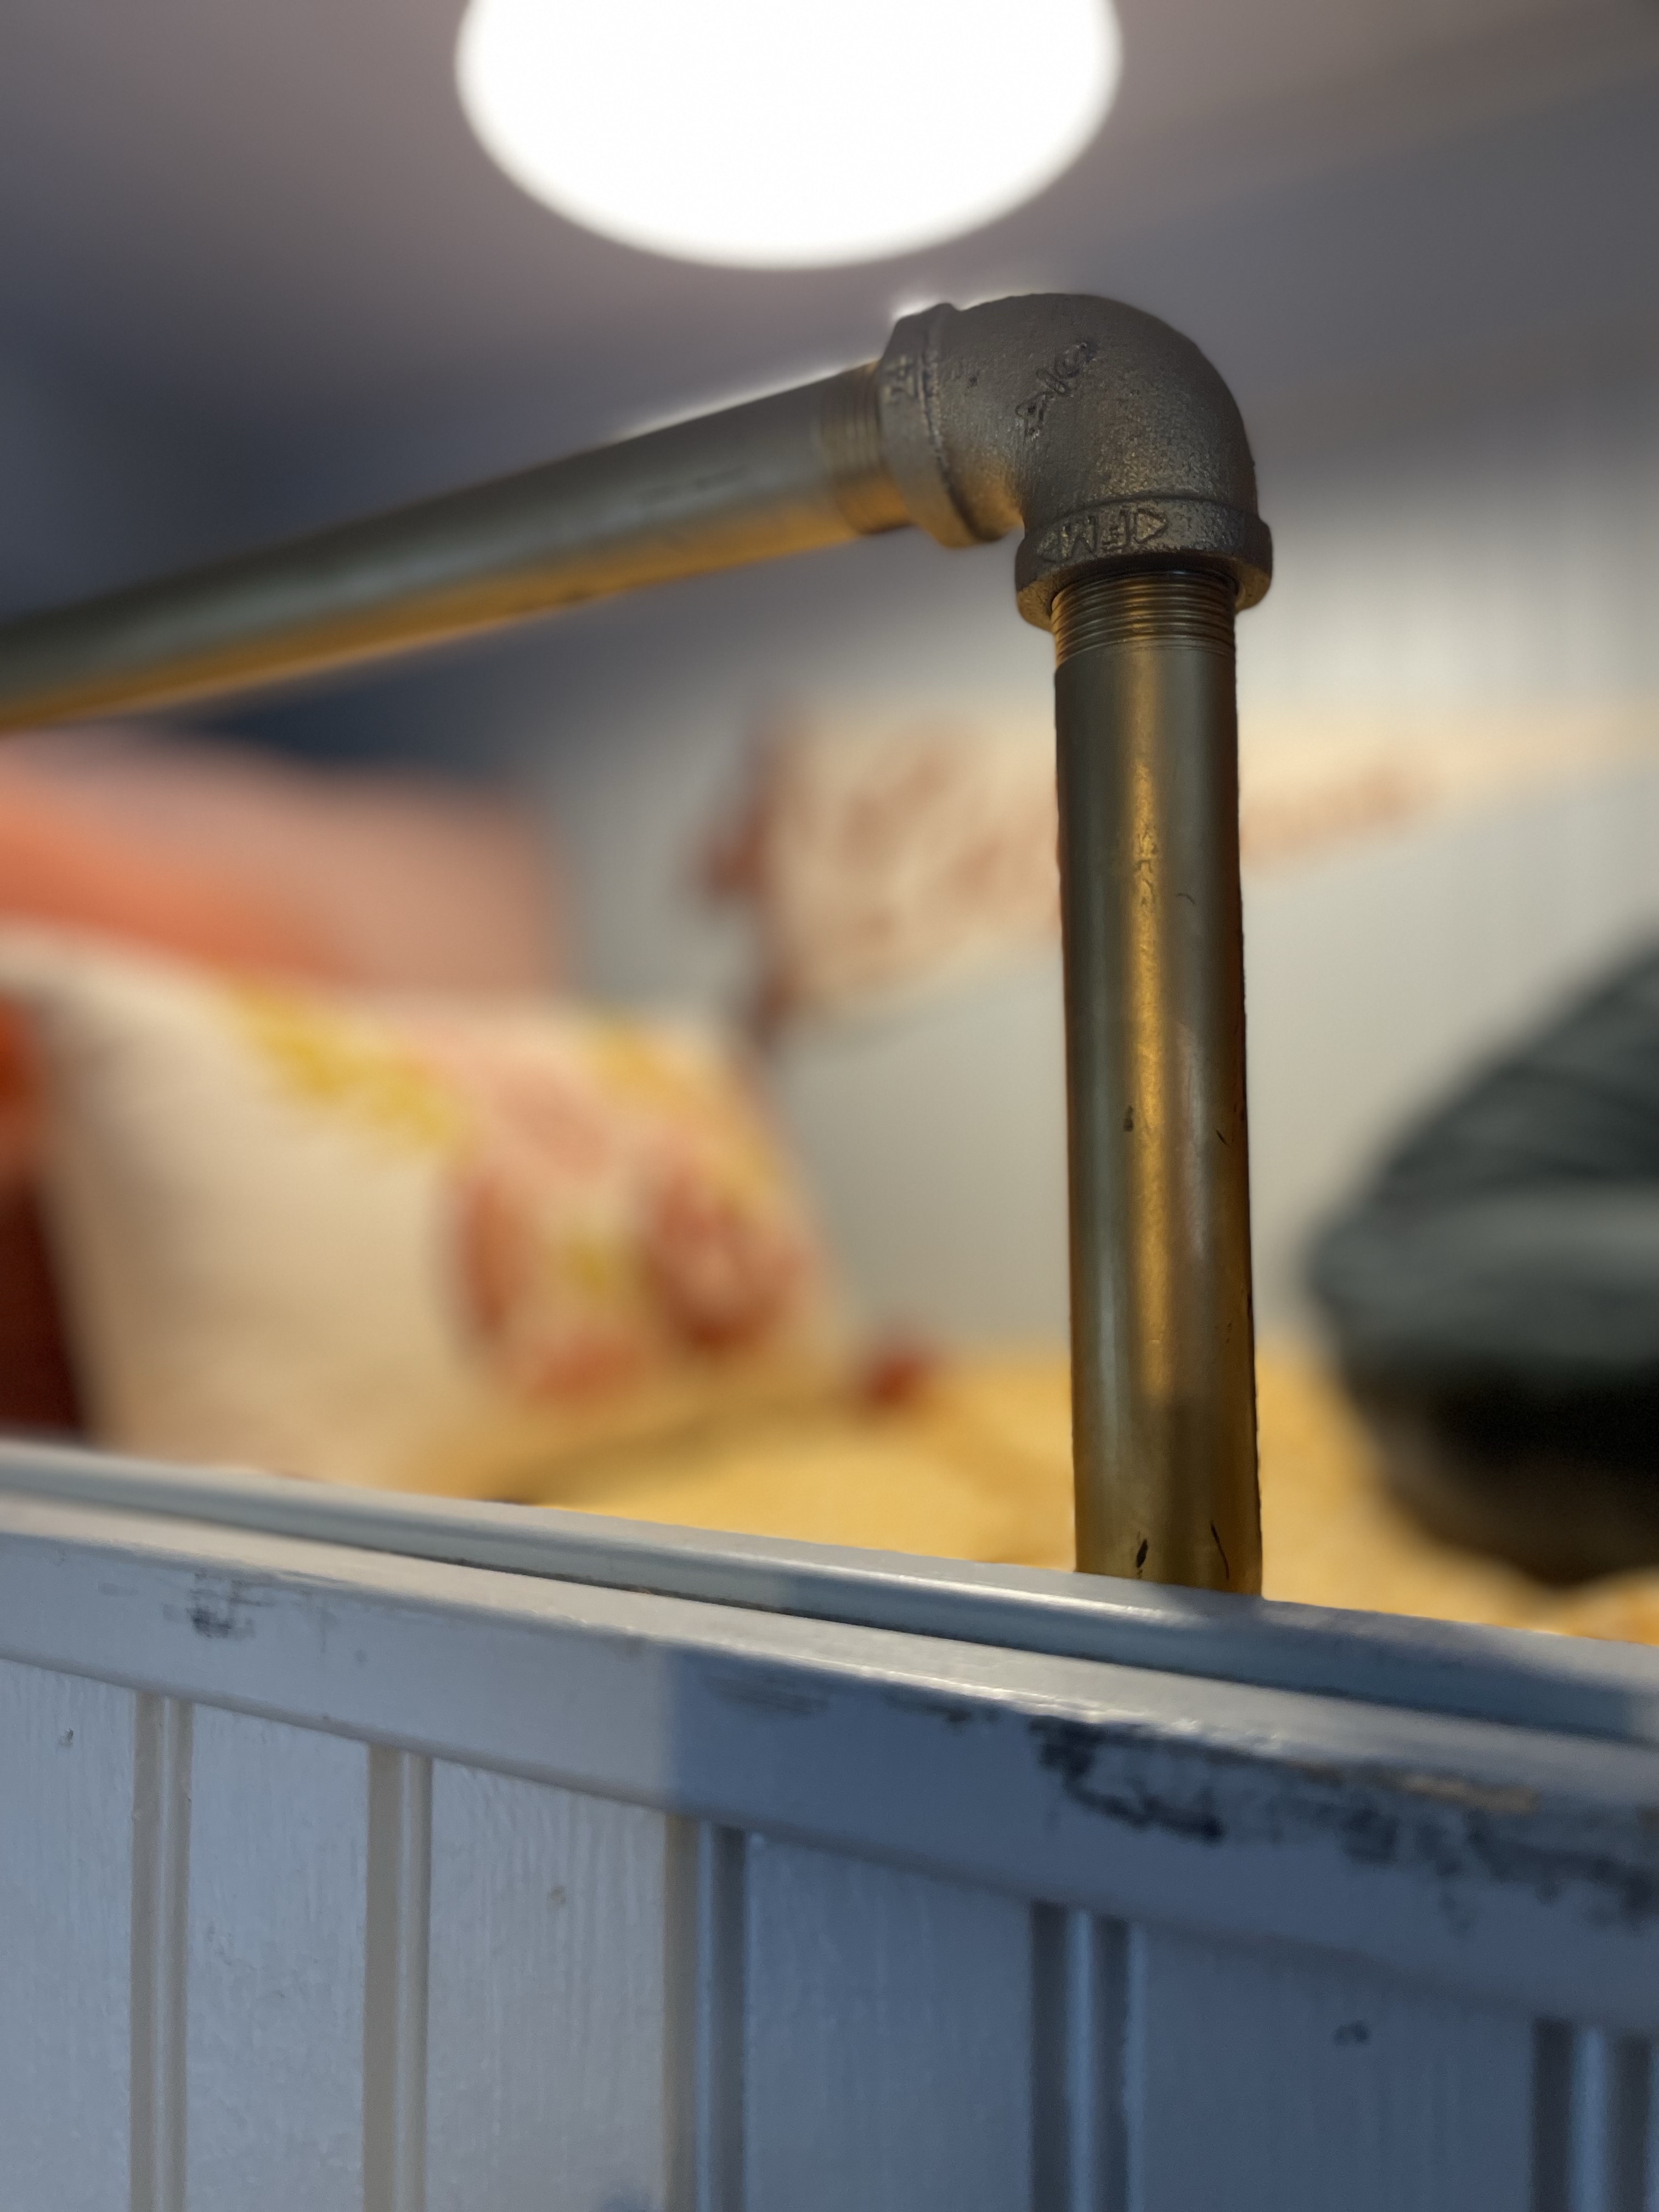
We even made custom bunk ladders. Originally planning to make the same type of ladder similar to what we made for our kiddos built-in-bunks upstairs, which were galvanized pipe ladders (see below).
This time however Tom got the idea to find old antique ladders and repurpose them. We watched marketplace for awhile, found one long enough to cut in half so we had one for each bunk. Then he cleverly made custom hooks to hang onto the bunk or when we needed extra space by their desk the ladders could then mount and hang on the wall. Antique ladders to us, are artwork in themselves. So whether they were hung off the bunk or displayed on the wall, they turned out beautifully.
And, would you look at that.
Don’t mind if we do. Lovely? Why yes.

Now to just to get the rest cleaned up so they really sparkle.
Once the ladders were set, we were on to other fun finishes for the space.
LEARNING WHAT WORKS & WHAT DOESN’T
From the beginning, we planned to use these antique jacks because they are so cool. We picked them from an auto shop that was closing down. Design wise they stinking rock. We absolutely loved them in the space and visually they helped separate the kiddos desk space.
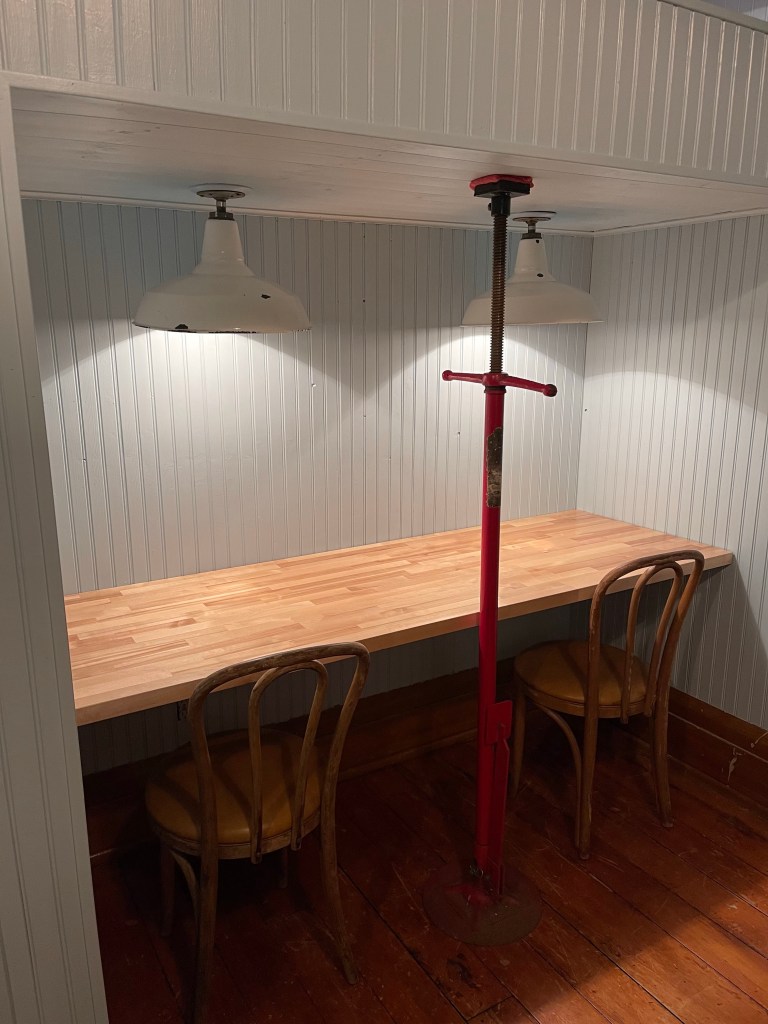
As we shared sneak peek photos people began to freak out because they thought that was how the bunks were being held up. These beauties were causing quite the panic, but we can assure you they were a looks only kind of move. Conversation starter to keep? I think so, however, after months of utilizing them in the space the kiddos felt they interfered too much with their space. They also loved playing with them which began to put black marks on the bottom of the bunks and cause us too much maintenance. Don’t worry we will find another use for these bad boys.

Stubbornly, I really wanted this stunning antique cane couch I about drove off the road for when I saw. Like a beauty she shined in the antique shop window. Sparkling and winking out to me to buy her! It was love at first sight. And we got a lot of use out of her for awhile. I could read so comfortable to all the kiddos in her comfort. But—once living in the space day to day, we realized the couch took up too much valuable space and what we really needed was a table instead, you will see that later down the blog. If the room had been just a bit bigger I could have made it all work.

Bummers. I’m learning function is more important for this type of space than feeling crammed and getting frustrated. The room in the end has to work for what we need. Good news is the couch is now living in Tom’s shoffice (shed turned into office) and is working perfectly in that space when I come to visit him and hear about his day.
Take away—spaces can be editable from our original “picks” and plans and that’s ok.
MOVING FORWARD WITH WHAT WORKS
And more customizing. Utilizing every square inch of this room to meet a need.

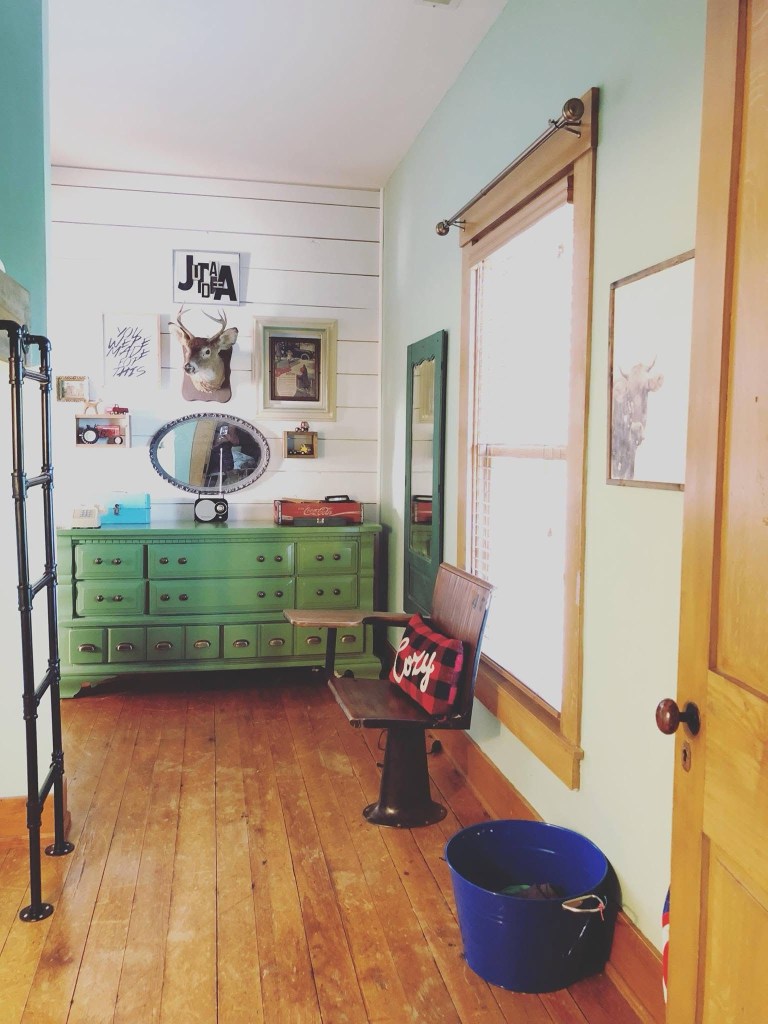
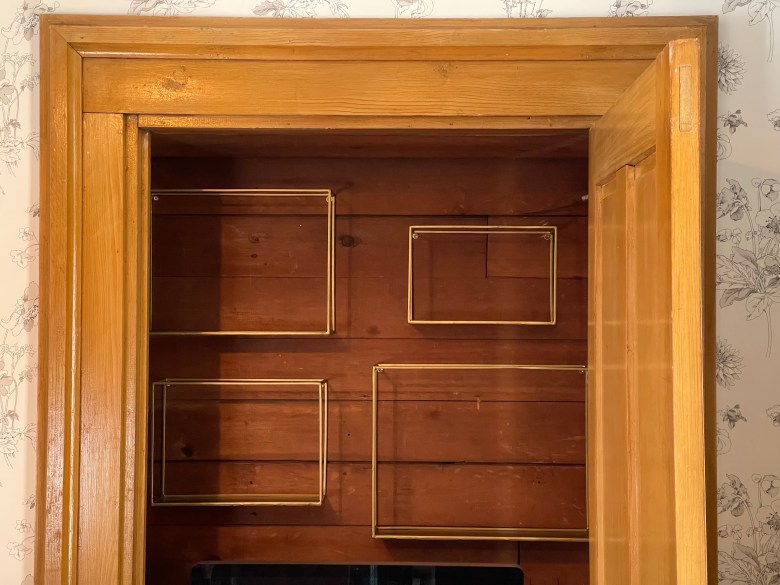
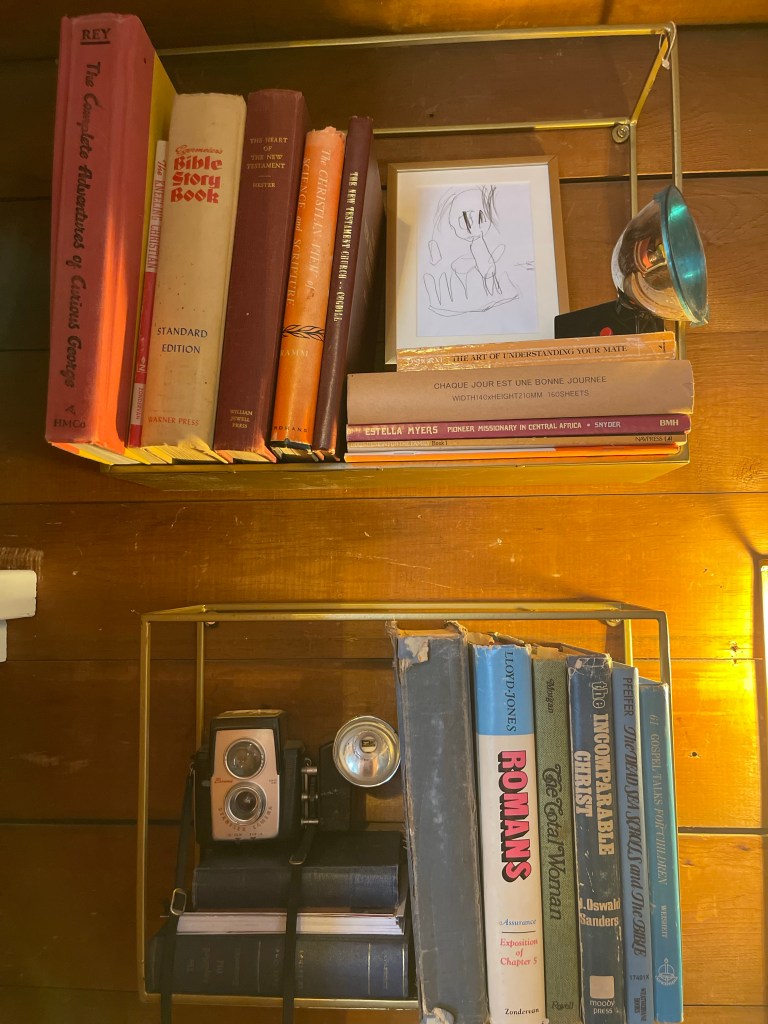
Including this closet—which was the only closet on the first floor. With charm, we made her the perfect spot for our tucked away computer space and storage for all the homeschool work that isn’t necessarily pretty for display. Working to mix in the kiddos endearing, comical, free at heart, playful and adorable pieces. Having that one dedicated place in the house for the master pieces to be on showcase like they deserve. Adding this thrifted stool which fit perfectly in the space with the ability to slide under or out.
And voilà. That turned out quite nicely.

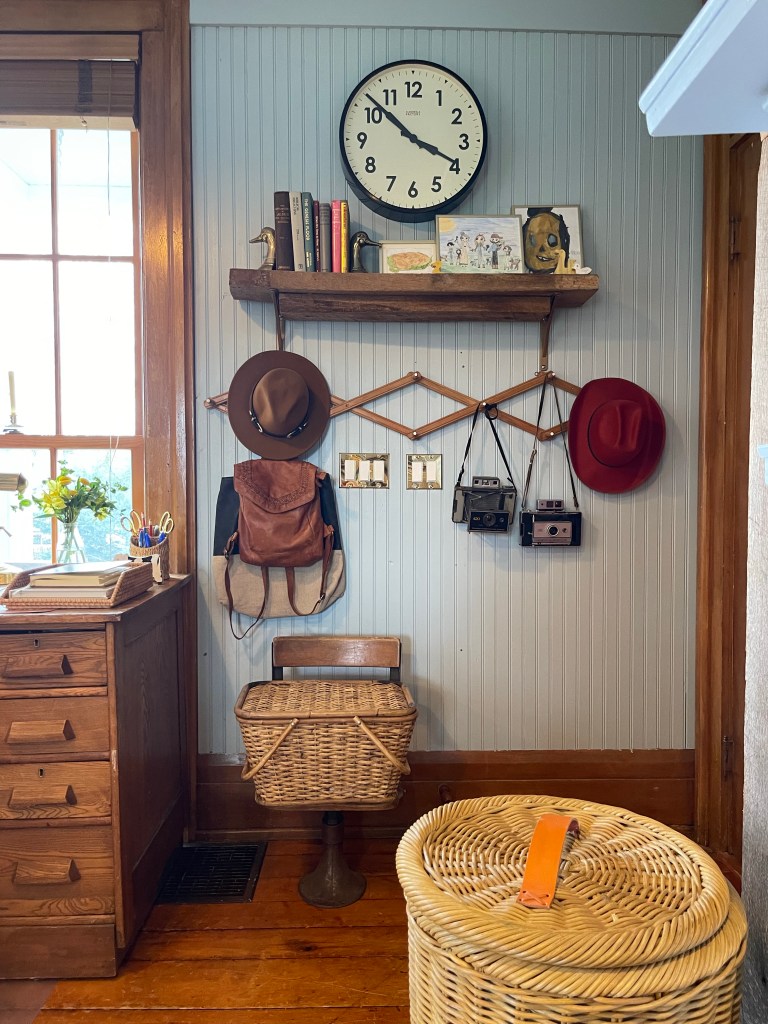
Styled with fun book collections and antique cameras Tom gifted me when we were first married. Just a hidden space of fun and wonder. We packed in a punch with this closet and it met a very great need.


SAFETY FIRST & DOUBLE USE OF SPACES
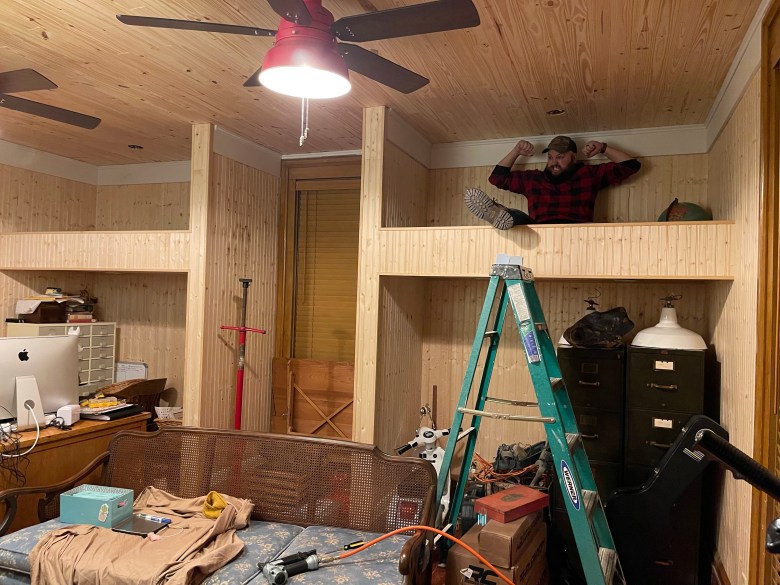
We finished up the bunks by adding the safety railing that we made out of painted galvanized pipe. Good news this space could now also double as a great space when the kiddos had sleepovers as the bunks were created a hair smaller than a twin bed and made great sleeping quarters.
That being said, now that the main functional spaces—lighting, built-ins, closet customization, ladders, railings, etc. were complete.
The finalizing details could begin.
“PURTY” IT UP TIME
The pretty stuff. Getting to really design and stage the space and add all those last minute details that make something come together and tell a story that you had sketched out in your mind—it’s the part any designer has been dreaming about. It’s what keeps you up at night or causes you to rise early to put those last details in place. To see the prettiness you dreamt up finally become reality.
Take a look with me.
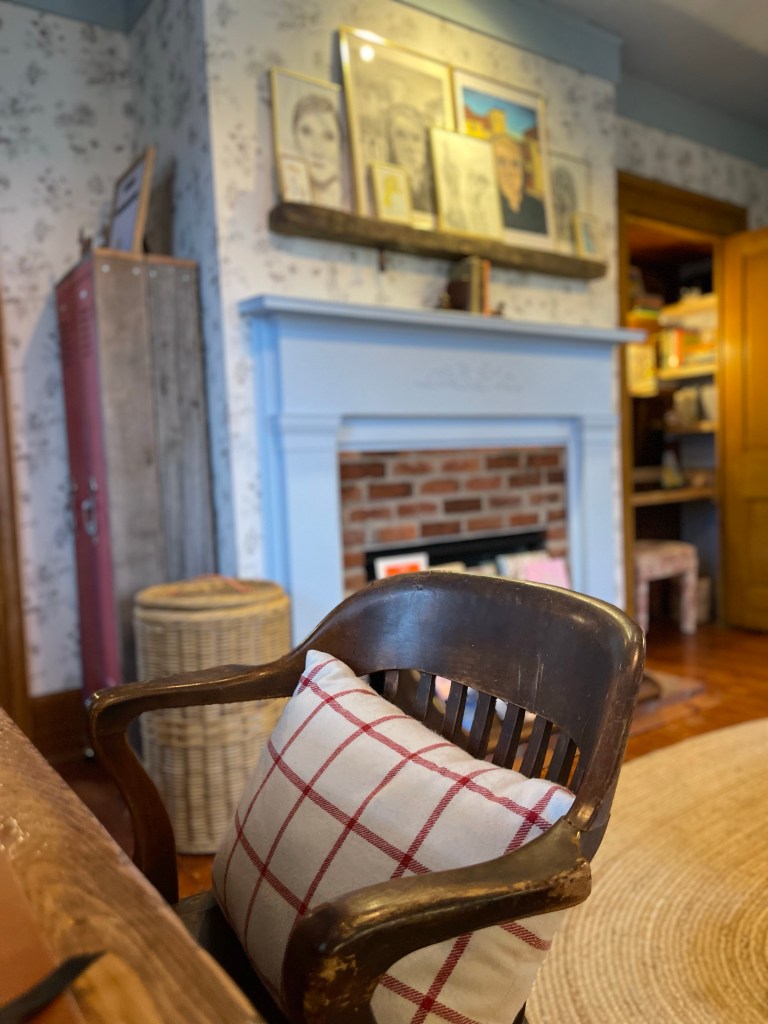
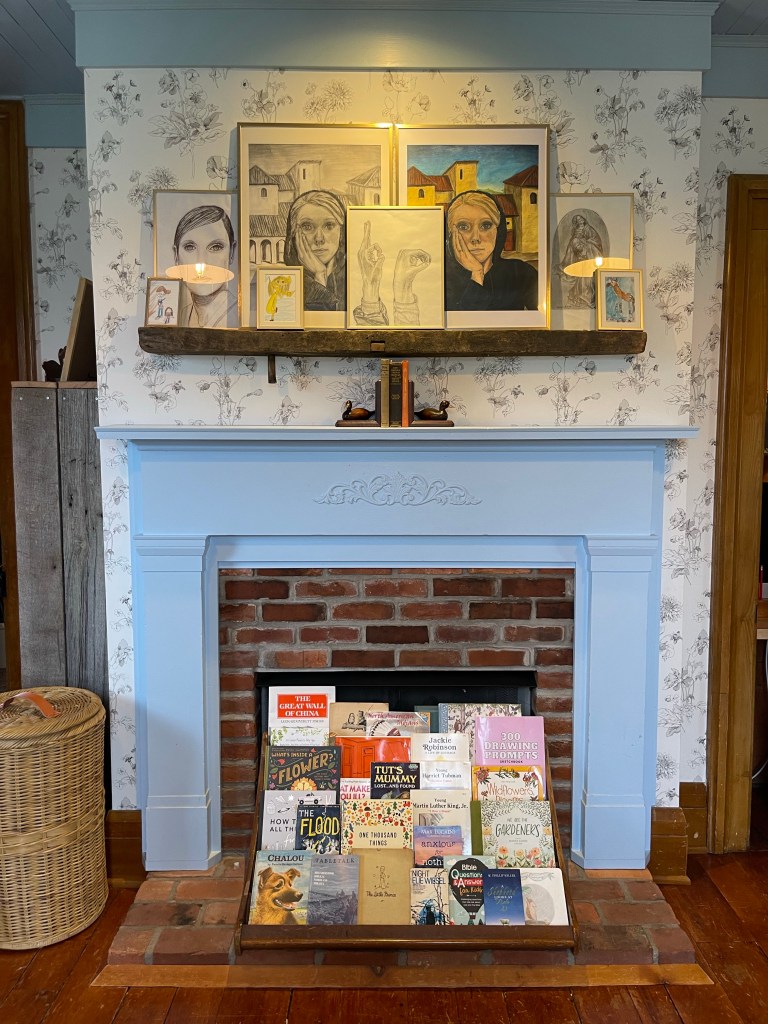
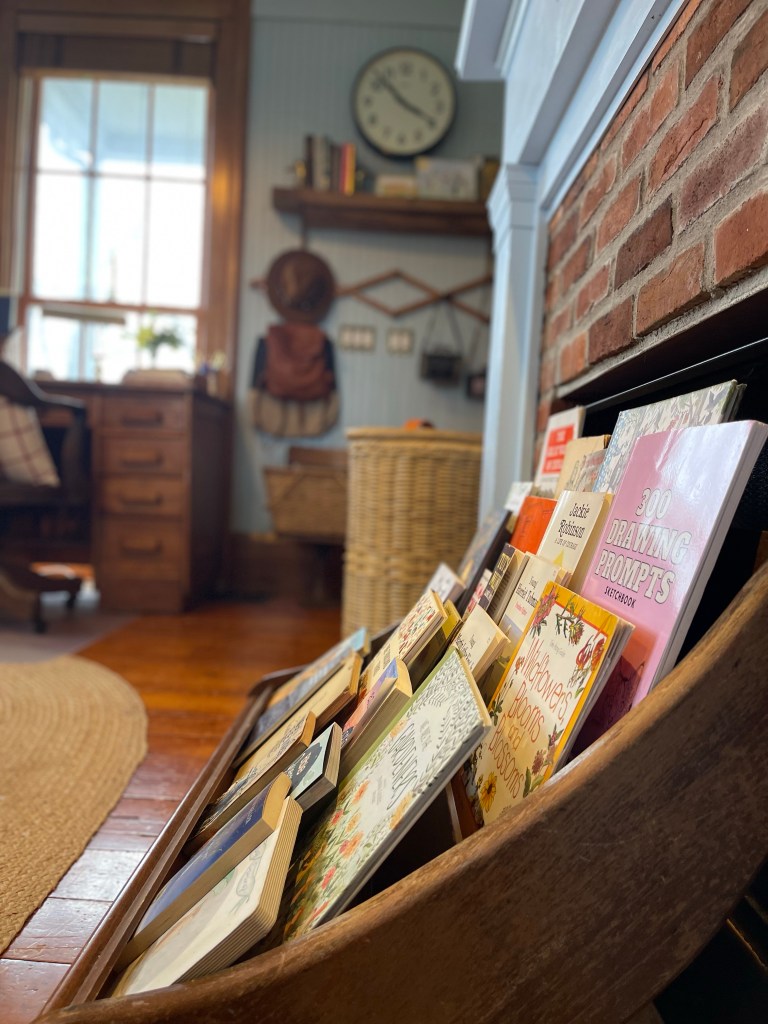
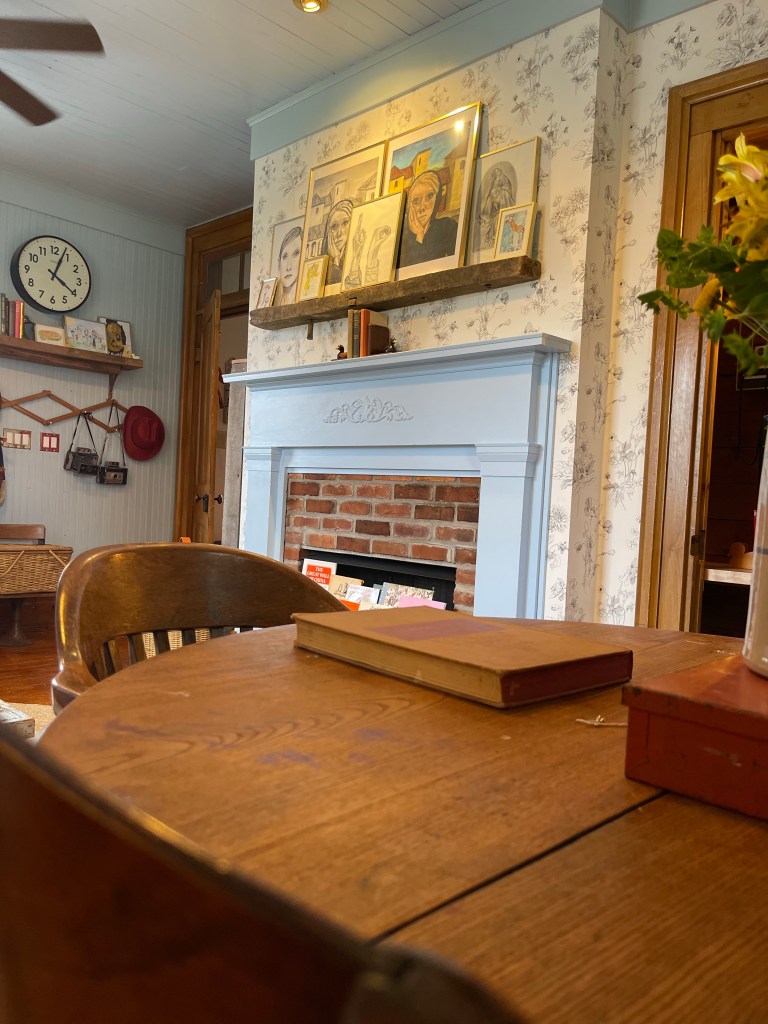
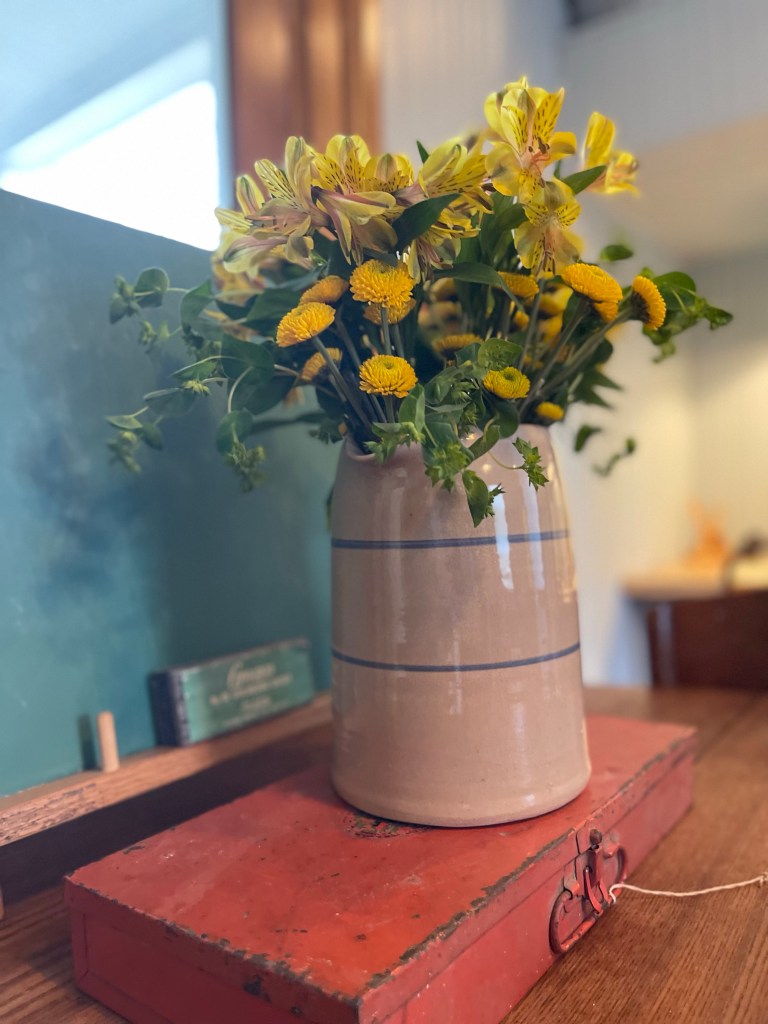
That wicker garbage can was a splurge well worth taking. Beauty and function all in one. And the joy that fills a pickers heart to finally see pieces you picked go into a space. Like this cool, chunky piece of wood that we found beauty in with pegs missing and all—turned into the fireplace shelf for our gallery wall.
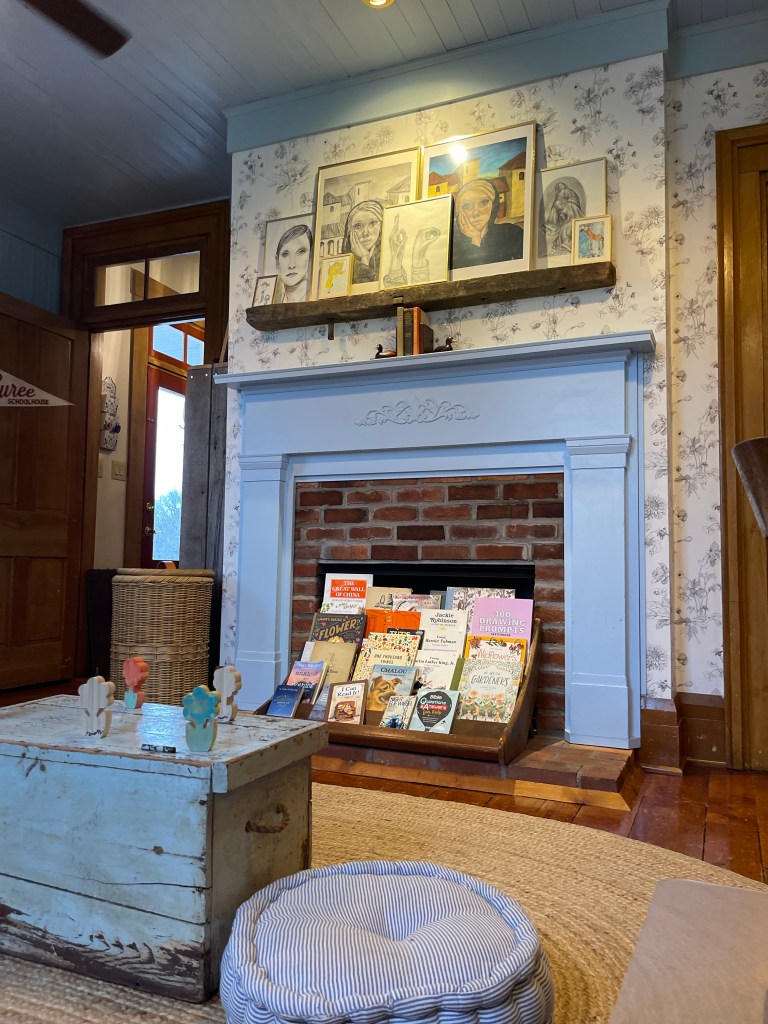
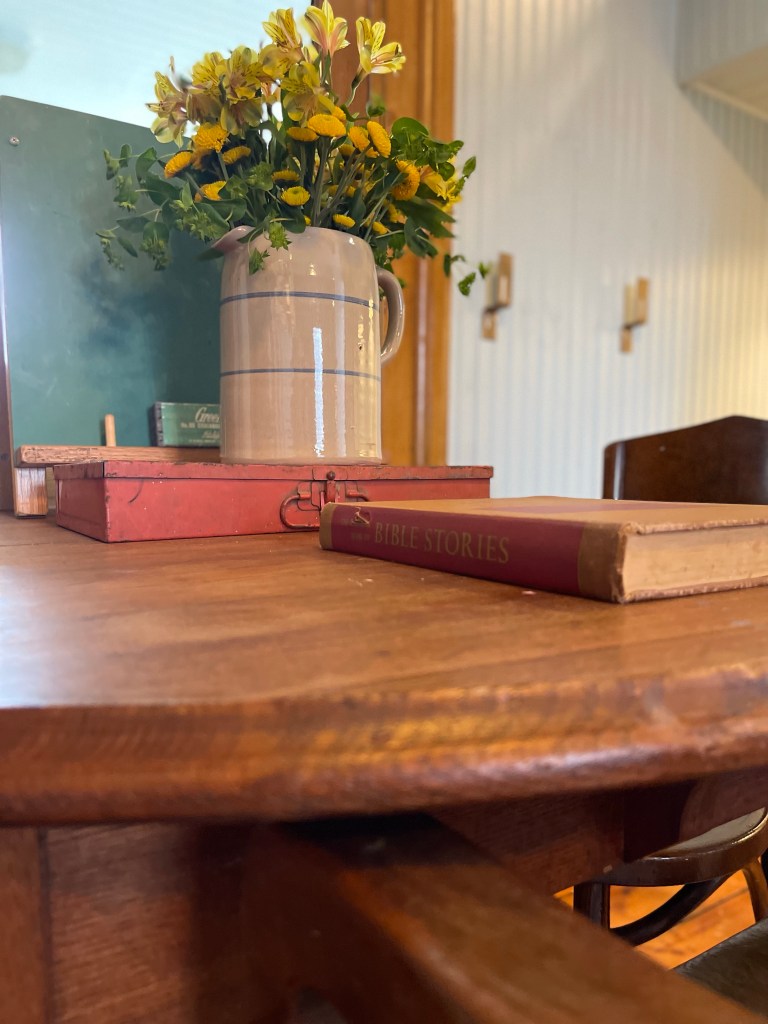
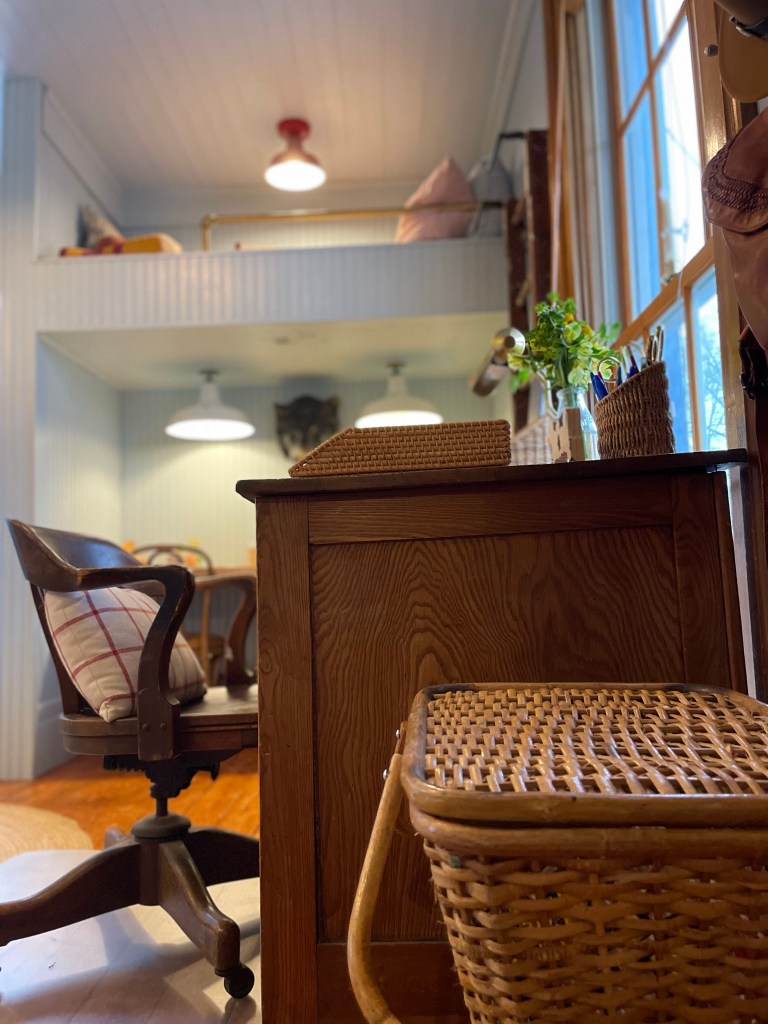
In a similar shot we see how in the center of the room I staged it with a distressed antique trunk with sitting pillows for book basket time. With the removal of the couch, it allowed for an open loungy, adjustable space that gave us some wiggle room to move around easily depending on what we were working on that day. The distressed trunk was one of our first antiquing picks when Tom and I were first married from Logan Antique Mall and we scored the amazing wooden vintage book rack display in front of the fireplace from our Round Top, Texas trip. Pieces woven in that tell a story and share our travels.
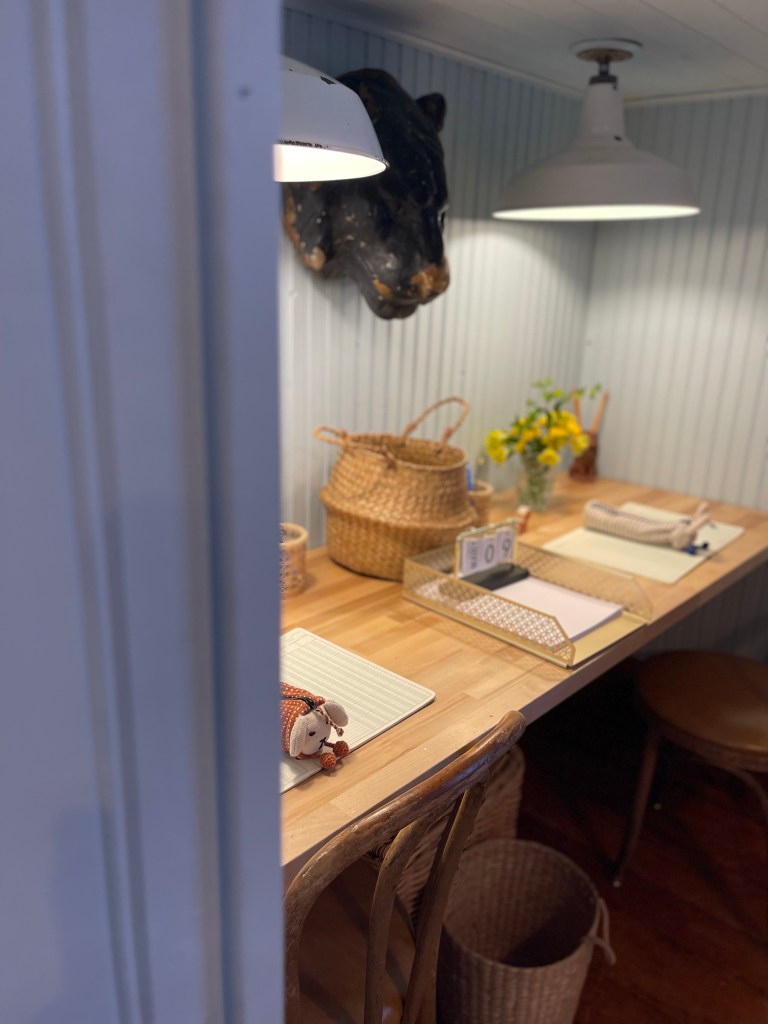
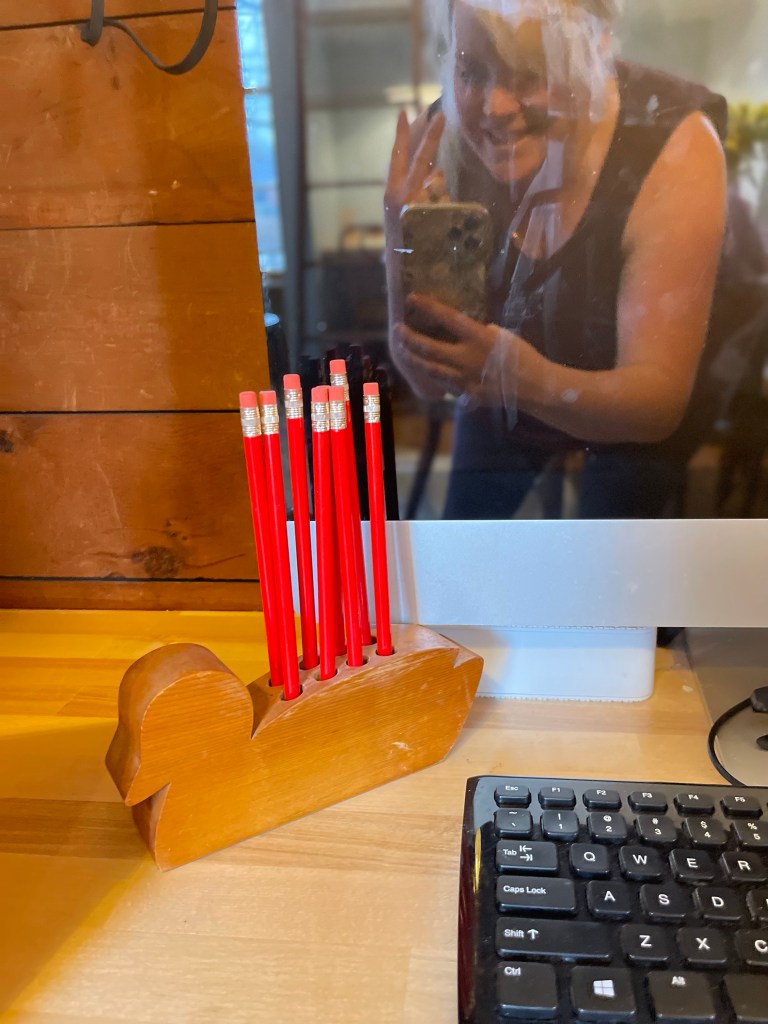
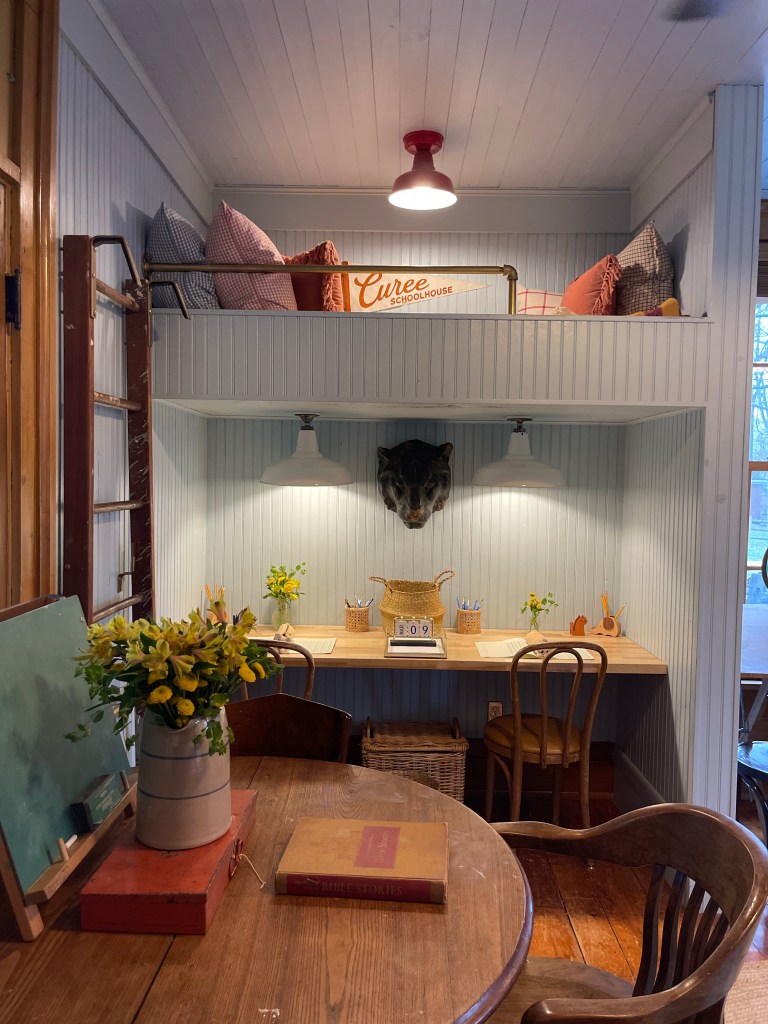
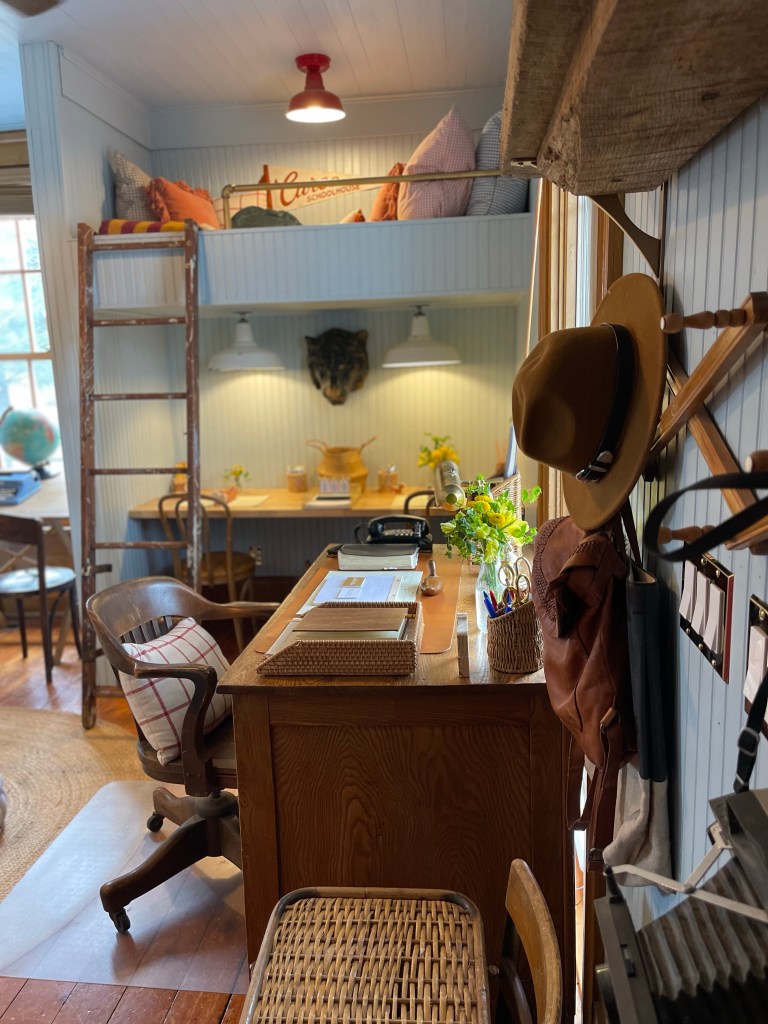
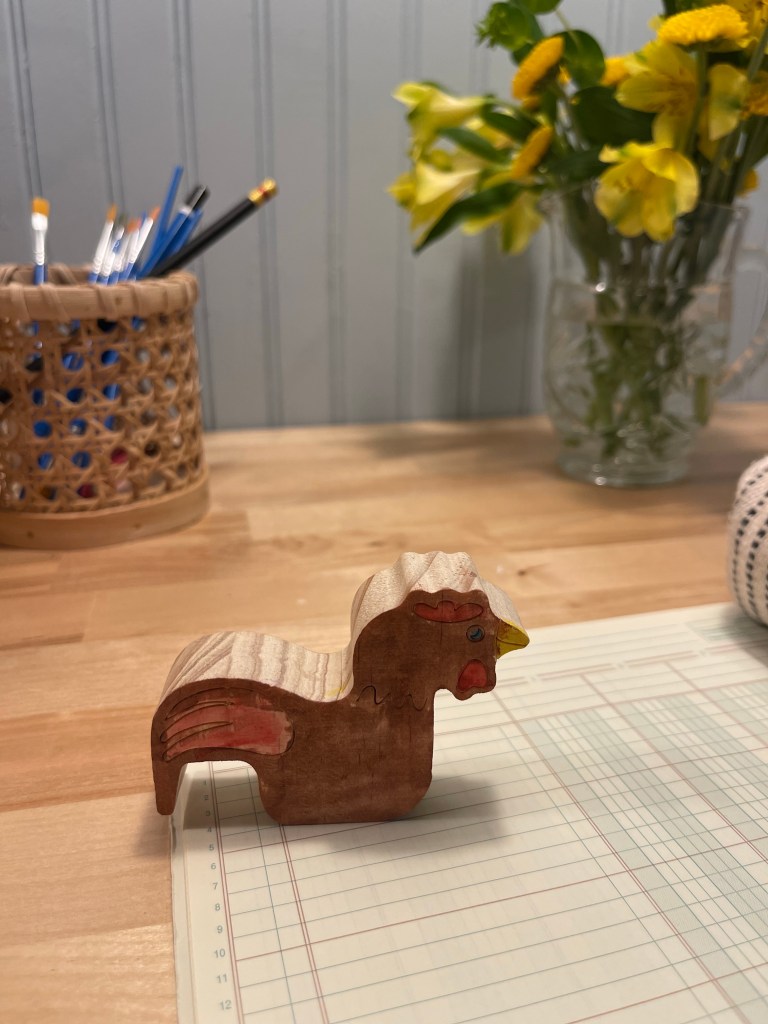
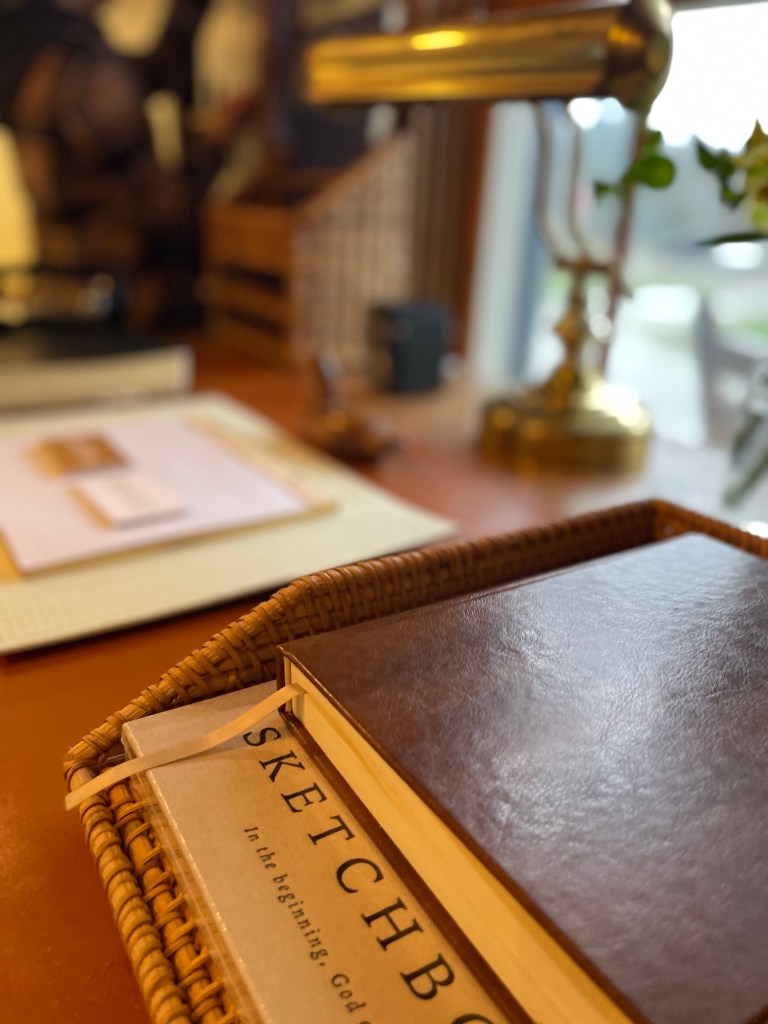
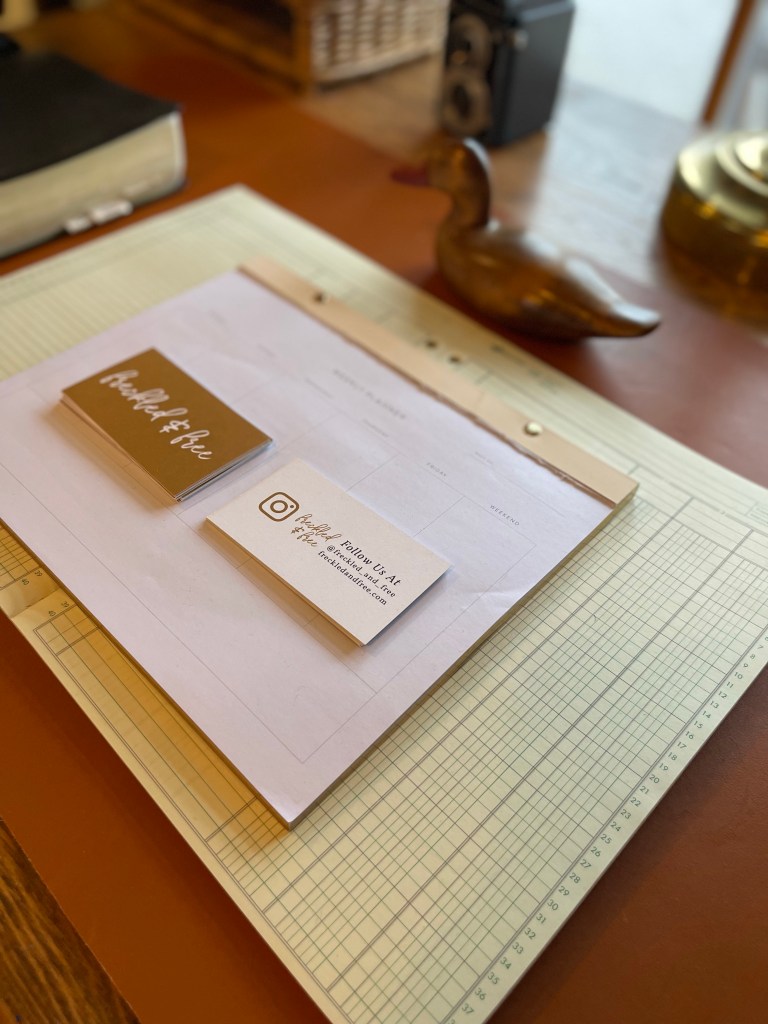
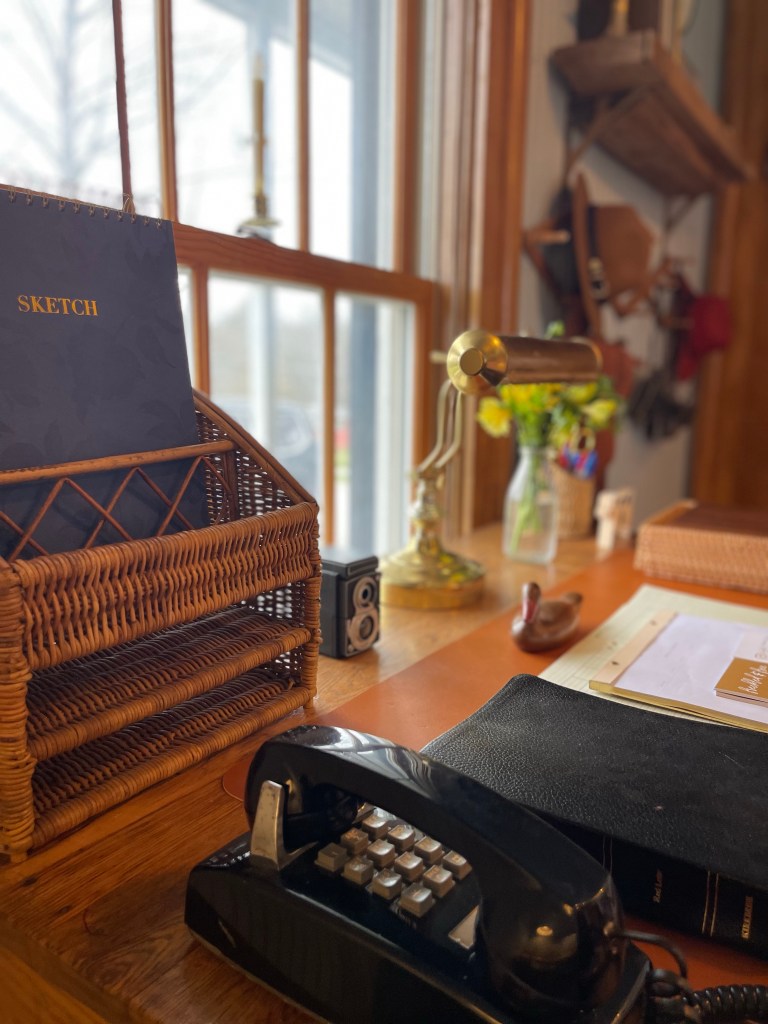
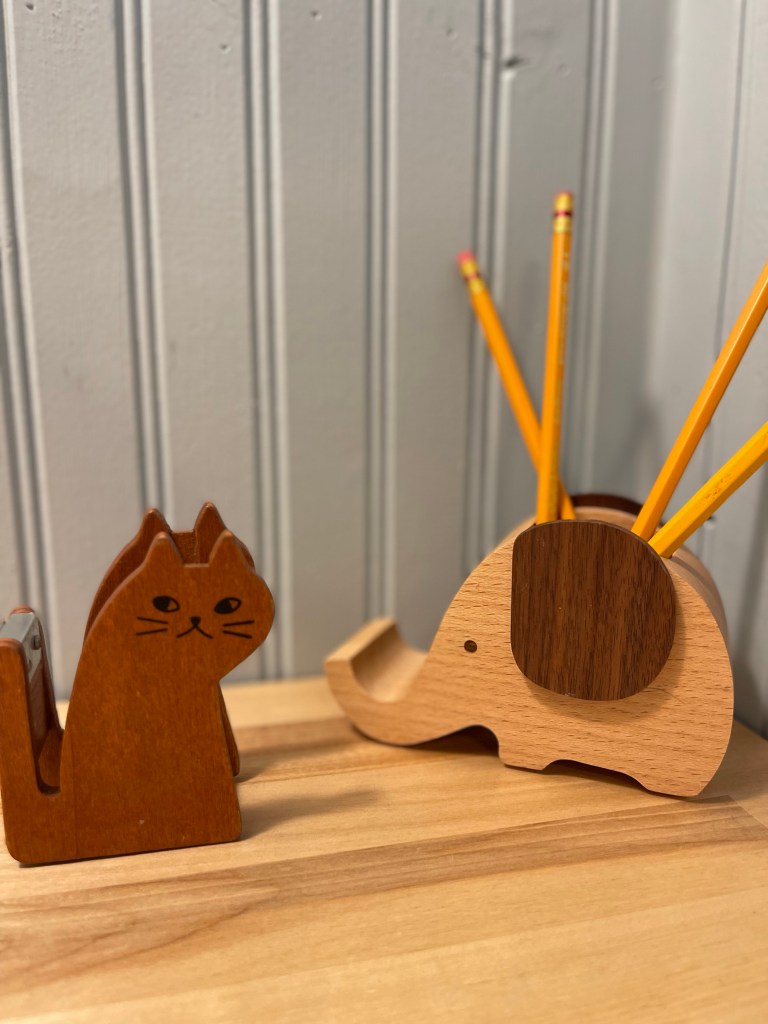
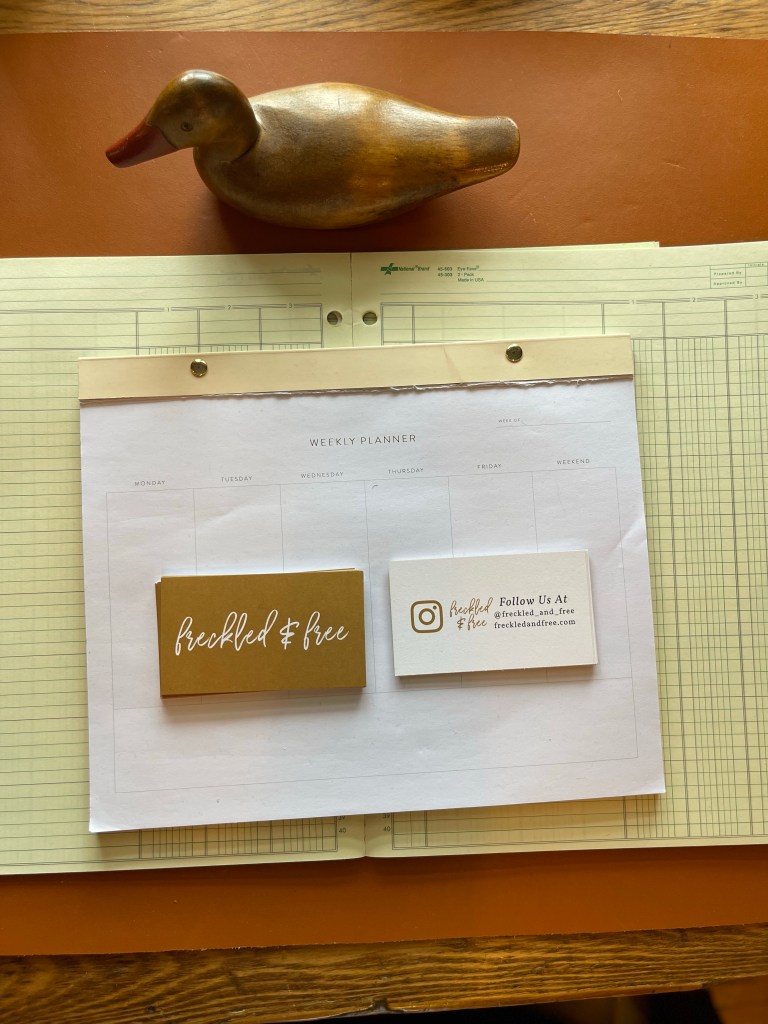
For their desk, each of my four kiddos had their own half of the space. Adorable desk organization, rattan pencil holders, baskets for all their craft items. Brass desk top file holders for paper storage or worksheets and their own perpetual calendar.
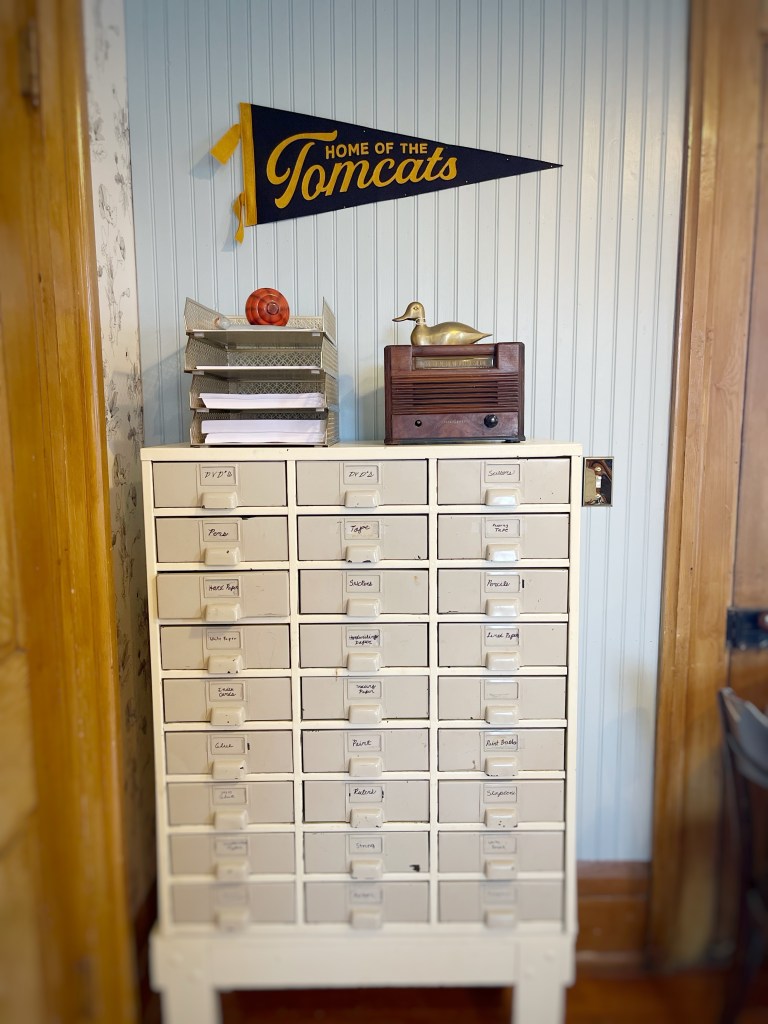
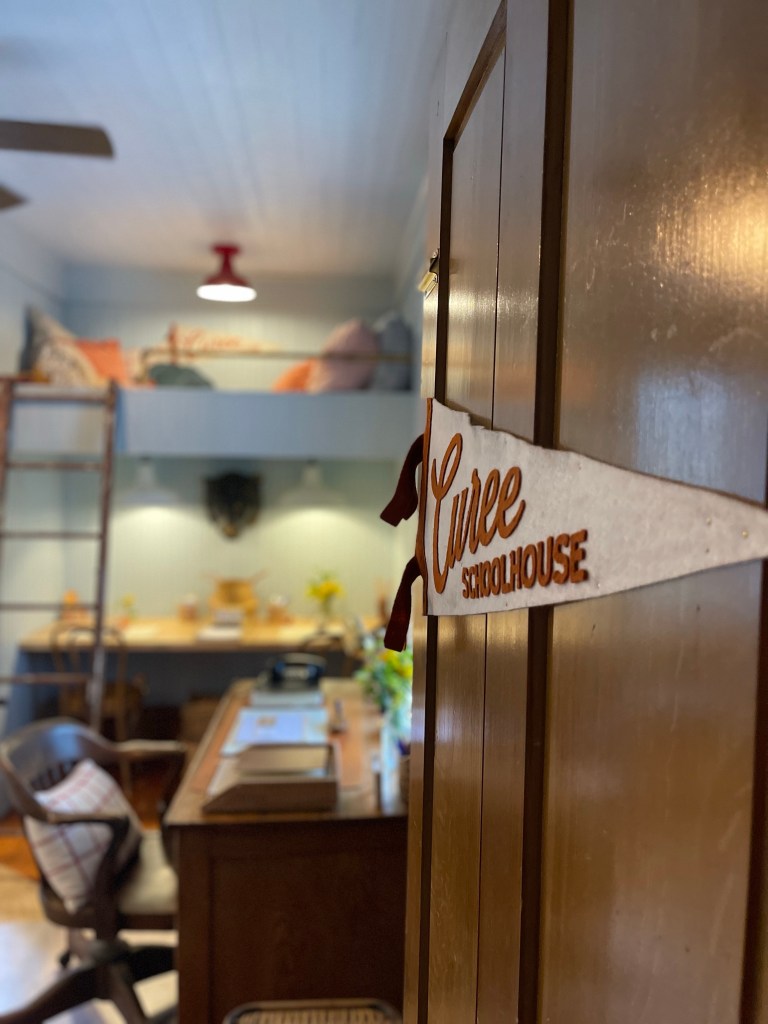
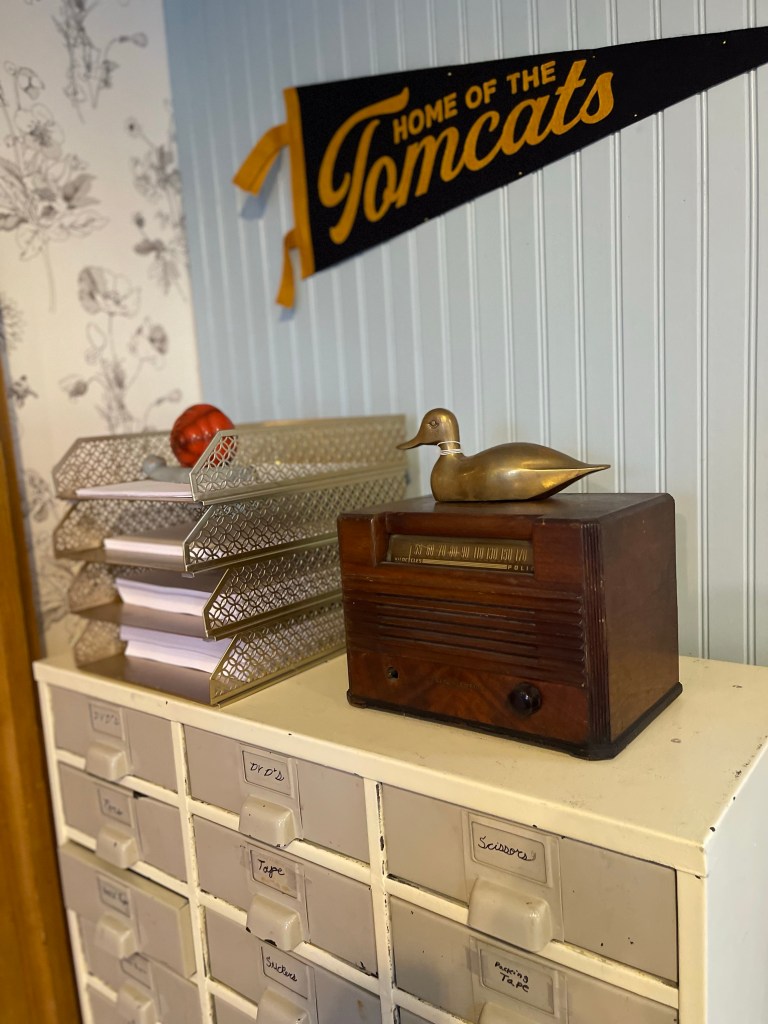
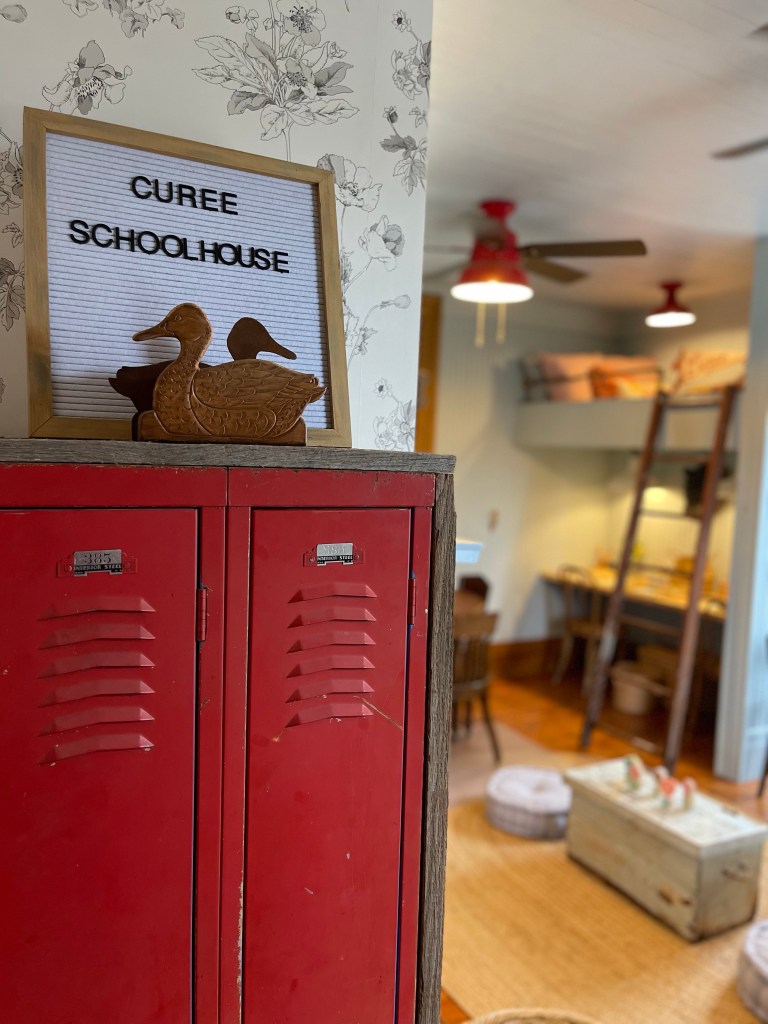
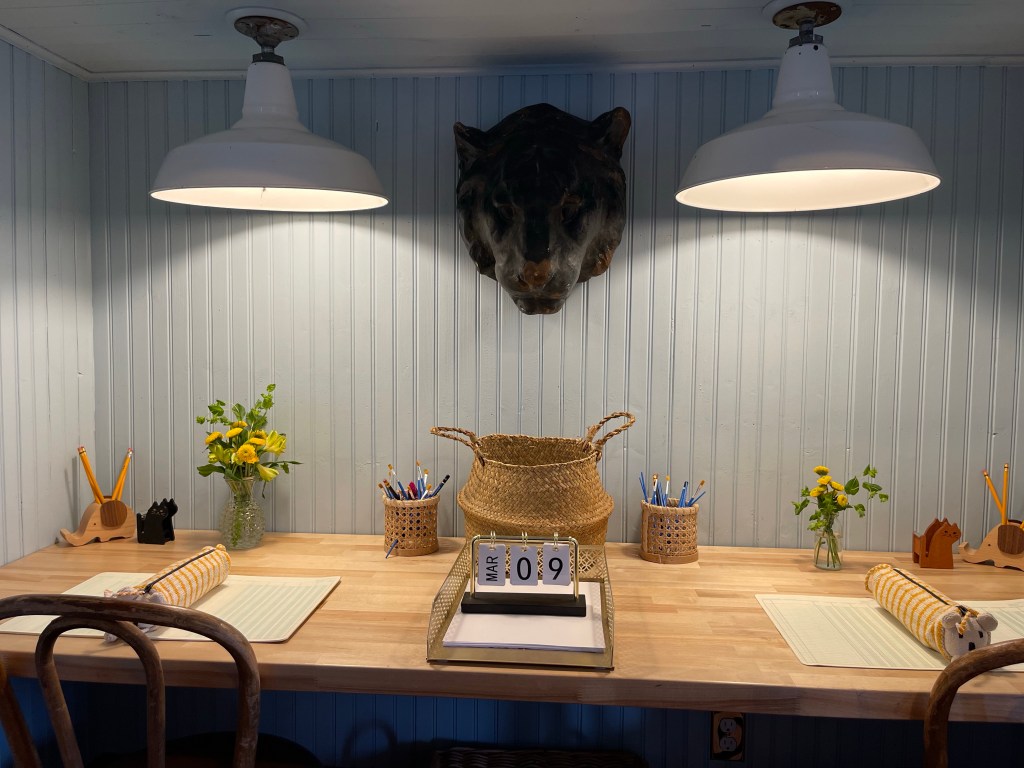
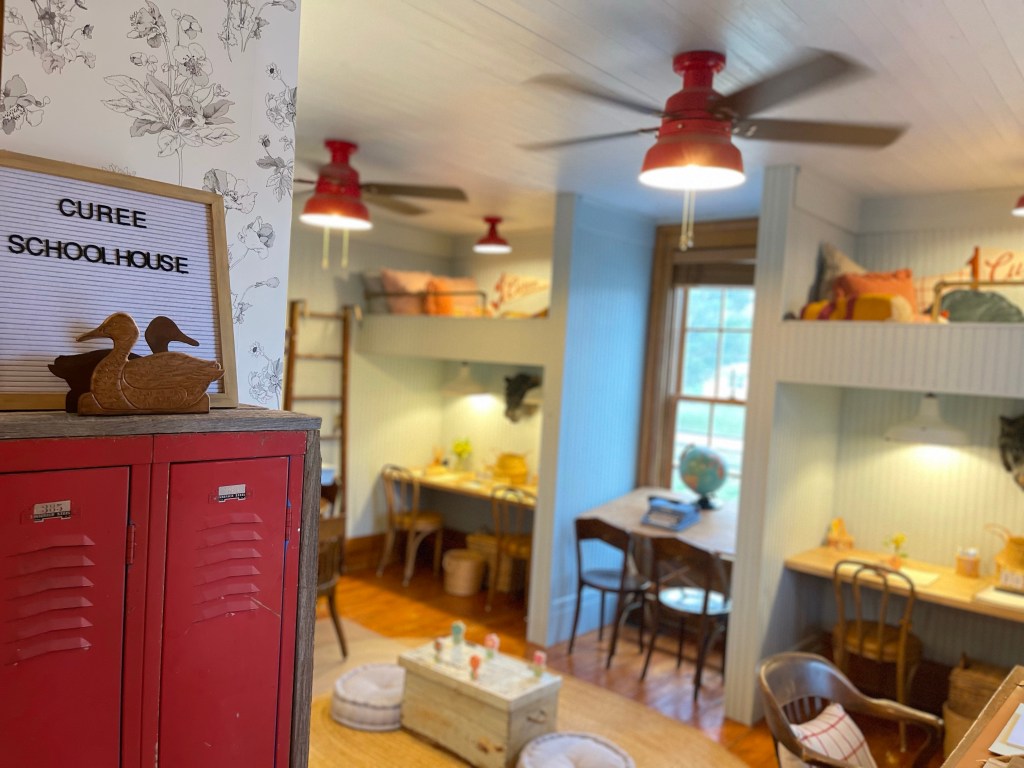
Perfect cat head centered between the desk spaces for our official Curee Schoolhouse mascot, “The Tomcats“.
Purrfect right (ahem…dad’s name is Tom)!? We were geeking out at this clever idea. I even had custom pendants made to represent our Curee Schoolhouse well from FellowFlagCo on Esty. They did a fantastic job executing my vision. I had two different custom pendants created, Home of the Tomcats and 3 Curee Schoolhouse pendants, one for each bunk and one for the door entering into the homeschool room of our house.
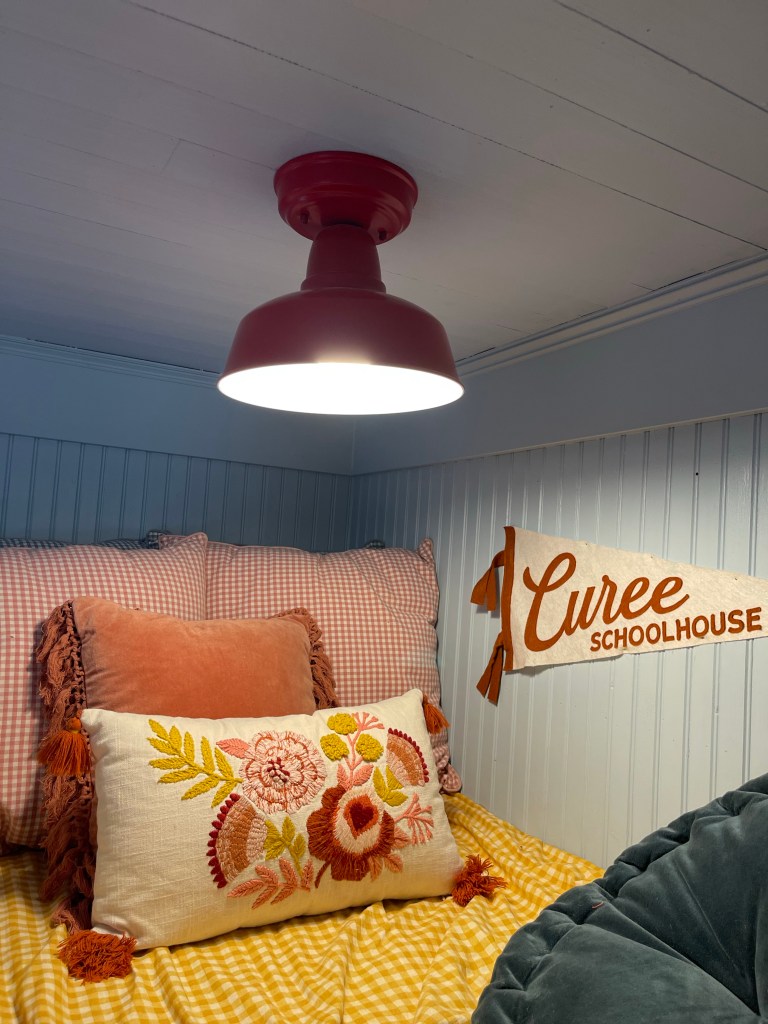
It’s always a goal of mine to master the balance of pattern and textures in a space without overdoing it. This space was ideal to put it to practice. Here we see a close up view of textures and fun bunk elements added to make the bunk reading nooks cozy. The vision being ultimate comfort. With this, I didn’t hold back on loading it up with enough pillows to fit that need. I picked a mixture of throw pillows, several from Target but a few from our friends at Rustic Grains. I loved the New Zealand Virgin Wool Throw Blanket with fringes that I found on Amazon when purchasing items for the space. The design was exactly the pop of color and texture I wanted to bring to the space. In addition to the yellow checked sheets, (another Target find), the place was getting complete and the patterns were singing in harmony.

A constant mixture of old and new, but a strong story of beauty and function coming together to solve a problem and create a motivating place for us to learn and grow.
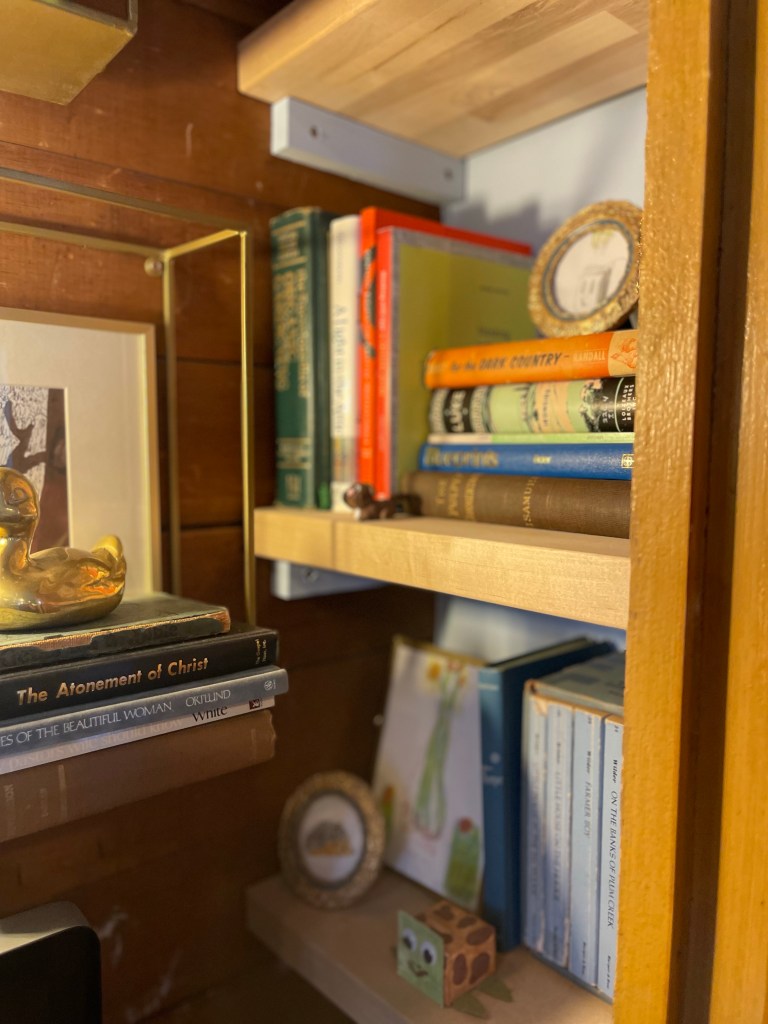
Vintage accordion racks are always a must. Baskets galore—and organization that works. Vintage phone for play and fun.
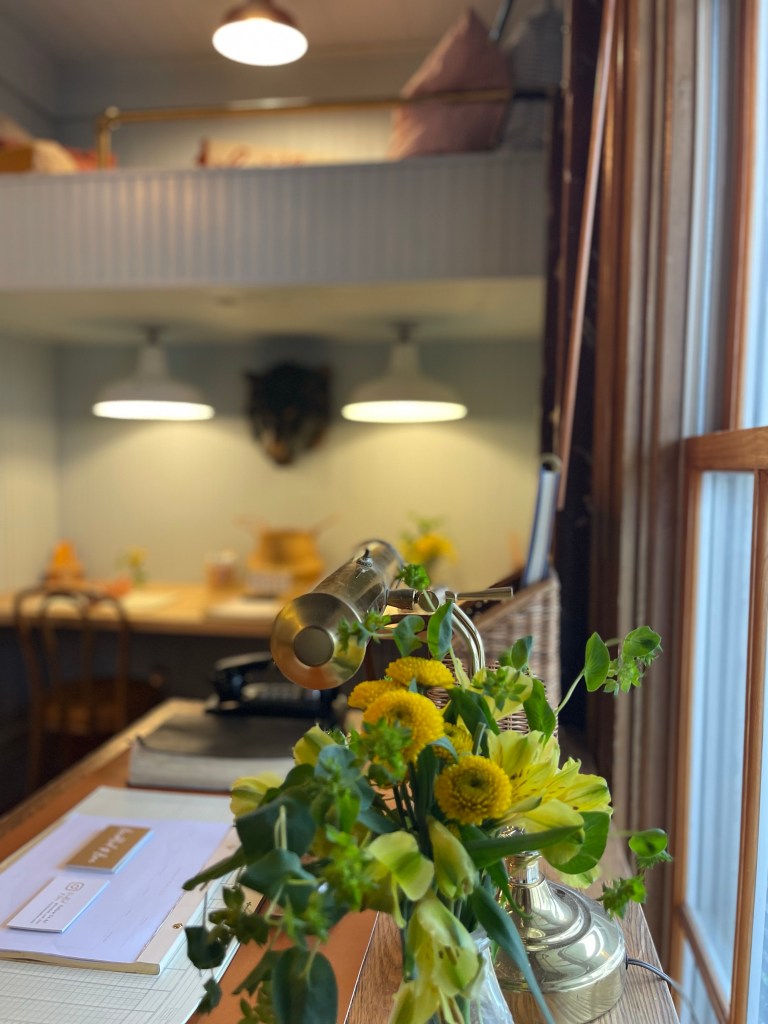
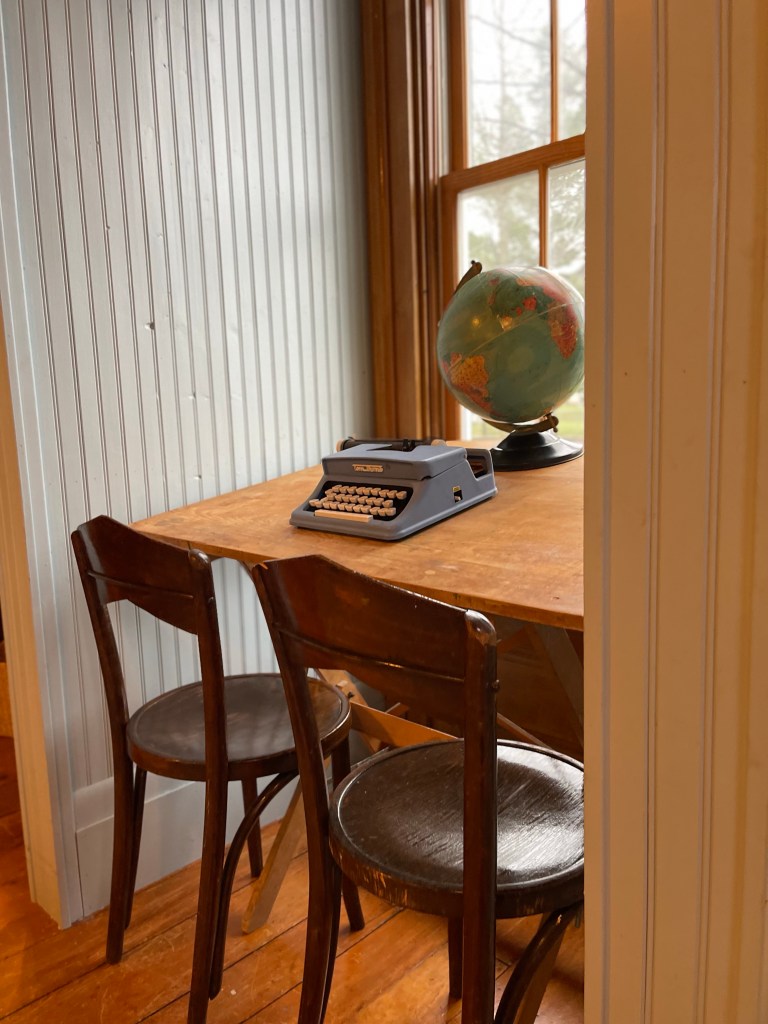
I was quite happy with the placement of my antique desk. This room and home was also full of dreamy floor to ceiling windows loaded with character already, that I just got to build upon.
From the white and brass light switches, to the collected trinkets sprinkled throughout—my heart was feeling so happy to be in this space with my darling little joys to teach. Something I will never take for granted.
A LITTLE MORE BEAUTY & DETAILS


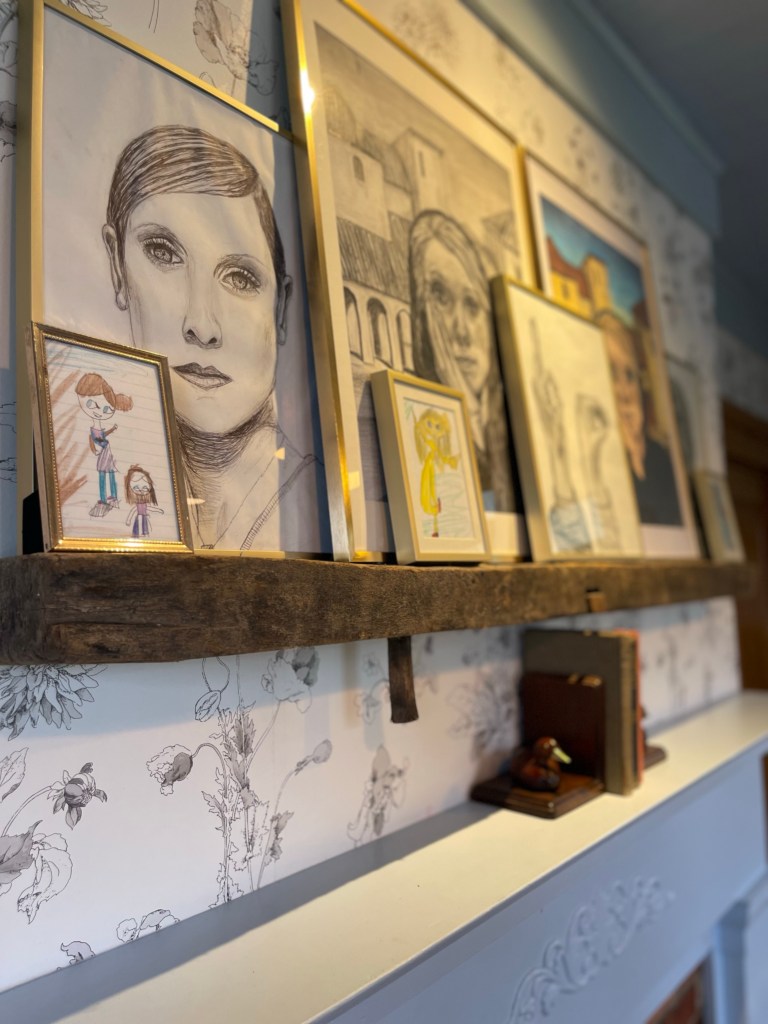
THE IMPORTANCE OF ART
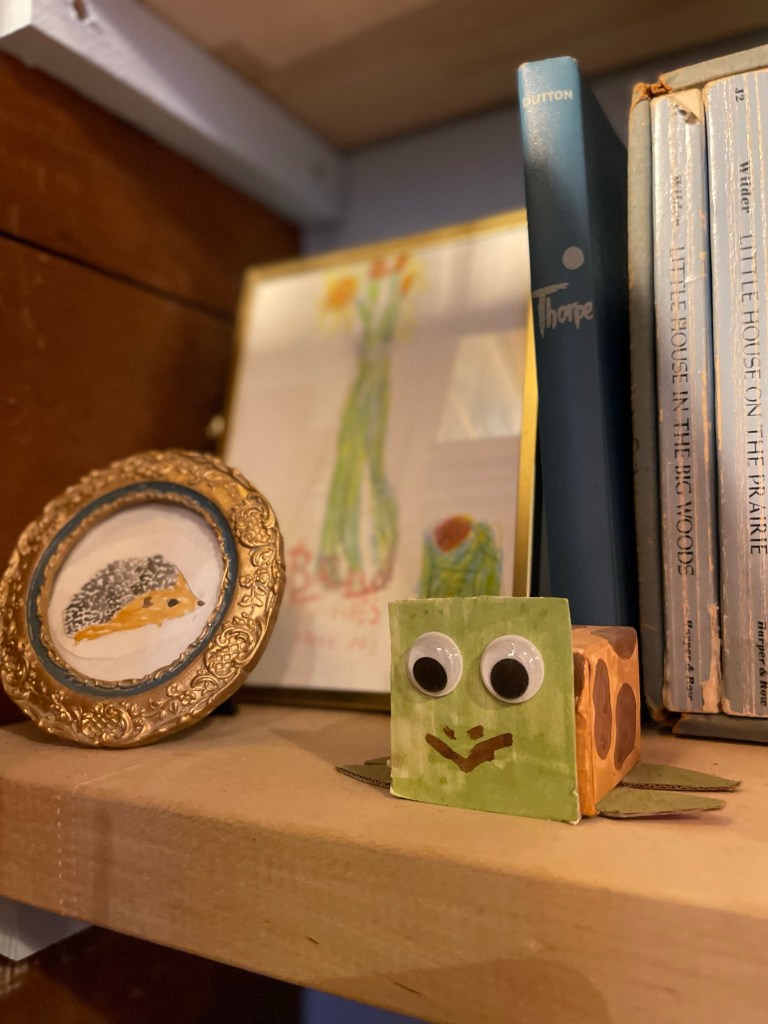
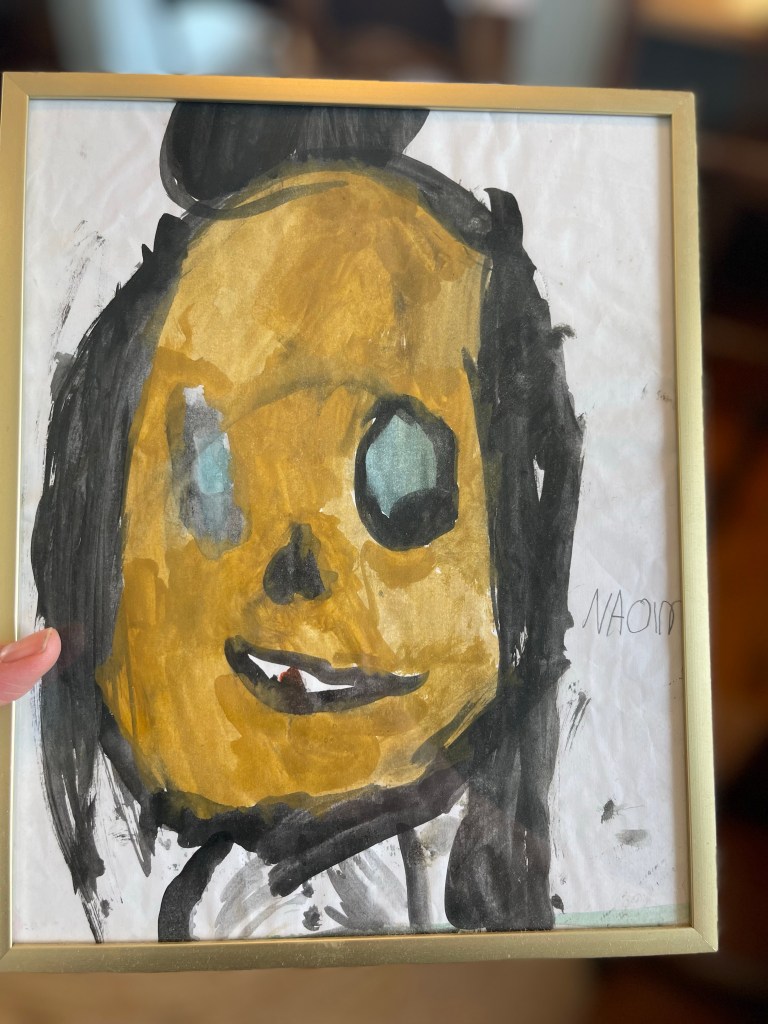
By now you should know I’m a huge fan of kid artwork. I think we should totally open a kid art museum. Maybe I will someday? It’s just precious. For example, check out this self-portrait Naomi did, some people think it’s terrifying, I think it’s the cutest thing I ever saw and I may say it’s one of my favorite pieces in the space. The truth is she really was trying so hard, she wanted it to look just like her with all her heart. In her little innocent sweetness, that’s how her mind could paint a picture of her. She was so proud and we truly will cherish it forever. It’s where her heart could tell the story of herself from her viewpoint at this age. I think she expressed herself perfectly. A clever little “wild” flower always fighting hard to figure things out.
With art forever in our hearts, this became that place to thrive in creating as we desired it to be. As visual creative types, it works best for our crew and helped us retain information we were learning about.
The place to share it mattered.
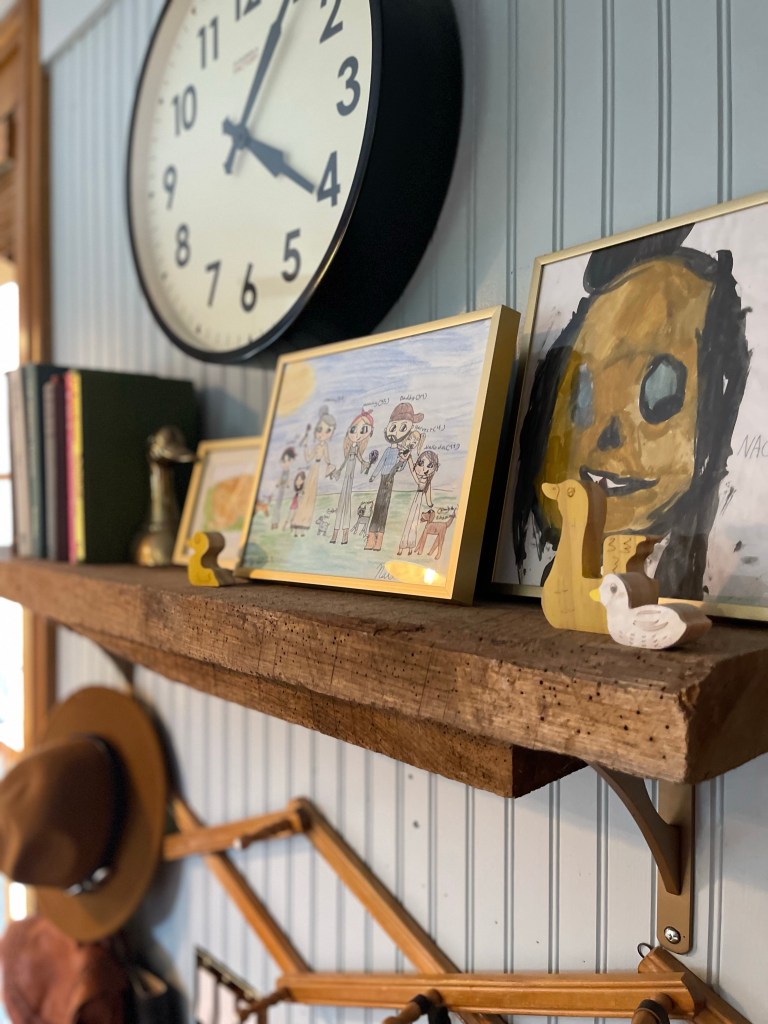
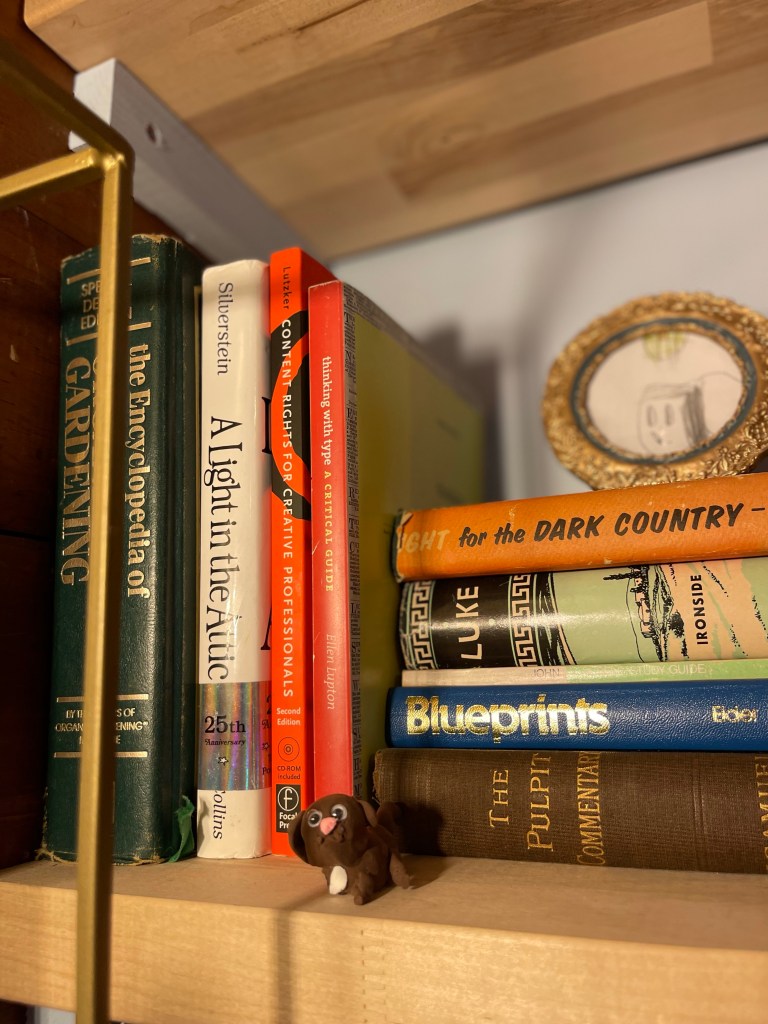
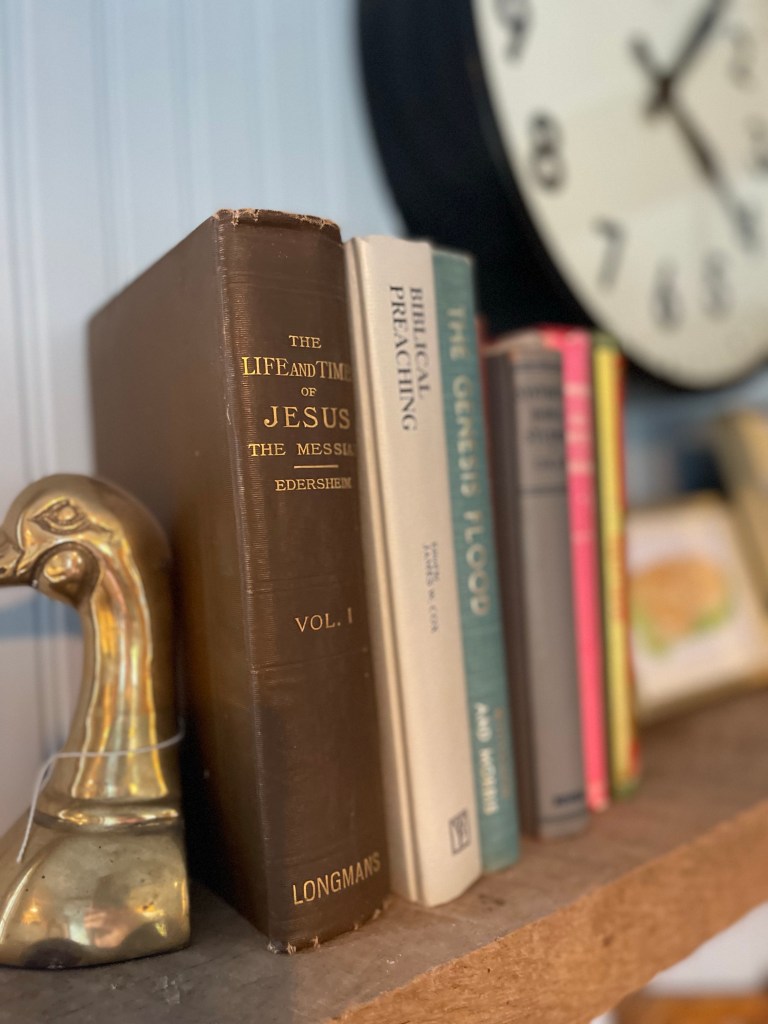
Mixed in with our collections, a large vintage looking clock from Magnolia and one amazing piece of wood from a 100+ year old barn we repurposed into a shelf simply by adding brackets. The wood contained all the beauty just as it was and held up this gallery space.
PRIVACY & SPACE MATTERS
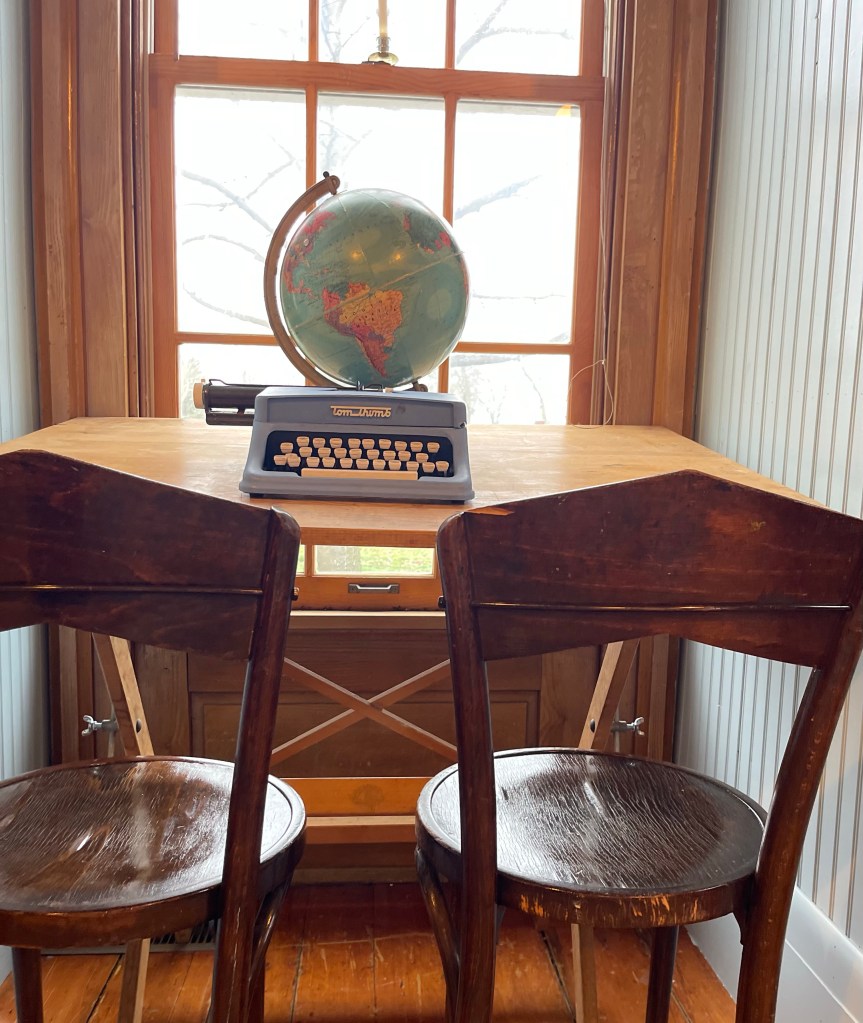
We did try to create some privacy with the split spaces. But snuck in any additional work spaces where we could. If you have ever homeschooled, or have kids for that factor, you know some days they just need space from each other. I couldn’t believe how well my antique adjustable art desk fit in front of the window. Needless to say, they had options to move if needed.
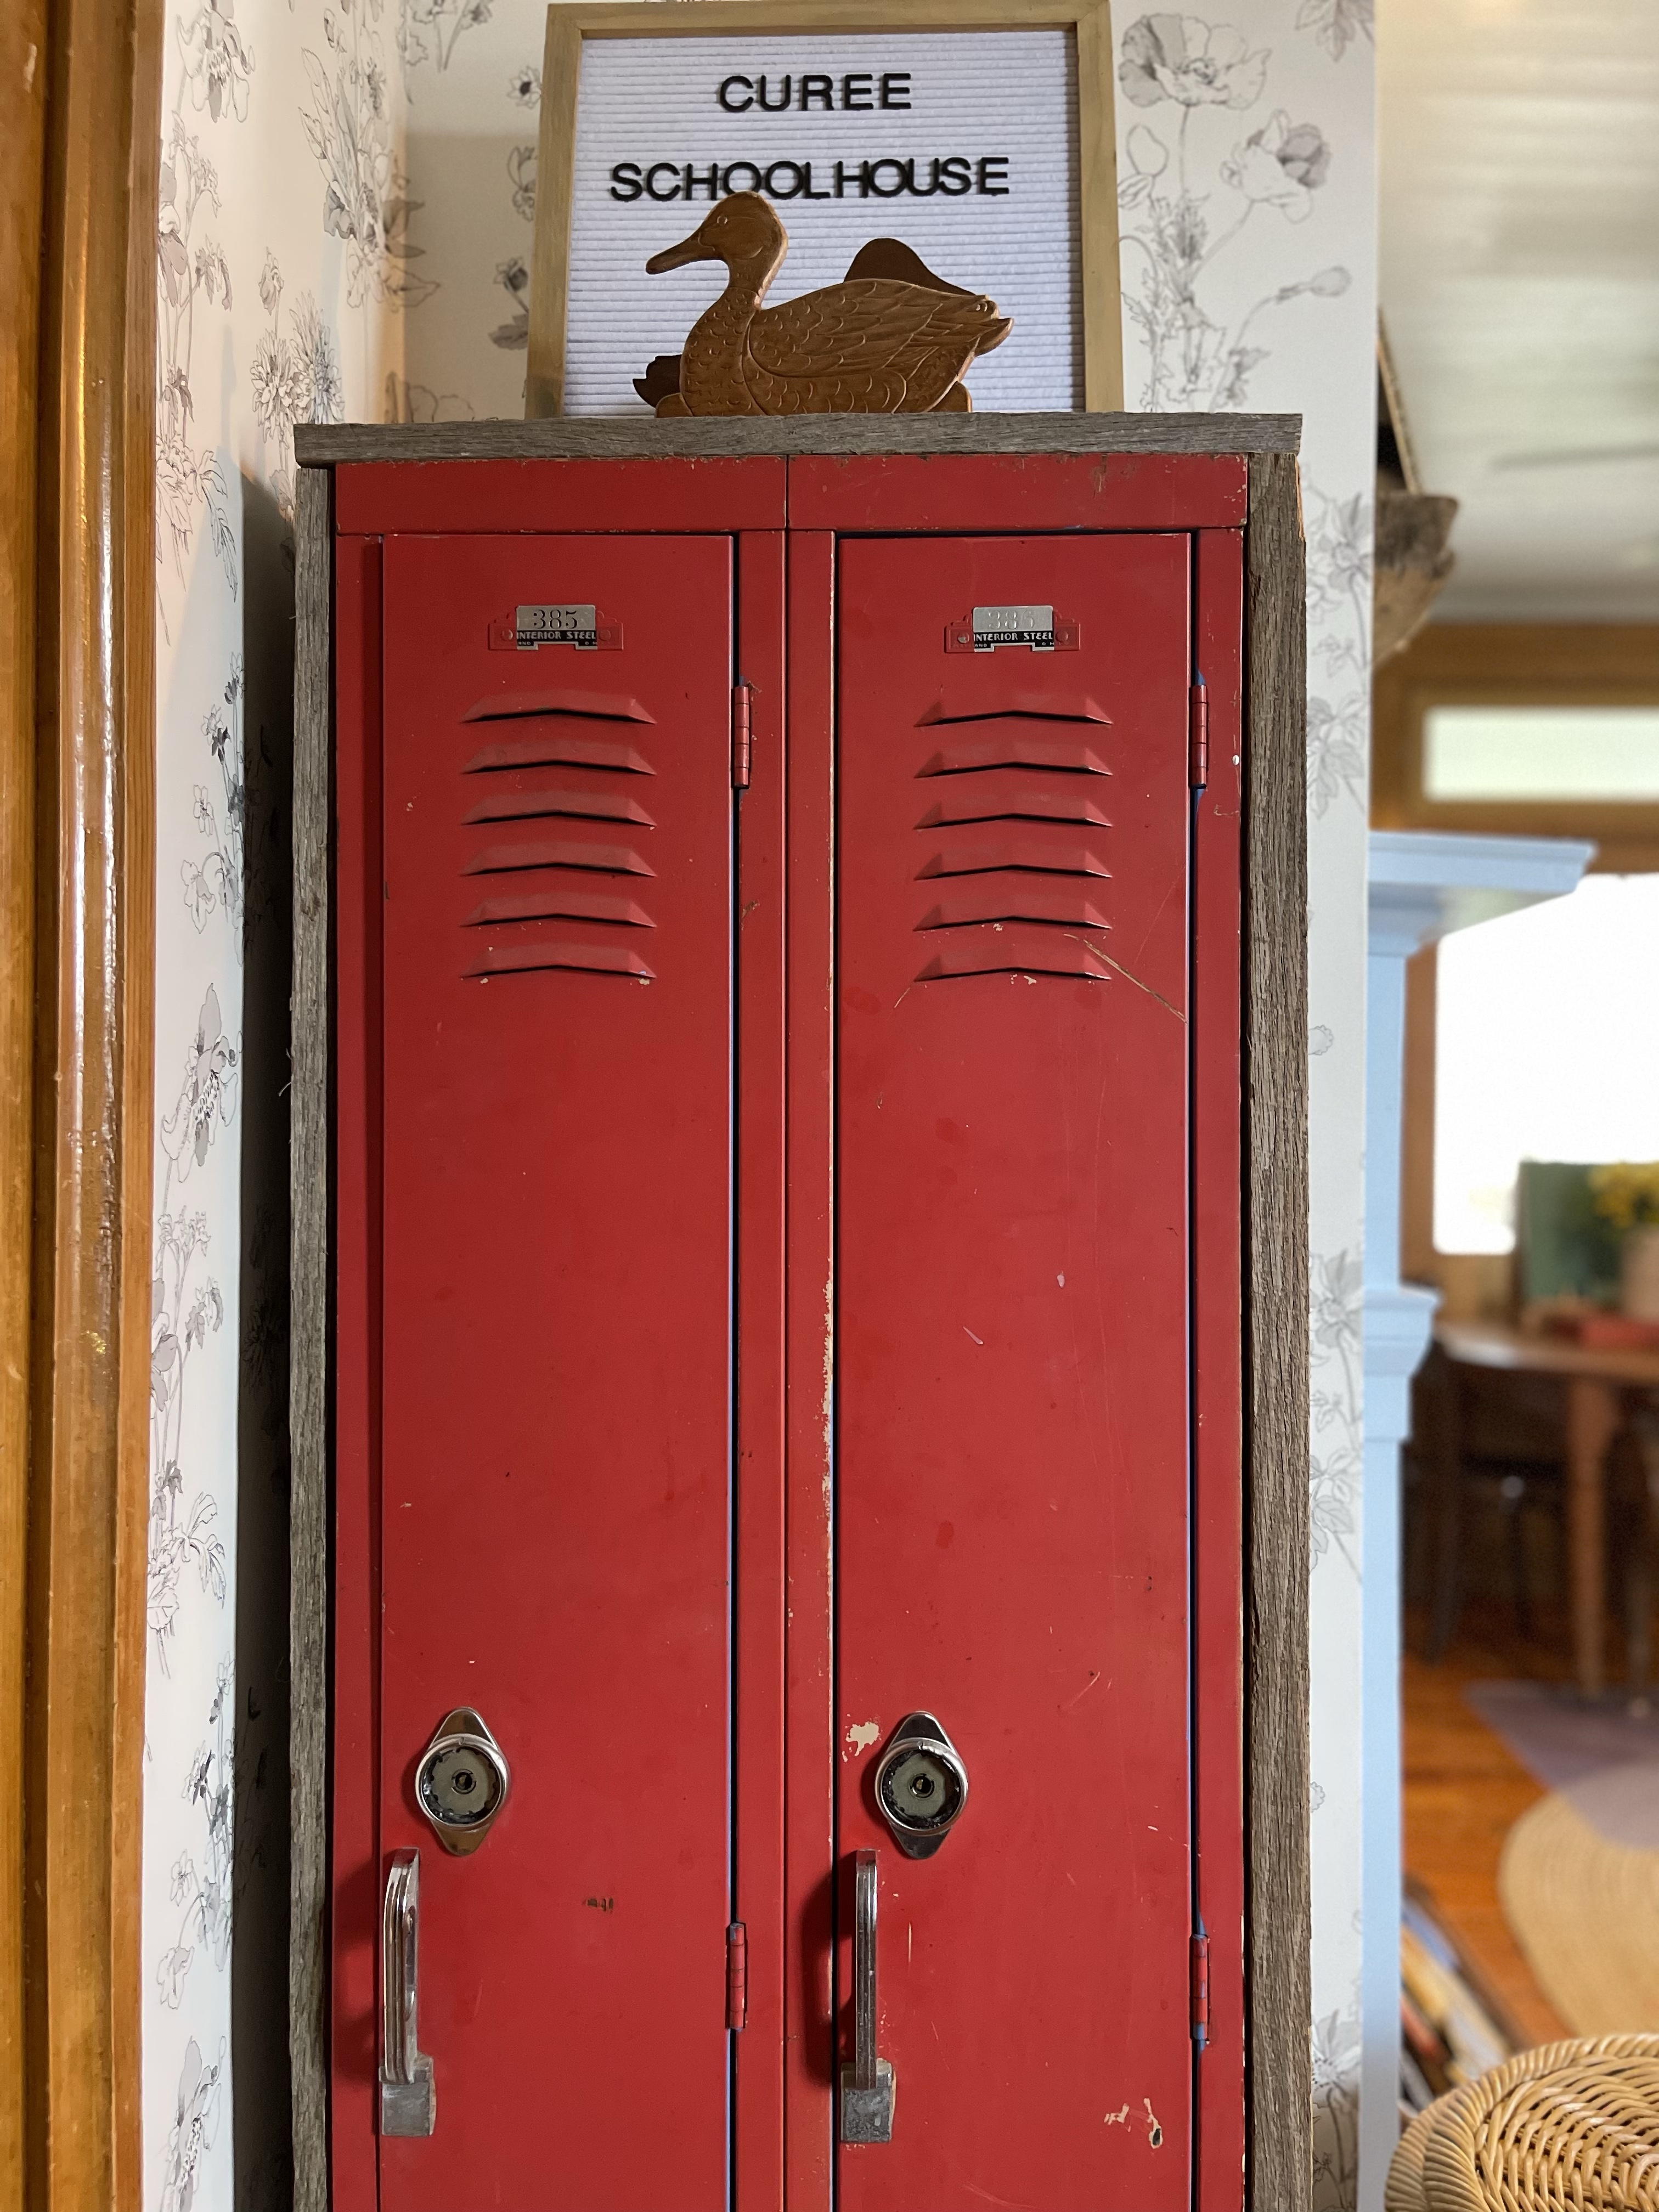
Tom and I were so stoked when we found some of the original school lockers from our local school district for sale that we actually used when we were students there. It was a no brainer that we had to utilize them in this room and save a piece of local history for our kiddos to enjoy as well. They needed a little cleaning up, so I had Tom frame them out with more of the barn wood and we refreshed the inside with a clean coat of blue paint for another interesting detail.
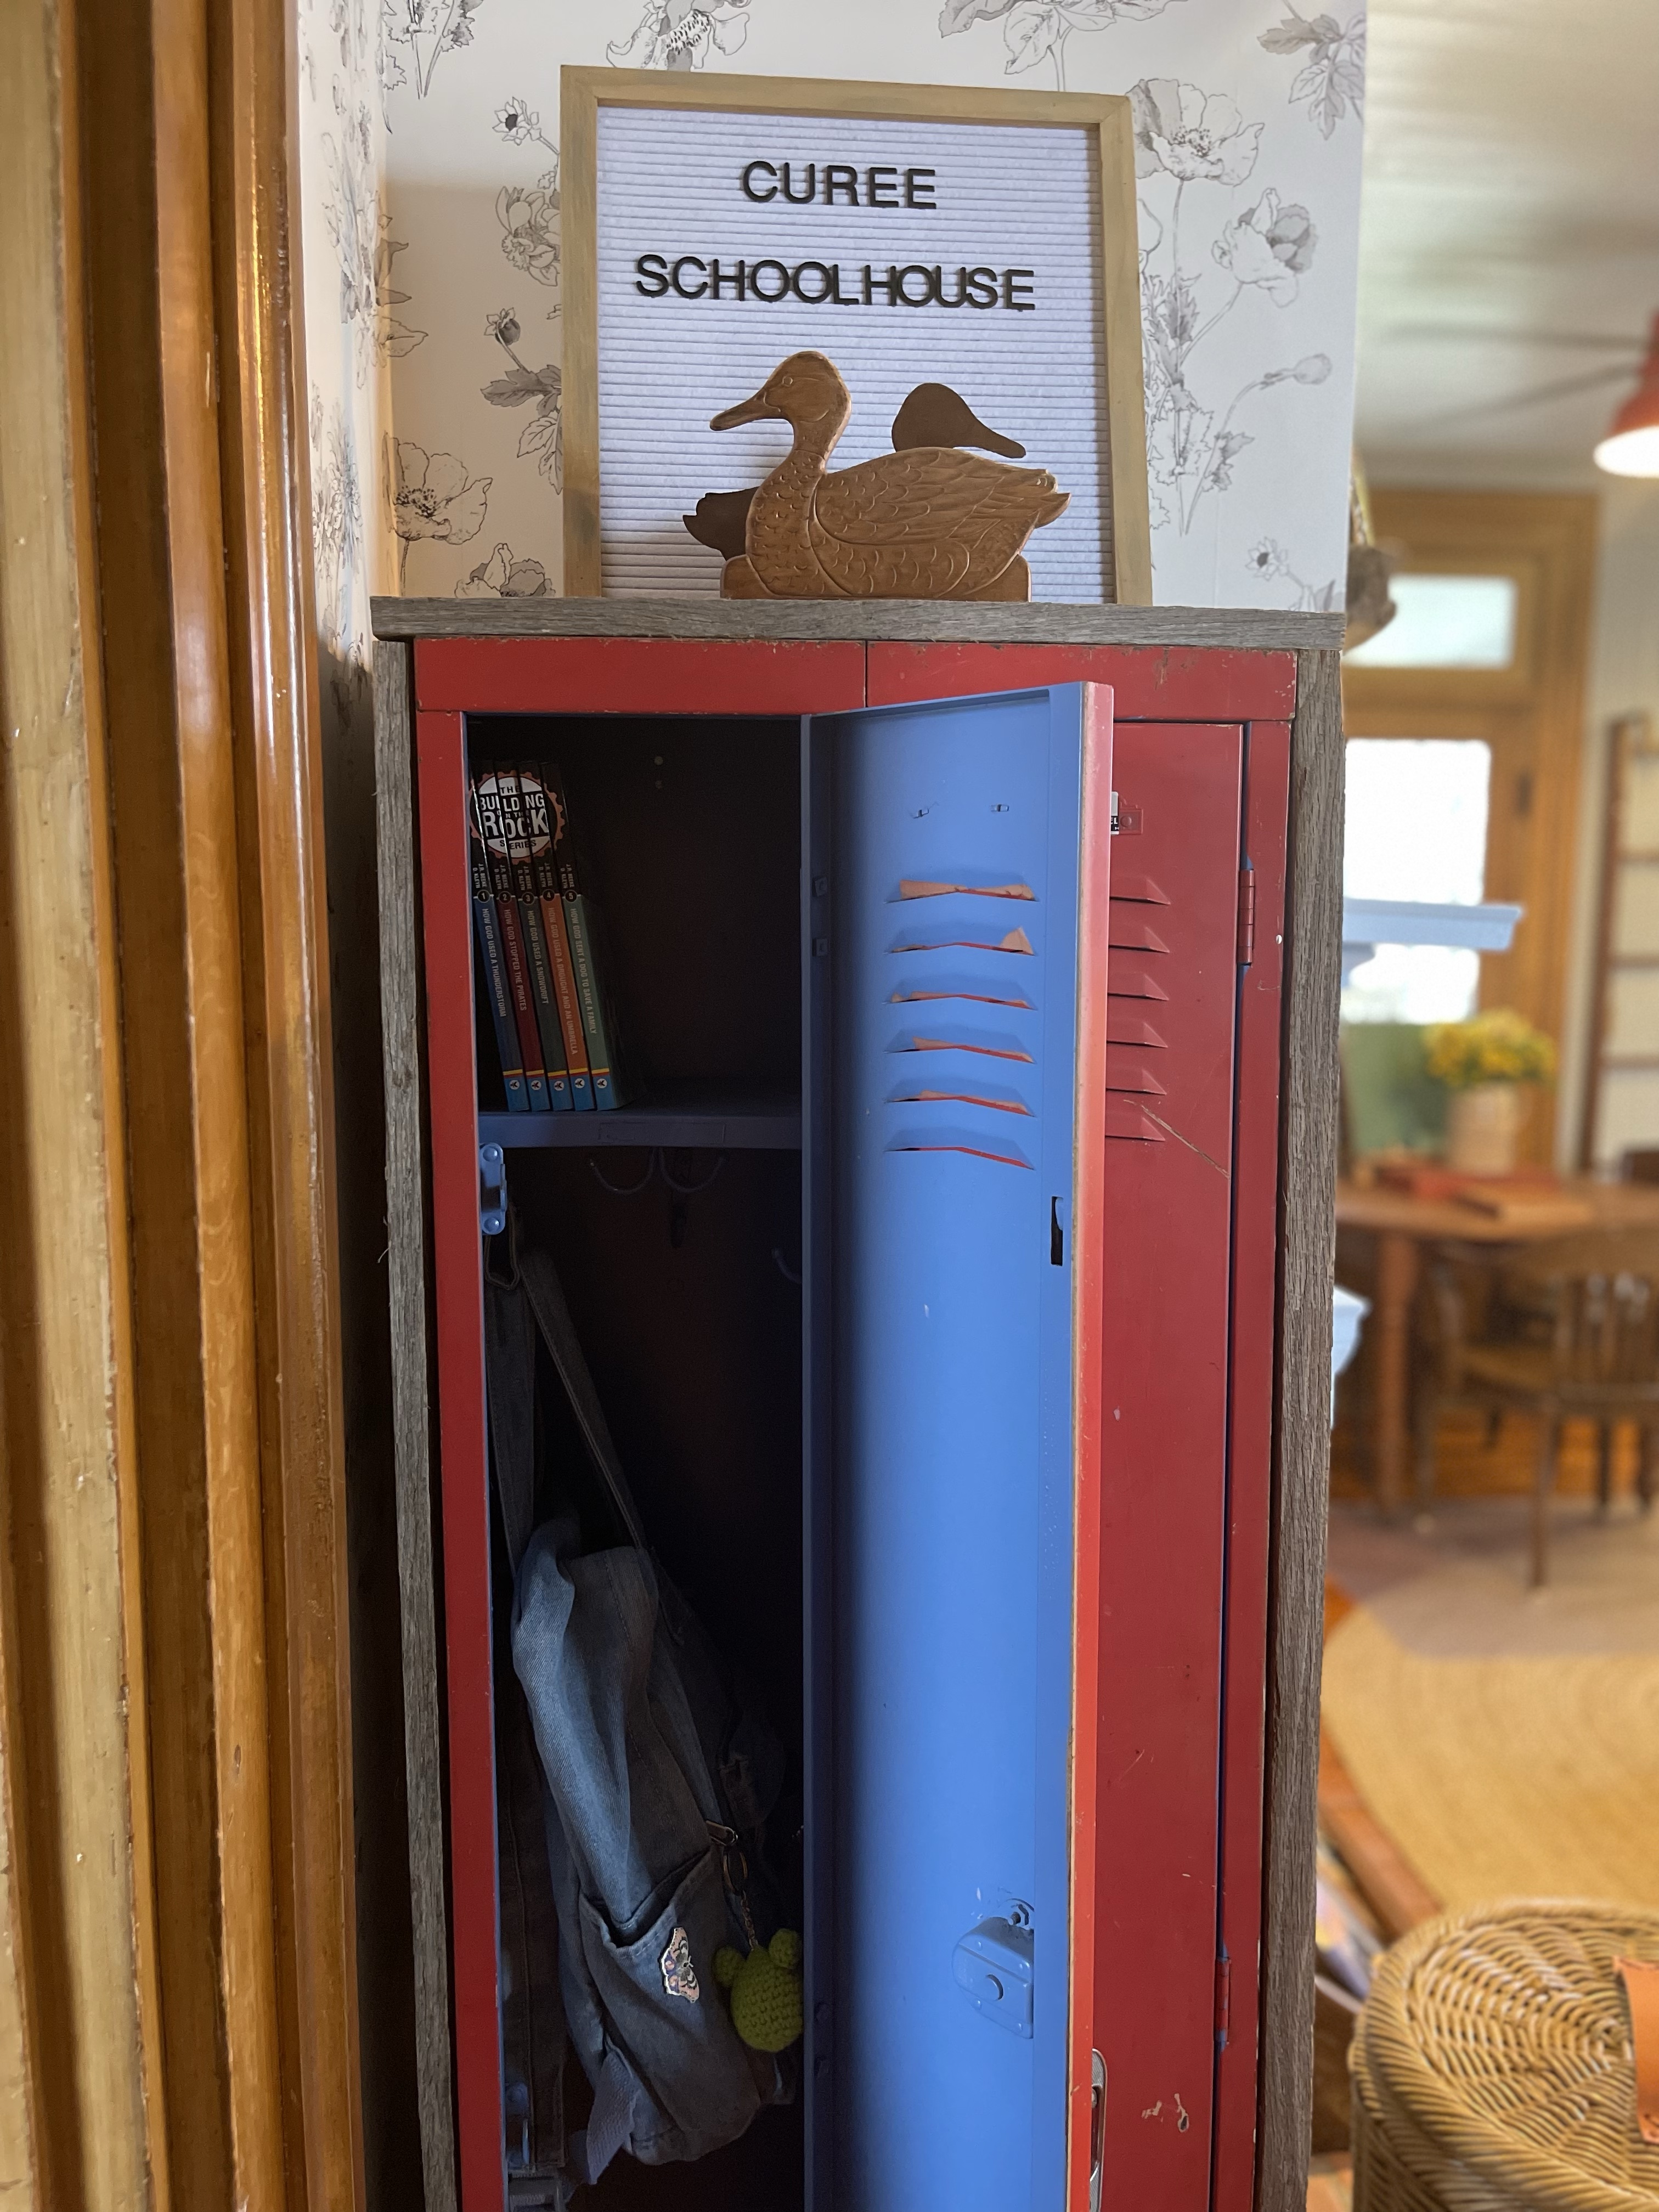


With the space being 90% complete, because if you know me, I had a few more projects I wanted to implement in the space. I had everything needed for Tom to create four custom foam boards for each of their work spaces that I had chosen adorable fabric to cover them in. A space they could customize and switch up as they wished. Tacking all their favorite pieces or photographs they collected. I also had a white board I’d been saving that was waiting to be framed out and hung on the back of the homeschool room door for spelling practice. I already had the trim and all. But that didn’t get to happen. Two things that we never got to finish that was a part of the original plan and would have completed the last missing functional pieces we needed.
Nevertheless, we had to begin utilizing it.
Small cringed moment as I didn’t want the space to ever be the mess it had been in the past but alas—trusting good design and organization was going to help us be more successful in keeping of the space.

And you know how the story ends from my previous blog.
Not much longer after completing the room, we had to leave. Selling our stunning home for the call of land.
Right when I got this one styled to my liking, it was time to pack her up. I took photos like a madman trying to remember every crevice of her beauty and began the separation process. Stripping her back down to the smallest amount to get her “sell” ready.

It was hard to do but necessary for the next exciting project in our lives.
Keller Williams photographed her simplistic charm for the next buyer lickety split.
Just like that she sold. Quickly. To be appreciated and loved by the next owner who was ecstatic.
We got it all empty and ready to hand off.

This home and this space had our love, personality and style forever imprinted in it. Bittersweetly, we said our goodbyes. Holding on to the all the good that we accomplished in this space. All that we learned from the bad and proud of the work we did with our own hands. Carrying on the skills it taught us to the next historical home. To yet again, create and leave our mark.
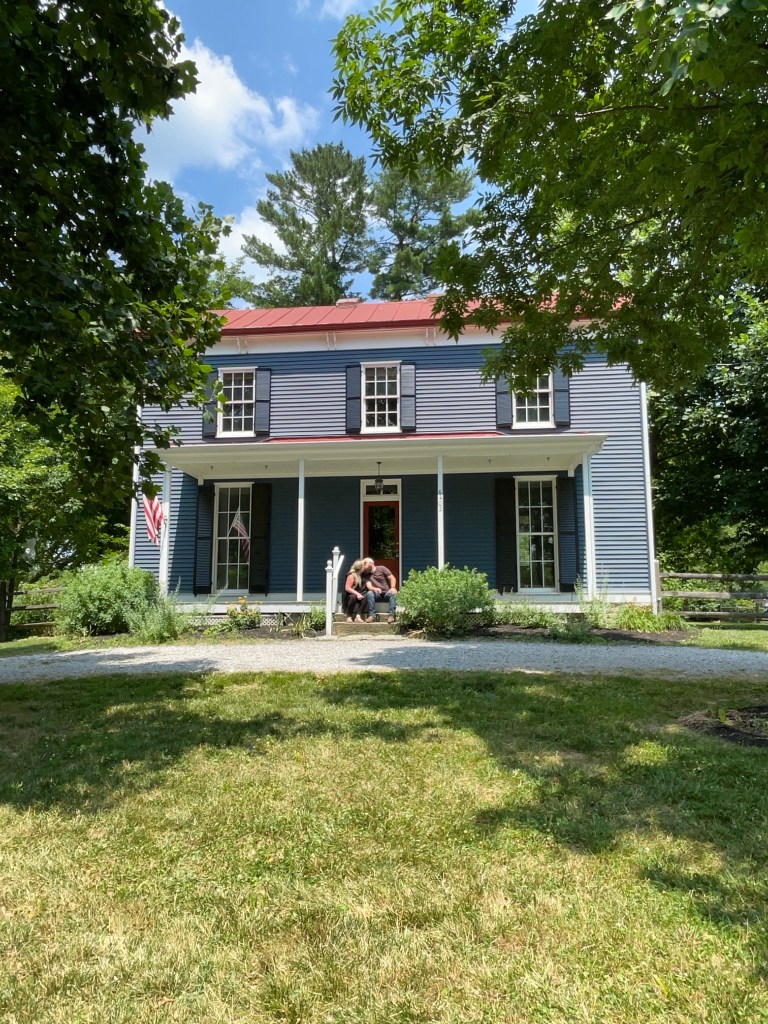

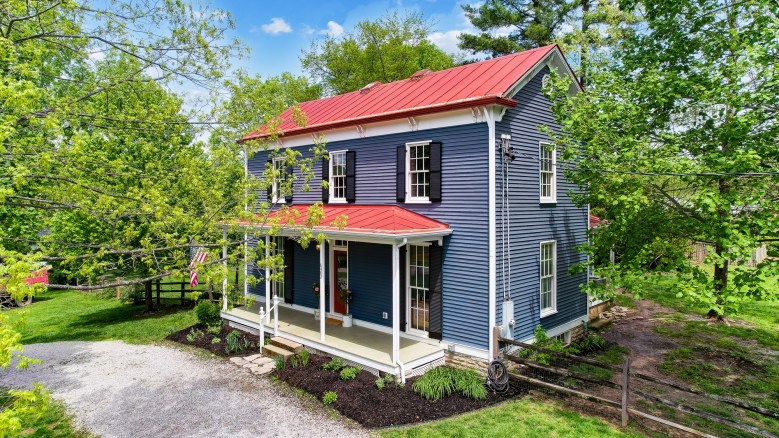
Goodbye, 1955 historical beauty.
We’re handing her off, but not without showcasing all we achieved there. We hope you enjoyed this completed room and the beauty she was. Our Curee Schoolhouse.
Stay tuned to the blog and my socials for many finished projects that will finally be posting under my Interior Design section of this site in the coming months. We’ve got a killer kitchen and dining room post in the near future. So, stick with us, you might just be inspired.
Written by Bethany Curee, God’s Daughter – Freckled & Free
